Best Sunrise Hikes in U.S. National Parks
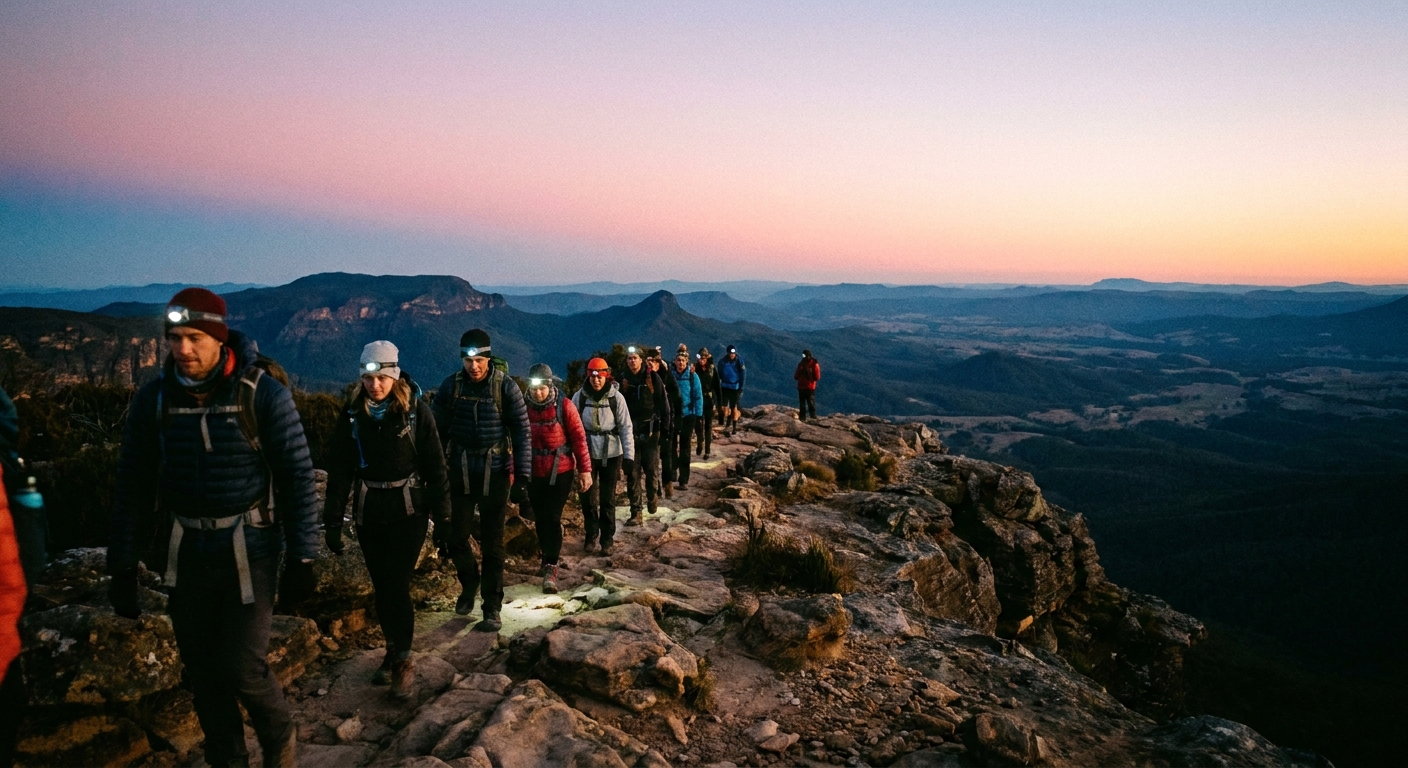
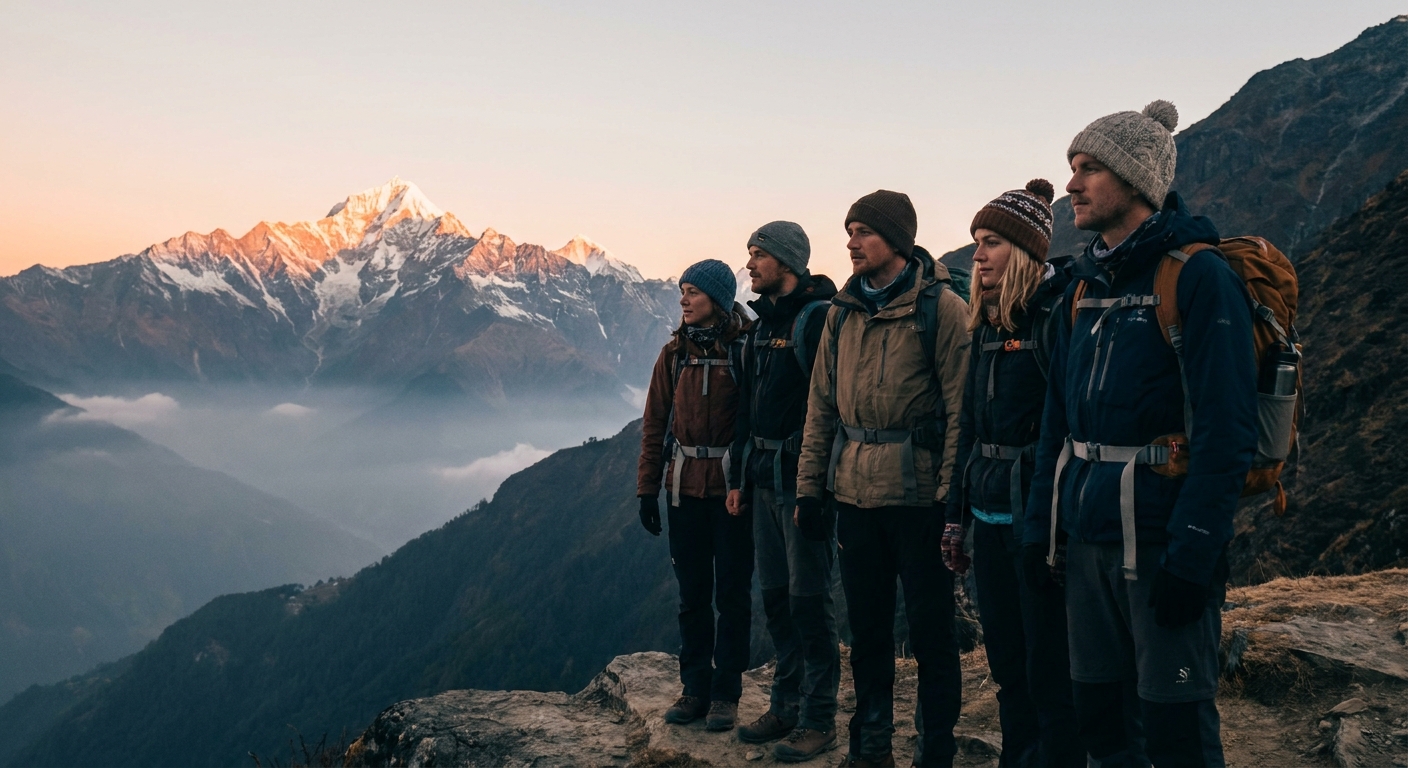
Sunrise in a national park is equal parts magic and logistics. The light is unreal, the air is sharp, and the parking situation can feel like a competitive sport. This guide is built for the traveler who wants the payoff photo and the calm, not just a list of overlooks you've already seen on a million “top views” pages.
Below you'll find a curated set of sunrise hikes across U.S. national parks, plus consistent planning notes: where the view hits hardest, what time to start, how early to park or shuttle, and how crowds actually behave at dawn.

How to time a sunrise hike
If you want sunrise to feel peaceful, your timeline matters more than your camera settings. Use this three-step approach in any park.
1) Anchor to civil twilight, not sunrise
The best color often happens 15 to 30 minutes before the official sunrise time. Look up sunrise for your exact date, then also note civil twilight start (often labeled “Begin civil twilight” in apps). Plan to be at your viewpoint by civil twilight or a little after.
2) Work backward with real pacing
- Flat, smooth trail: 2 to 2.5 mph
- Steady uphill with switchbacks: 1.5 to 2 mph
- Rocky, high elevation, or lots of steps: 1 to 1.5 mph
- Add a buffer: 15 minutes for clothing, photos, and bathroom stops
Note: Those speeds are moving time. If you love lingering for photos (same), add it on purpose.
3) Add the “parking tax”
In the most popular parks, the hike isn't the hard part. The hard part is getting a legal spot, catching a shuttle, or walking from overflow. For many of the sunrise hikes below, getting to the trailhead area 60 to 90 minutes before sunrise is the difference between calm and chaos in peak season.
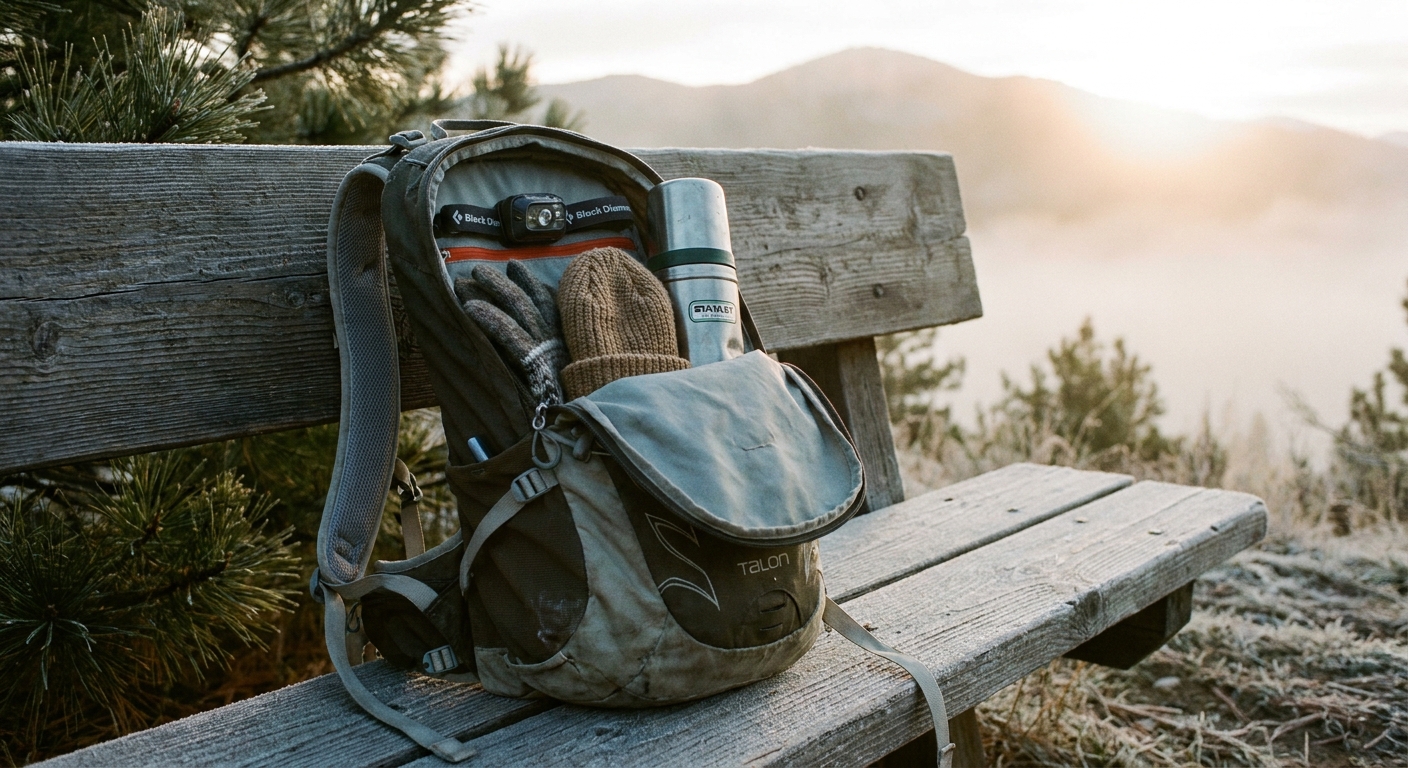
Cold-start essentials
You can absolutely do sunrise with a carry-on-only packing style. Just make your dawn kit consistent.
- Headlamp with fresh batteries (and a backup light on your phone). Start on low power to preserve night vision.
- Warm layer you can hike in (light fleece or active insulation) plus a packable wind shell. Wind makes sunrise feel 15 degrees colder.
- Gloves and a beanie in shoulder seasons or high elevation parks (Bryce, Grand Canyon, Rocky Mountain, Glacier).
- Traction awareness: in spring and fall, shaded sections can hold ice. Microspikes are worth it when conditions call for them.
- Hot drink or warm water bottle for the viewpoint. It makes waiting enjoyable instead of endurance.
- Red light mode etiquette: if your headlamp has it, use it near others at the viewpoint.
Best sunrise hikes by park
Times below assume average hikers in typical summer conditions. In winter, add time for traction and slower footing. Always check your park's current shuttle rules, road closures, reservation or timed-entry requirements, and trail conditions before you commit to a pre-dawn start.
Acadia National Park: Cadillac Summit via North Ridge Trail
Why it's worth it: Ocean horizon, island silhouettes, and that crisp Atlantic light. You'll understand why this sunrise has a following.
- Hike: North Ridge Trail (strenuous, rocky) to Cadillac Mountain summit
- Trail time: about 1.5 to 2.5 hours one-way depending on pace and conditions
- Be at the viewpoint by: 30 minutes before civil twilight if you want to settle in before the sky pops
- Crowd steering: Most people drive. Hiking spreads you out and feels quieter.
- Road access note: If you're driving up, Acadia typically uses a vehicle reservation system for Cadillac Summit Road in peak season. Search the park site for “Cadillac Mountain vehicle reservation” and confirm the rules for your dates.
Bryce Canyon National Park: Navajo Loop to Sunrise Point
Why it's worth it: Hoodoos catch first light like they're lit from inside. It's dramatic even on a quick loop.
- Hike: Navajo Loop and rim connection to Sunrise Point (or reverse depending on closures)
- Trail time: 1.5 to 3 hours for a loop-style plan with viewpoints
- Plan to park by: 60 minutes before sunrise for easier parking in peak months, earlier on holiday weekends
- Closure reality check: The Wall Street side of Navajo Loop is often closed seasonally (and ice is common). If it's closed, use the open section plus the rim, or swap in Queen's Garden for a smoother dawn plan.
- Crowd steering: Walk 5 to 10 minutes beyond the main railings along the rim for breathing room. Even a small distance makes a big difference.
Grand Canyon National Park (South Rim): South Kaibab to Ooh Aah Point or Cedar Ridge
Why it's worth it: The canyon layers turn from purple to copper in minutes. This is one of the most reliable “wow” sunrises in the U.S.
- Hike: South Kaibab Trail to Ooh Aah Point (short) or Cedar Ridge (longer)
- Trail time: 1 to 2 hours round trip for Ooh Aah Point, 2.5 to 4 hours round trip for Cedar Ridge
- Aim to start by: 60 to 90 minutes before sunrise if you're using shuttles and you want to avoid a rushed start
- Critical logistics: Private vehicles aren't allowed at the South Kaibab Trailhead. Plan to use the early morning Hikers Express Shuttle (seasonal) or other park shuttle options that serve the area, and confirm the first departure time and current routes the day before.
- Safety note: Down is optional, but up is mandatory. Start with enough water and a firm turnaround time so your sunrise plan doesn't turn into a late-morning suffer-fest.
- Crowd steering: Shuttles concentrate people at predictable times. Catch an earlier shuttle than you think you need so you can hike without that anxious, head-down pace.
Zion National Park: Canyon Overlook Trail
Why it's worth it: A short hike with a big view over the main canyon, and you can still be eating breakfast in Springdale before the day gets hot.
- Hike: Canyon Overlook (short, some drop-offs)
- Trail time: 30 to 60 minutes round trip
- Try to park by: 60 minutes before sunrise for the tiny parking area, earlier on spring and fall weekends
- Road note: This trail sits off the Zion Mt. Carmel Highway near the tunnel. Check for any tunnel traffic controls, road work, or restrictions that could slow access before dawn.
- Crowd steering: Parking is the bottleneck, not the trail. If the lot is full, don't gamble with illegal roadside parking. Pick a backup sunrise like the Pa’rus Trail for a calm walk with soft light.
Yosemite National Park: Glacier Point or Sentinel Dome
Why it's worth it: First light on Half Dome is the kind of thing you remember years later. The high viewpoints feel alpine, even though you're not far from valley comforts.
- Hike: Sentinel Dome (moderate, short climb) for a 360-degree sunrise, or Glacier Point overlook for minimal walking
- Trail time: Sentinel Dome is roughly 1.5 to 2.5 hours round trip depending on route and snow
- Plan to arrive by: 60 to 90 minutes before sunrise for parking at trailhead areas in peak season
- Access note: Glacier Point Road is seasonal. Confirm road status and any reservation requirements for your dates.
- Crowd steering: Valley sunrise spots can fill fast in summer. High-country viewpoints spread people out better, but they require road access and seasonal planning.
Rocky Mountain National Park: Bear Lake to Emerald Lake
Why it's worth it: Still water, jagged peaks, and that thin high-altitude light. It feels cinematic even if you only go to Dream Lake.
- Hike: Bear Lake corridor to Dream Lake or Emerald Lake
- Trail time: 1.5 to 3.5 hours round trip depending on endpoint and conditions
- Try to park by: 60 to 90 minutes before sunrise to park at Bear Lake, especially on summer weekends
- Critical logistics: RMNP often uses a timed-entry reservation system in peak season, and the Bear Lake Road corridor typically has the stricter option (sometimes called “plus”). Details can change year to year. Check the park site for your dates, including release times, entry windows, and whether pre-dawn entry is exempt.
- Altitude note: If you're coming from low elevation, hike like you're on a longer leash. Slower pace, more water, and warmer layers make sunrise feel fun instead of faint.
- Backup sunrise: If Bear Lake parking or reservations feel dicey, consider sunrise at Sprague Lake (easy, great reflections) or Many Parks Curve (big horizon, minimal walking).
- Crowd steering: This is a popular area all day. Sunrise buys you serenity, but only if you beat the parking crush. If you can, choose a weekday dawn.
Joshua Tree National Park: Ryan Mountain
Why it's worth it: A big desert panorama that catches pastel light, plus cooler temps before the sun turns the park into an oven.
- Hike: Ryan Mountain (steady climb, exposed)
- Trail time: 1.5 to 3 hours round trip
- Plan to arrive by: 45 to 60 minutes before sunrise for easier trailhead parking in busy seasons
- Crowd steering: Desert sunrise tends to be quieter than alpine icons, but weekends can still stack up. Bring a layer for the summit wind.
Arches National Park: Delicate Arch
Why it's worth it: Icon status for a reason. Sunrise can be gentler than sunset, with fewer people and softer shadows.
- Hike: Delicate Arch (moderate, slickrock, some exposure)
- Trail time: 1.5 to 3 hours round trip
- Try to park by: 60 to 90 minutes before sunrise for trailhead parking, earlier in spring break and fall weekends
- Entry note: Arches has used timed entry in recent seasons. Check whether it applies to your dates and whether early entry is exempt.
- Backup sunrise: If Delicate Arch feels like a parking gamble, go for The Windows area at first light for big scenery with less stress.
- Crowd steering: The arch bowl can echo with voices. If you want a quieter experience, stand slightly off the main photo line and enjoy the light on the surrounding fins.
Mount Rainier National Park: Fremont Lookout or Dege Peak
Why it's worth it: When the mountain is out, dawn light makes Rainier look unreal. In peak season, wildflowers add a second layer of magic.
- Hike: Mount Fremont Lookout (classic Sunrise-area sunrise) or Dege Peak (quieter, big horizon)
- Trail time: about 2.5 to 4 hours round trip for Fremont depending on pace and stops; 2 to 3.5 hours round trip for Dege Peak
- Plan to park by: 60 minutes before sunrise, earlier on summer weekends when parking fills fast
- Access note: The Sunrise area is seasonal, and morning temps can be downright rude. Confirm road opening dates and trail conditions.
- Crowd steering: Cloud cover is common. Still go. Low clouds and alpenglow on ridges can be the better story.
Bonus note: If you're aiming for the Skyline Trail, that's a Paradise area hike (not Sunrise). It's a phenomenal sunrise option when roads and conditions line up, just plan it from the Paradise side.
Crowds at sunrise
Sunrise crowds aren't the same everywhere. Here's what tends to happen, and how to plan around it.
Drive-up icons: early and intense
Places with close parking at the viewpoint (think summit roads and famous rim pullouts) attract larger groups who arrive in waves. Your best move is to arrive earlier than feels reasonable and walk a little farther than everyone else.
Short, famous hikes: parking is the bottleneck
Trails like Canyon Overlook and Ryan Mountain can feel peaceful once you start walking, but the lots are tiny. If you don't get a spot, your sunrise evaporates. Build a backup sunrise within 15 minutes that doesn't depend on that same parking area.
Shuttle parks: predictable pulses
Where shuttles are involved, people bunch at the first few departures and the last “safe” departure. Aim for an earlier shuttle than you need so you can hike without that rushed feeling.
Big wilderness parks: fewer people, higher consequence
In parks where sunrise hikes mean remote trailheads or longer routes, you'll often see fewer hikers, but you need to be more self-reliant. Carry a headlamp, extra layers, and enough water to handle an unexpected delay.
Etiquette and safety
- Keep lights low at viewpoints. Headlamps pointed at faces ruin night vision and photos.
- Stay on durable surfaces. Sunrise often means fragile soil, cryptobiotic crust, or icy edges that hide under snow.
- Leave No Trace at sunrise. Avoid shortcutting switchbacks and adding social paths around viewpoints. A few footsteps in the wrong place is how “secret spots” get permanently trashed.
- Be quiet by default. Many people come for the hush. If you're traveling with friends, save the full recap for coffee afterward.
- Know your turnaround time. It's easy to chase “just one more viewpoint” after sunrise. Plan your day so your sunrise hike doesn't turn into an exhausted, risky late-morning scramble.
Make the morning last
My favorite way to do sunrise is to earn the view, then lean into comfort. Pack a clean layer for the car, warm up with a local breakfast, and let the rest of the day be slower.
If you want to build a two-in-one itinerary, pair your sunrise hike with one town stop that supports the community: a locally owned coffee shop, a small museum, or a market breakfast. It's the easiest way to travel lighter on the landscape while still getting that unforgettable morning.