Cathedral Rock Trail: Steep Spots, Parking, and Sunset
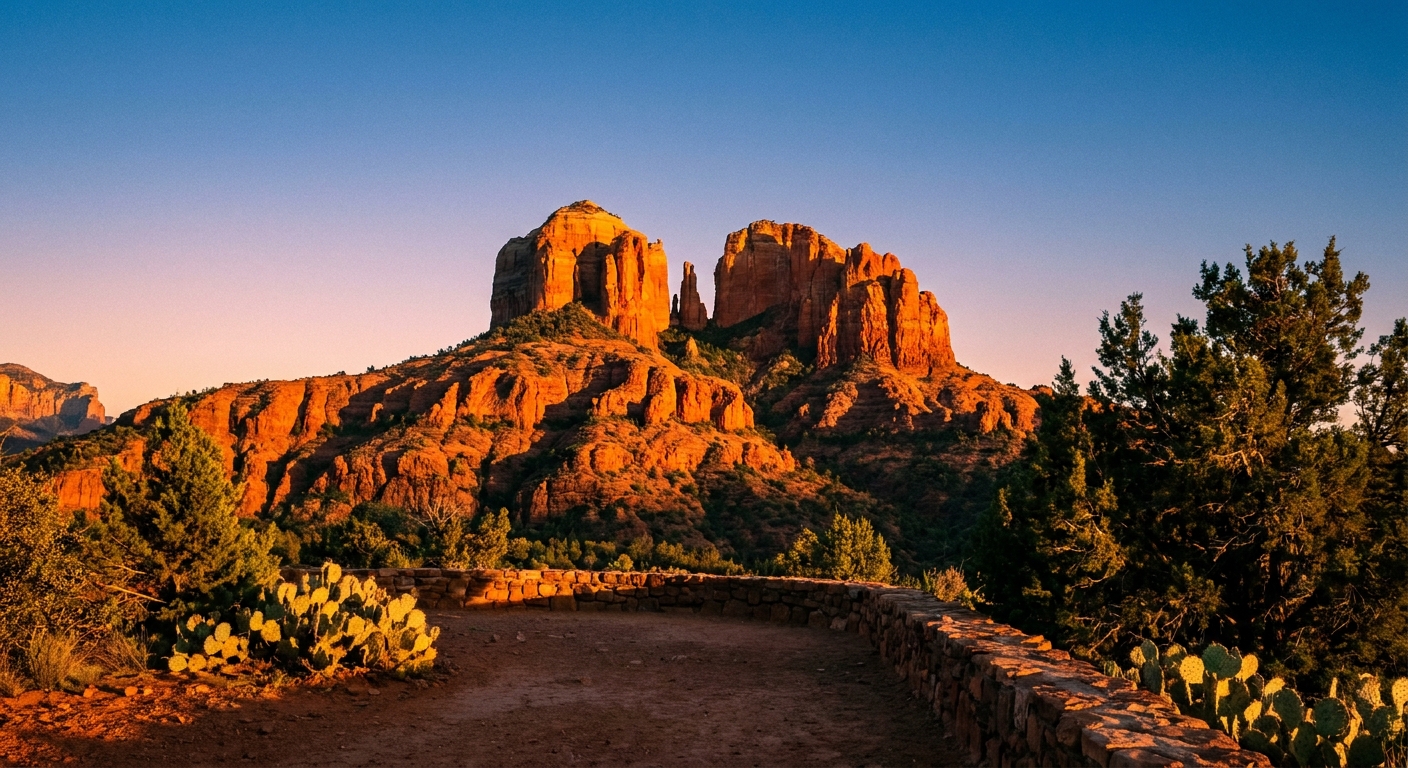
Cathedral Rock is one of Sedona’s most iconic “short hike, big reward” trails. It is also one of the most misunderstood. Photos make it look like a casual stroll to a postcard. In real life, it is a steep, scramble-heavy climb on smooth sandstone where traction, timing, and a Plan B matter.
If you want the views without the stress, this guide breaks down exactly where it gets steep, how the parking and shuttle situation works (including the days you cannot drive to the trailhead lot), smart turnaround points for nervous hikers, and how to time sunset so the spires glow instead of turning into a dark silhouette.

Cathedral Rock Trail at a glance
- Type: Out-and-back (most people hike to the saddle and return the same way)
- Distance: About 1 to 1.5 miles round trip depending on where you stop and how much you explore
- Elevation gain: Over 700 feet in a short distance
- Time: 60 to 120 minutes for most hikers, longer at sunset
- Difficulty: Short but strenuous. The “hard” is mostly the steep, grippy-or-slippery rock.
- Best for: Big views, photographers, adventurous beginners who are comfortable using hands for balance
- Not ideal for: Anyone with strong fear of heights, knee issues on the descent, or people expecting a dirt path the whole way
Reality check: This trail is popular because it is accessible, not because it is easy. If you like hikes where you can zone out and walk, Cathedral Rock is not that vibe.
Where it gets steep (and why people turn around)
The first part lulls you in with a relatively normal path through juniper and slickrock. Then the trail starts climbing in earnest and becomes a choose-your-own-adventure of rock steps and natural ramps.
Steep section 1: The first slickrock climb
You will hit a broad rock slope with trail markings (usually cairns and painted markings). This is where people realize they need to slow down and use their hands occasionally. The grade is not vertical, but the rock can feel polished, especially after rain or in early-morning dew.
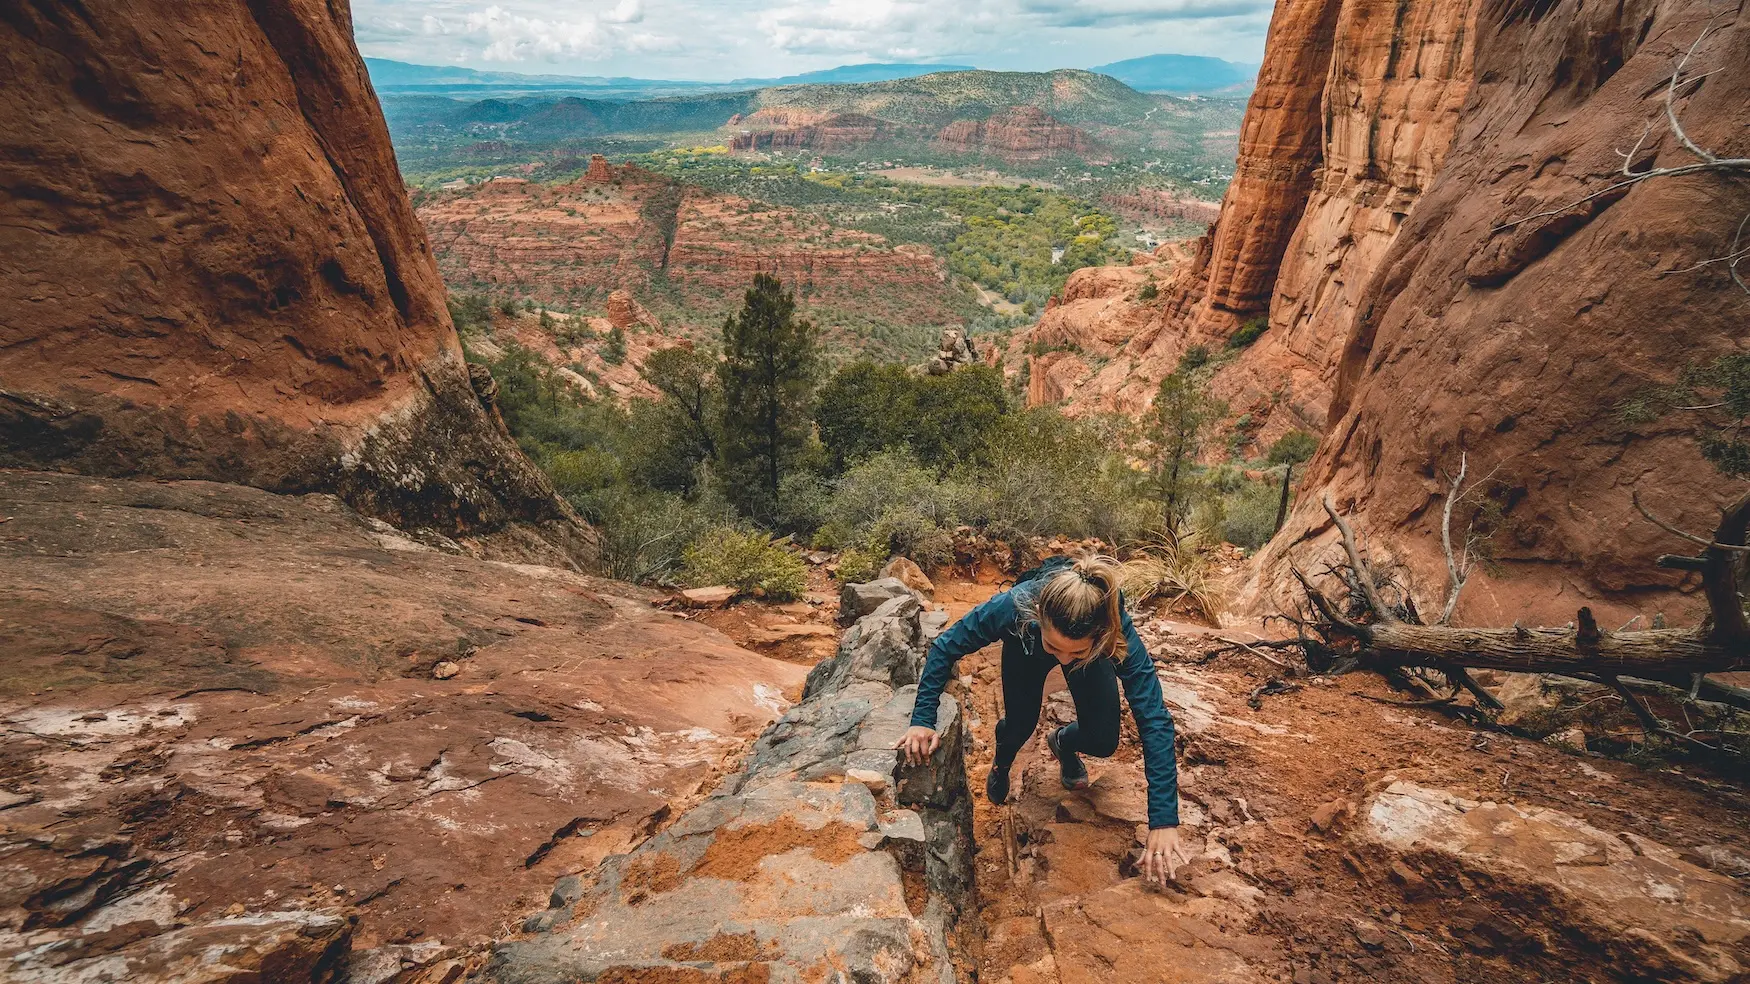
Steep section 2: The scramble to the saddle
The most committed part is the final push to the saddle between rock formations. The “trail” becomes a series of steep steps, ledges, and narrow-ish lines where you are more climbing than hiking. There are a few spots where you will want three points of contact for confidence.
What makes it feel intense:
- Exposure: There are areas where a slip would be scary, even if the actual drop is avoidable with careful movement.
- Traffic: On busy days, passing others in tight spots increases nerves.
- Downhill is harder: Many hikers feel fine going up, then get stuck mentally on the descent.
If you are thinking “This is already too steep,” listen to that. There are great views before the saddle and zero shame in a turnaround.
Shoe grip: what actually helps on Cathedral Rock
This is not a place for smooth soles. The rock has texture, but high-use sections can feel slick, and dust acts like ball bearings on slanted slabs.
Best footwear choices
- Trail runners with sticky rubber and a solid lug pattern work well and keep you agile on scrambles.
- Light hiking shoes with grippy outsoles are great if you want more structure for the descent.
What to avoid
- Fashion sneakers with worn tread
- Flat-soled shoes that slide on sandstone
- Brand-new boots that are stiff and not broken in, which can feel clumsy on rock steps
Small tip that makes a big difference: If you start slipping, check your soles. A thin layer of Sedona dust can reduce traction. Tap shoes against rock or brush them off before a steep move.
Parking and shuttle reality
Parking is the make-or-break factor for Cathedral Rock. The trailhead sits near Back O’ Beyond Road, and the lot is small for the level of demand.
Important: when you cannot park at the trailhead
On Sedona Shuttle operating days (typically Thursday through Sunday, year-round), the Cathedral Rock trailhead parking lot is closed to personal vehicles. On those days, you are required to use the free Sedona Shuttle from the SR 179 Park and Ride to reach the trailhead.
This is not a “maybe I will get lucky” situation. If shuttles are running for Cathedral Rock access, plan your day around the shuttle and do not count on driving up to the lot.
What the lot is like on non-shuttle days
- Small capacity: It fills fast, especially weekends, holidays, and spring and fall peak seasons.
- Overflow is limited: Roadside parking rules change and are actively enforced in high-traffic periods. Do not assume you can just squeeze in along the road.
Best times to park easily (when the lot is open)
- Early morning: Think sunrise-ish, not “a little after breakfast.”
- Midday in summer: Hot temperatures scare off crowds, but you need water, sun protection, and a heat plan.
- Weekdays: Still busy, just more manageable.
Shuttle game plan
Service patterns and details can change, so check the official Sedona Shuttle information the night before and again the morning you plan to hike. If you are set on sunset, build in extra buffer for shuttle timing and lines.
My approach: If you want sunset glow, either take the shuttle and accept the logistics, or do an early start and a long, slow day with coffee and town time in between. Banking on “I will find a spot at 5 pm” is risky on open-lot days and simply not an option on shuttle days.
Turnaround options for nervous hikers
Cathedral Rock is perfect for strategic turnarounds because you start getting views quickly. You can make it a confidence-building hike instead of a white-knuckle one.
Option 1: Viewpoint on the lower slickrock
After the first noticeable climb, pause and look back. You will already have a sweeping view over the Verde Valley and a classic red rock panorama. This is a great stop if the rock slope feels slippery or your group is not moving smoothly.
Option 2: Midway benches and flat pockets
There are flatter spots where people naturally pause to let others pass. If your nerves spike around crowds, these pockets are good places to wait for a gap and decide whether to continue.
Option 3: The base of the final scramble
You will reach a point where the trail narrows and steepens into the final series of rock steps toward the saddle. This is the best “honest decision point.” If you do not like how exposed it feels, turn around here and you will still leave with a memorable hike.
If your fear is the descent: It is okay to go up a few moves and test how it feels to downclimb the same section immediately. If it feels sketchy now, it will feel sketchier when you are tired and it is darker.
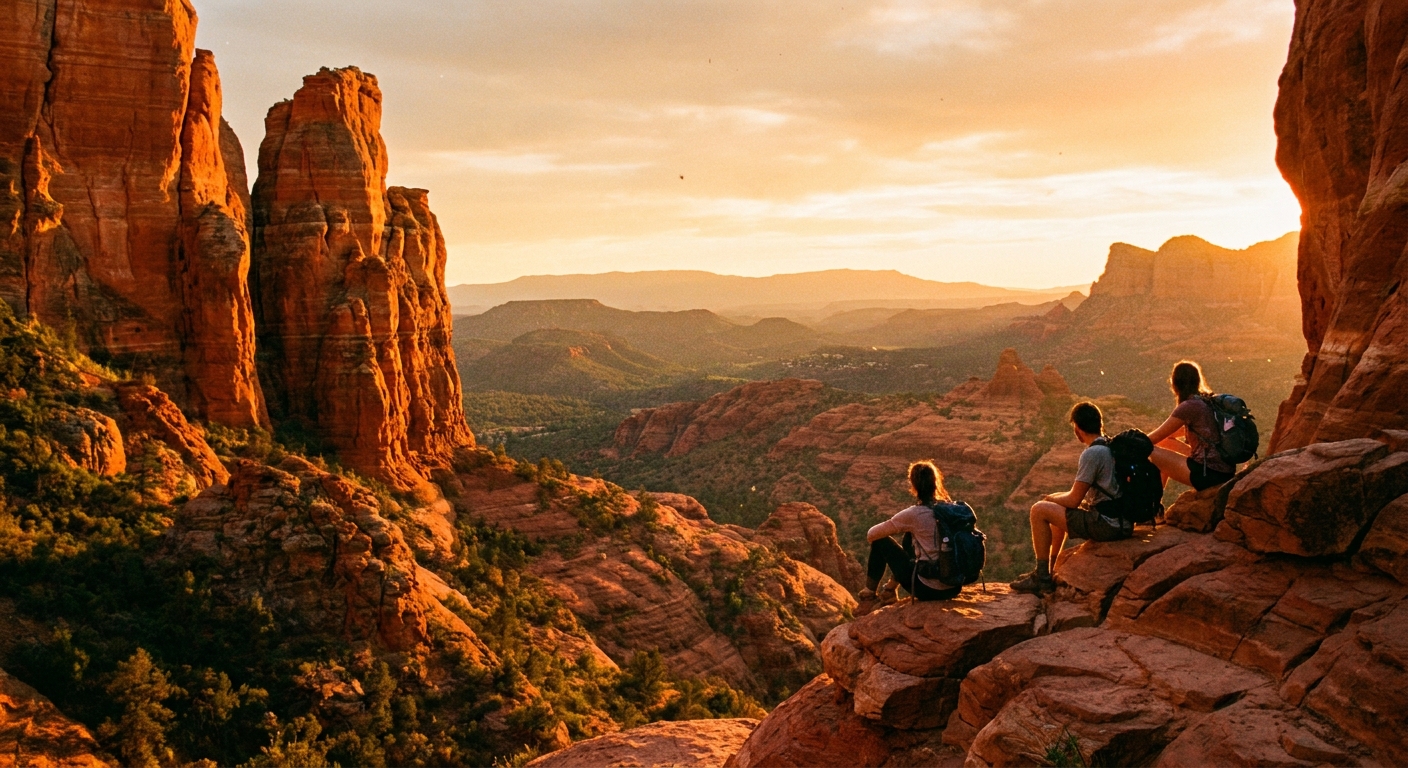
Sunset timing: when the red rock actually glows
Sunset on Cathedral Rock can be magical, but the light changes fast. The goal is not just “be on top at sunset.” The goal is to catch the warm, low-angle light that makes the sandstone look like it is lit from within.
Golden hour vs. the moment of sunset
- Best glow: Typically 30 to 60 minutes before official sunset, when the sun is low and warm.
- At official sunset: Depending on the season and where you are standing, Cathedral Rock can start to lose direct light and shift toward shadow and silhouette.
- After sunset: You get softer pastel skies, but the rock itself is often less vibrant.
A simple timing plan that works
- Start hiking 90 minutes before sunset if you want time for crowds, photo stops, and a calm pace.
- Aim to be at your chosen stopping point 45 minutes before sunset so you can settle in and enjoy the best color.
- Begin descending before it gets dim. The slickrock descent is not where you want to rely on phone flashlights.
Seasonal note: In winter, light fades quickly and temperatures drop fast. In summer, the evening heat can linger, but monsoon storms can build dramatically. If thunderheads are forming, skip the high, exposed rock.
Crowds: how to keep the hike enjoyable
Cathedral Rock is a shared experience most days. A little strategy goes a long way.
- Go early or go late, but plan for the dark if you go late. Sunrise is calmer. Sunset is busier and requires a safe descent plan.
- Be patient in scramble bottlenecks. Let faster hikers pass at wider spots. Do not rush a move because someone is behind you.
- Choose a less “prime” perch. The most obvious photo spot gets congested. Ten steps away can feel peaceful.
- Keep voices low at sunset. People come for the quiet, even if the parking lot energy says otherwise.
What to bring (carry-on only mindset)
This is a short hike, but it rewards a few smart items.
- Water: At least 1 liter per person, more in heat
- Grippy shoes: Already covered, but it is the biggest safety factor you control
- Headlamp: Better than a phone light if you mis-time sunset
- Sun protection: Hat, sunglasses, sunscreen. The slickrock reflects light.
- Light layer: Especially in shoulder seasons when the wind picks up at the saddle
- Small first aid basics: Blister care and a bandage or two for inevitable rock scrapes
Leave at home: Anything that throws off balance. Cathedral Rock is not the place for a heavy backpack swinging you sideways.
Safety and etiquette on the slickrock
- Do not hike this in active rain. Wet sandstone gets dramatically more slippery.
- Watch for ice in winter mornings. Shaded sections can hold frost.
- Stay on the marked route. Shortcuts damage fragile desert soil and create confusing social trails.
- Give uphill hikers space. They have fewer stable options for pausing mid-step.
- Respect closures and signage. Sedona has been working hard to manage impact and keep trails open.
After the hike: trail + town
If you time Cathedral Rock for sunset, you have earned a soft landing. My ideal combo is a quick rinse at your lodging, then a slow dinner in town and a real coffee the next morning. Sedona does “post-hike comfort” exceptionally well, and leaning into that is part of what makes this trail so satisfying.
If you are deciding between sunrise and sunset: choose sunrise for fewer crowds and easier parking (or faster shuttle logistics). Choose sunset if the glow is your priority and you are confident on a steep descent with a headlamp in your bag.
Quick FAQ
Is Cathedral Rock Trail scary?
It can be, especially near the saddle where it gets steep and exposed. If heights make you nervous, plan to turn around earlier and still enjoy big views.
Can kids do it?
Some can, but it depends on comfort with scrambling and how busy it is. Hands-on sections and crowd bottlenecks can make it stressful for families. A helmet is not typical, but close supervision is essential.
Is it worth it if I do not reach the top?
Yes. The mid-trail viewpoints are genuinely beautiful, and you can still get that Sedona red rock magic without the final scramble.