Dead Horse Point State Park Rim Walks
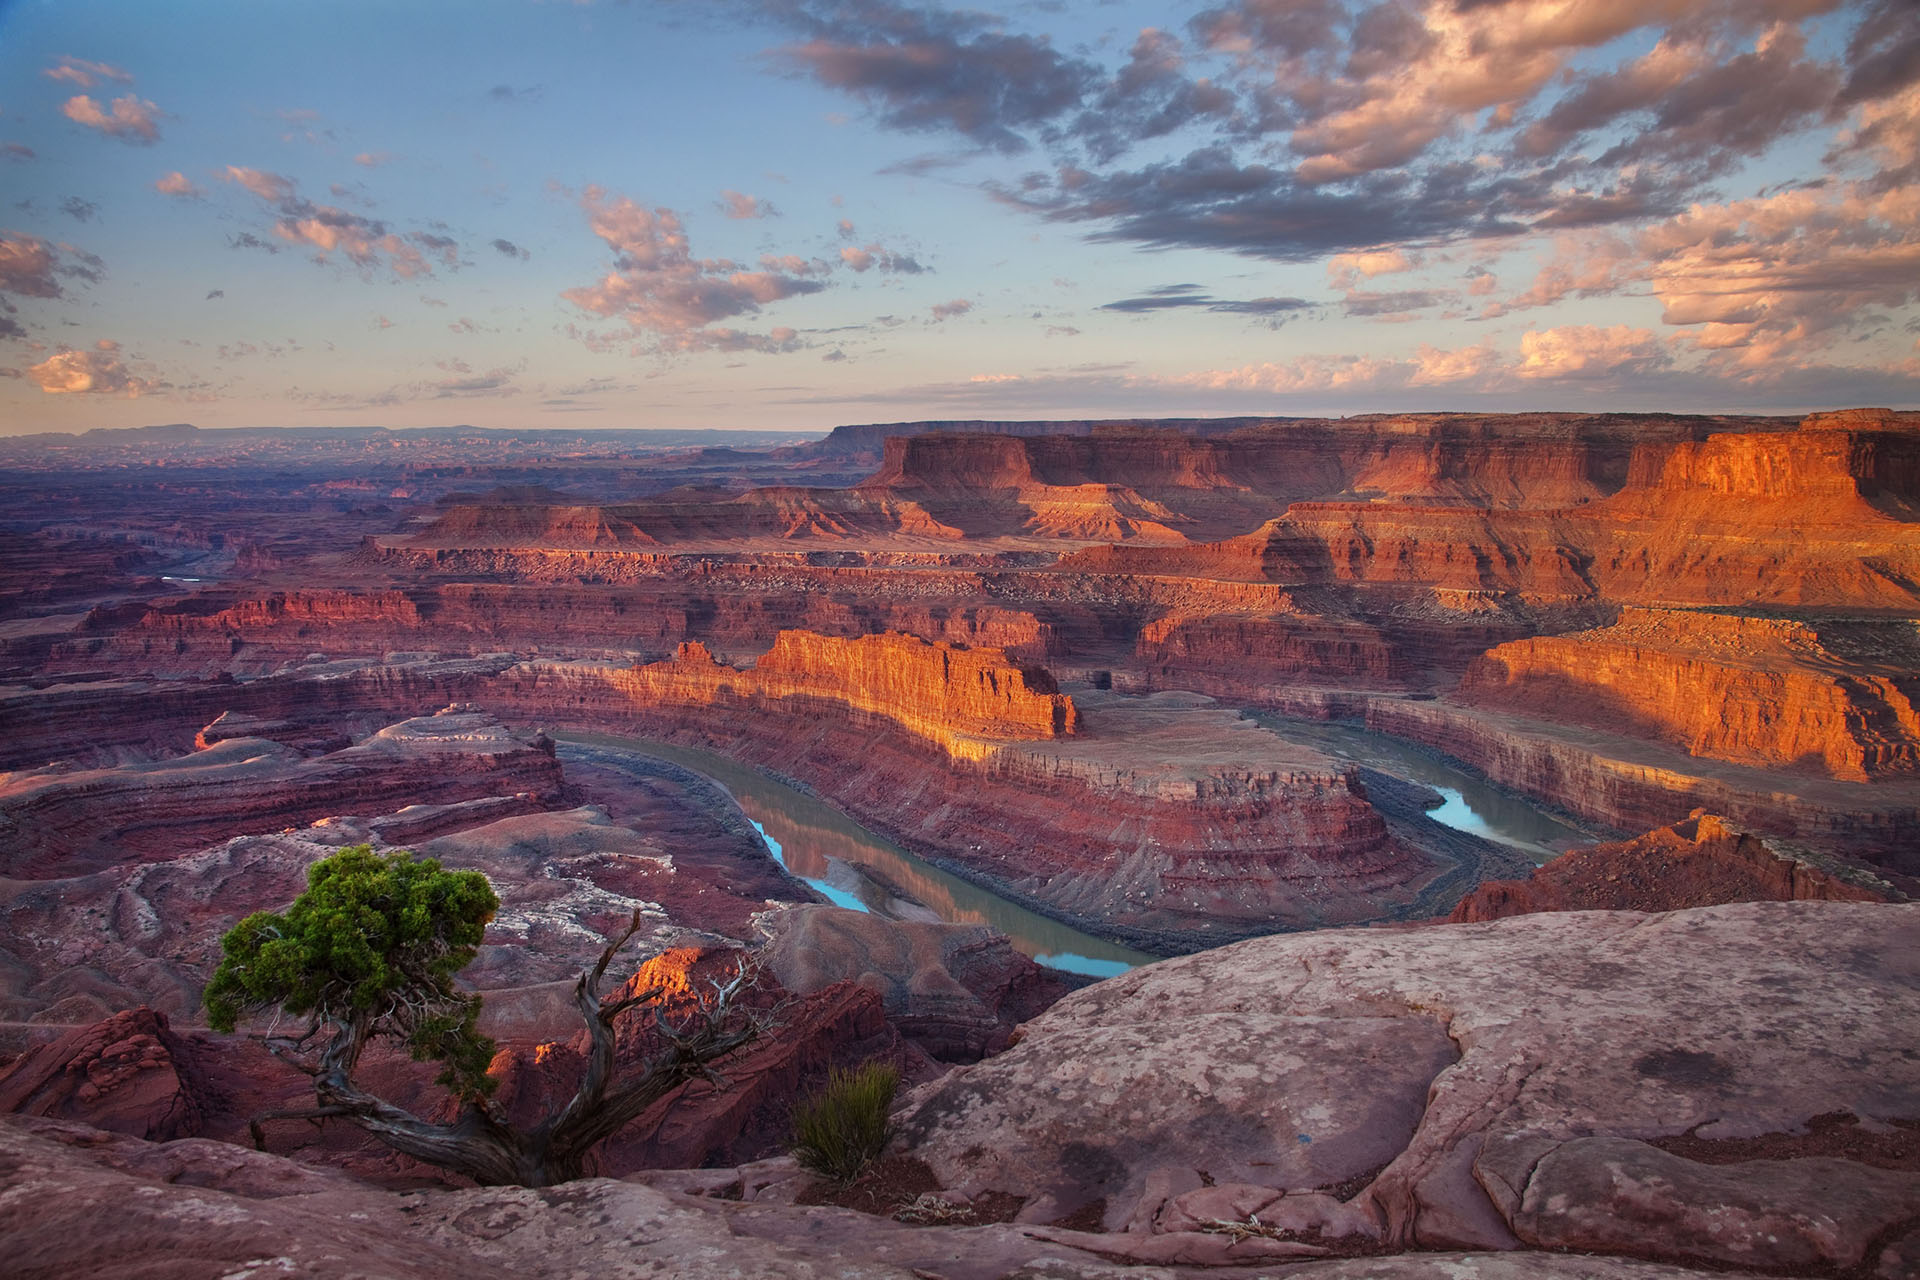
Dead Horse Point State Park is my favorite kind of “big view, small effort” destination. You can step out of the car and be staring straight down at a looping bend of the Colorado River, with Canyonlands stretching to the horizon like a rust-colored ocean. It is also one of the rare Moab-area viewpoints where you can get an iconic panorama without the Island in the Sky traffic jam vibes.

This page focuses on short rim walks , sunrise vs sunset photography, fees and passes, and exactly how to fit Dead Horse into an Arches and Canyonlands trip without feeling like you spent the whole vacation in the driver’s seat. I am also calling out two big reasons people pick Dead Horse on purpose: it is dog-friendly (with a few rules) and it has some of Moab’s most approachable mountain biking.
Know before you go
- Cliffs are the main hazard: This is a rim destination. Expect steep drop-offs and gusty wind. Keep kids close and pets leashed and back from the edge.
- Bathrooms: Available in developed areas near the main parking and visitor areas (best to use them before heading out on the rim).
- Water: Do not count on water on trail. Bring what you need for the walk or ride.
- Cell service: Can be spotty. Download maps before you go.
- Shade and wind: Very little shade, often windy. The mesa dries you out fast.
- Hours and conditions: Park hours and seasonal closures can change, and winter can mean ice on paved paths and slickrock. Check the official park alerts before you go.
Quick facts for planning
- Location: Roughly 40 to 50 minutes from Moab (about 30 miles), depending on where you start in town and traffic.
- What it is: A Utah State Park with multiple overlooks and a scenic rim loop around the main point.
- Best for: Families, photographers, anyone short on time, anyone who wants a “wow” view without a long hike.
- Terrain: Flat to gently rolling slickrock and packed trail, with short rocky sections near the rim.
- Exposure: Full sun and wind. Little shade.
- Dogs: Allowed in developed areas and on many trails on leash. A few areas and trail segments may have restrictions. Always check current park regs before you go.
- Bikes: The Intrepid Trail System has beginner to intermediate loops with big scenery and low stress.
Fees and passes
Dead Horse Point is a Utah State Park, so it does not take the America the Beautiful National Parks Pass for entry. You will pay a separate day-use fee at the entrance station.
Fee note: Rates can change and may vary by vehicle type and residency. Check the official Utah State Parks Dead Horse Point fee page for the current number before you go.
Pass confusion
- America the Beautiful Pass: Great for Arches and Canyonlands, but it will not cover Dead Horse Point.
- Utah State Parks pass: If you are doing several Utah state parks on the same trip, a state parks annual pass can pay off. For most Moab visitors doing just Dead Horse, it is usually simpler to pay the day-use fee.
Pro tip: Keep your receipt accessible. If you are bouncing between viewpoints, it is nice to know you are already squared away when you roll up to a kiosk or parking area.
Best overlooks
If you only stop at one place, make it the classic overlook. If you have time, add one quieter rim perch so your photos are not all the same angle.
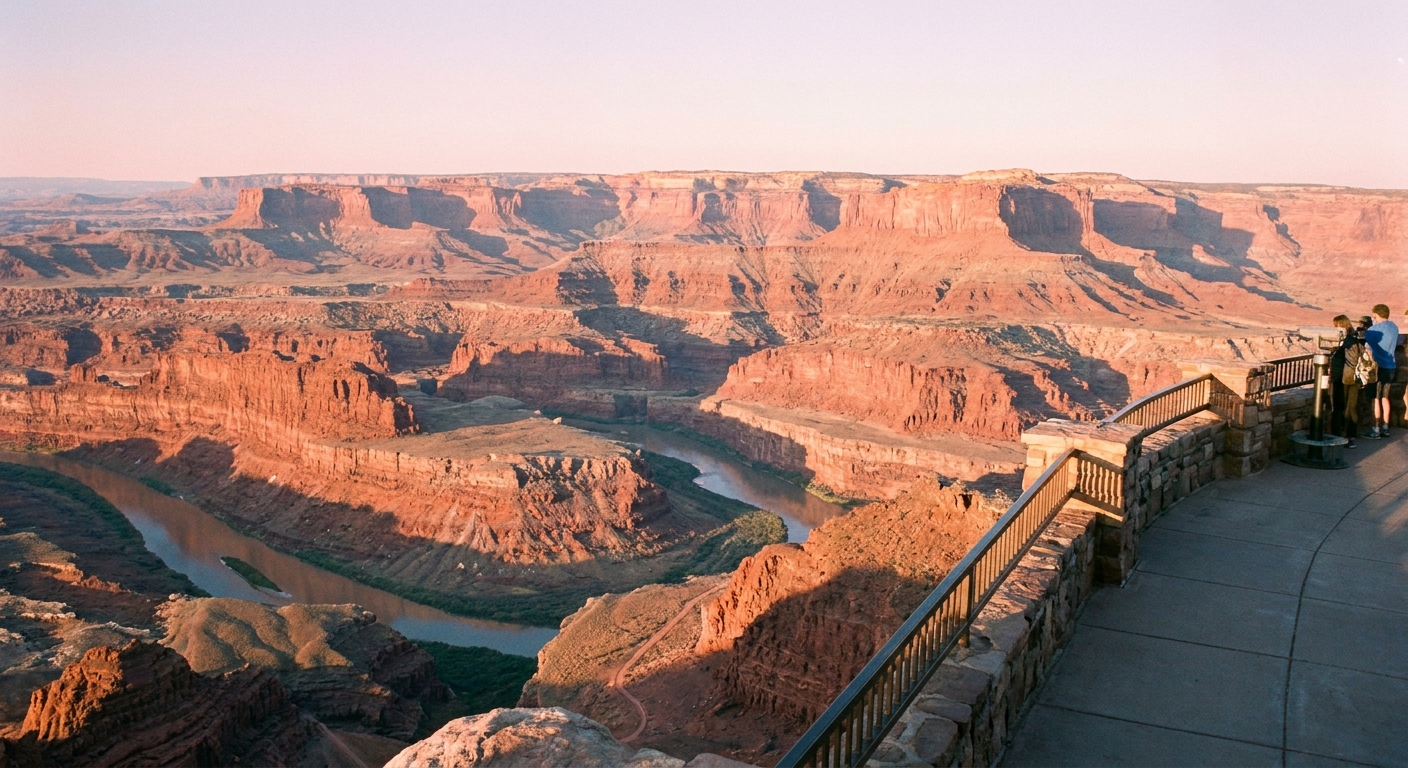
- Dead Horse Point Overlook: The headline Colorado River bend view. This is the one you have seen in photos.
- East Rim viewpoints: Great for spreading out when the main overlook is busy.
- West Rim viewpoints: Nice later in the day when you want warmer light and a little more breathing room.
- Rim Loop viewpoints: If you walk any portion of the loop, you will naturally collect several “wait, this one is better” angles.
Small reality check: Both Dead Horse and Canyonlands Island in the Sky have entrance stations. Either one can back up at peak times. Dead Horse often feels quicker, but sunset weekends can still get line-y.
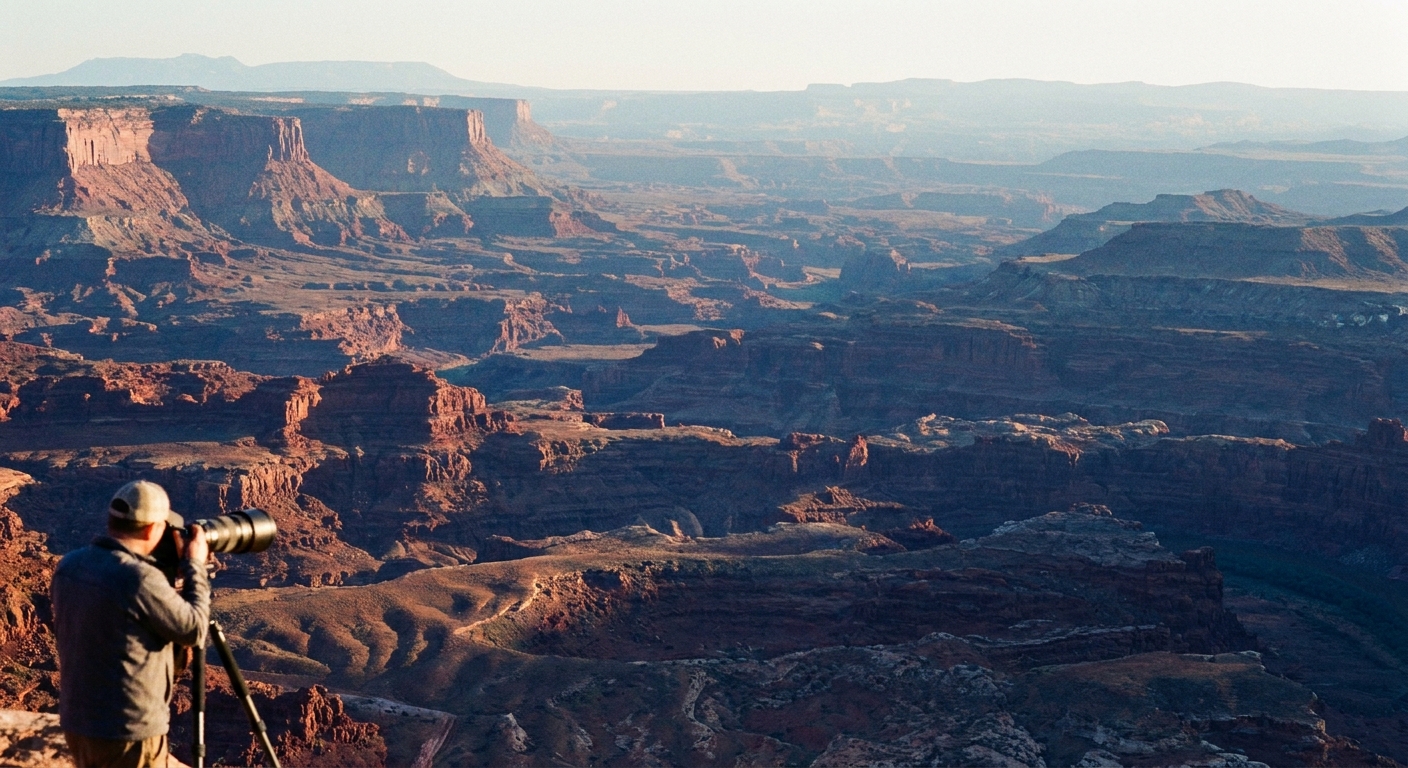
Sunrise vs sunset
This is one of the best places in the Moab area to be picky about light because the landscape is so layered. The cliffs, river, and distant mesas all turn on differently depending on the time of day.
Sunrise
If you can drag yourself out of bed, sunrise is the move. The air is cooler, the wind is often lighter, and you are more likely to get that quiet, just-you-and-the-canyon feeling. Early light can be softer and more pastel, especially if there are thin clouds.
- Best for: Peaceful vibes, families with kids who wake up early anyway, photographers who want subtle color and fewer people in the frame.
- Watch for: The rim can be chilly in spring and fall. Bring a light layer even if Moab feels warm.
Sunset
Sunset is famous here for a reason. The red rock glows, and the canyon shadows deepen in a way that makes every photo look like it had help. The tradeoff is that you will have company, especially around the main overlooks.
- Best for: Big contrast, saturated color, travelers who want the classic golden-hour shot.
- Watch for: Parking near the most popular viewpoints can fill close to sunset. Arrive earlier than you think, especially in spring and fall.
My honest pick
If you only have one shot, choose sunrise for the experience and sunset for maximum drama in photos. If you are staying in Moab for a few days, Dead Horse is one of the easiest places to do both because the walks are short and the payoff is immediate.
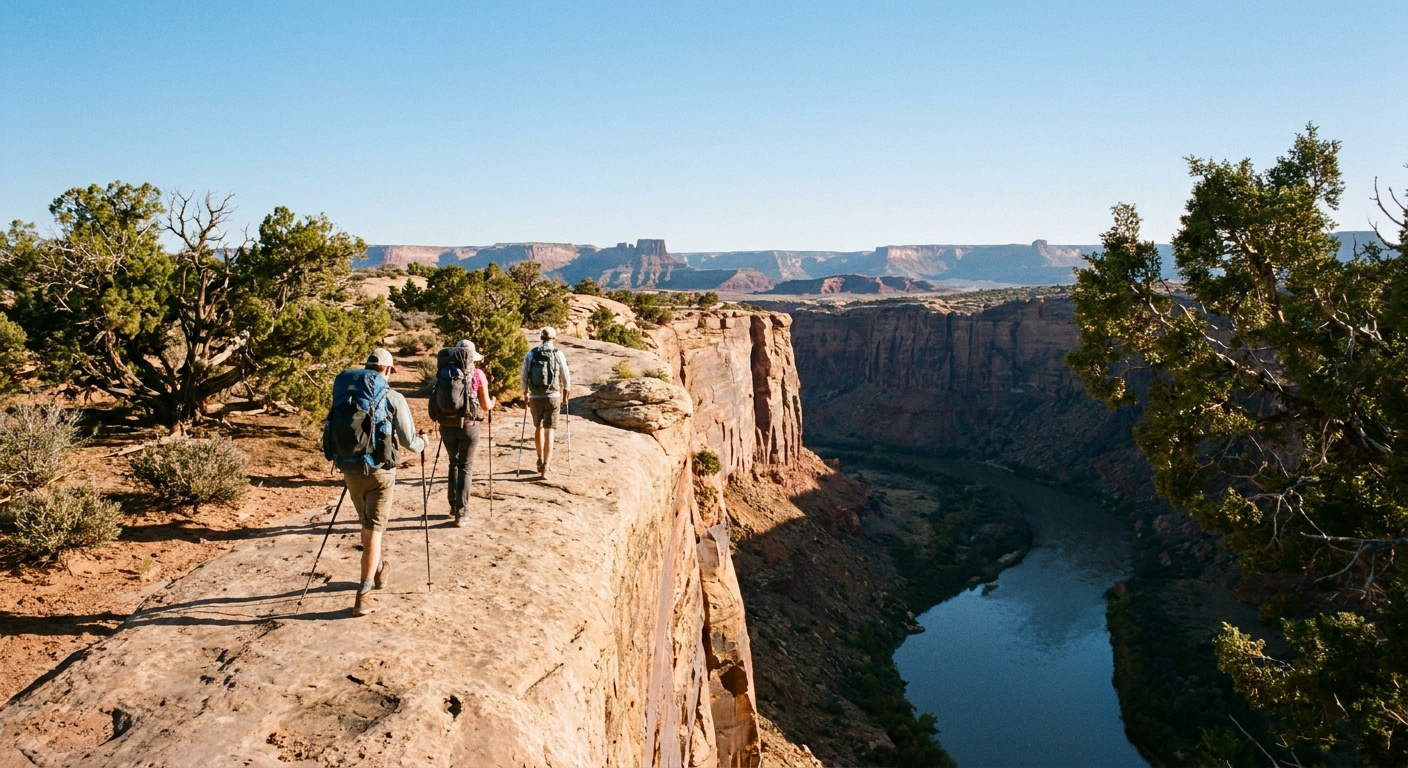
Short rim walks
Dead Horse is made for low-stress exploring. You can keep it as a quick viewpoint stop, or turn it into a mellow rim ramble that still feels like a real hike.
1) Main overlook stroll
This is the classic: park, walk a few minutes, and you are at the famous river bend view. From there, you can continue along the rim to other overlooks without committing to a full loop.
- Time: 15 to 45 minutes depending on how many stops you make
- Difficulty: Easy
- Surface: Mostly paved and packed path near the main developed overlooks
- Accessibility note: Some viewpoint areas are more accessible than others. If you need the easiest path option, confirm current accessible routes at the visitor area.
What to bring: Water, sun protection, and a wind layer. The rim can be breezy even when Moab is calm.
2) Rim Loop
If you want one walk that feels satisfying without being long, do the rim loop around the main point. It strings together multiple angles of the canyon so your photos actually look different from each other instead of being the same shot with slightly different elbows in the foreground.
- Distance: About 5 miles round trip (varies slightly with spurs and viewpoint detours)
- Time: About 1.5 to 2.5 hours at a strolling pace with lots of stops
- Difficulty: Easy to moderate, mostly flat with short rocky sections
- Surface: A mix of trail, slickrock, and some paved segments near developed areas
Kid note: The rim is real. There are sections with fencing near main viewpoints, but you should still keep kids close on the exposed stretches.
3) East and West Rim spurs
Depending on where you park and what is open, you can tack on short out-and-backs along the east or west side of the rim. These are great when the main overlook feels crowded and you want a quieter perch.
- Time: 20 to 60 minutes
- Difficulty: Easy
- Best for: Sunset when you want space, photographers hunting a cleaner foreground
Dogs at Dead Horse
If you are traveling with a dog, Dead Horse Point is one of the most satisfying “yes, you can bring them” spots near Moab. Unlike Arches and Canyonlands, where pets are heavily restricted, Dead Horse is generally pet-friendly in developed areas and on many trails. That alone is a big reason to choose it over Island in the Sky on a short trip.
Quick rule reality check: Pet rules can vary by area and can change. Before you go, confirm the current “pets” guidance on the official Dead Horse Point State Park page so you do not accidentally pick a trail or overlook with restrictions.
- Leash rule: Keep dogs on a leash and close to you, especially near the rim.
- Heat and paws: Slickrock and pavement get hot fast. Early morning and late evening are friendlier.
- Water: Bring extra. There is no shade up on the mesa, and wind dries everyone out.
- Trails and bikes: Some trails are shared-use. If you are walking a dog near bike routes, stay alert and step aside early.
- Courtesy: Keep the photo perches calm. Not everyone wants a surprise nose in their golden-hour tripod setup.
Mountain biking
Dead Horse is not just a viewpoint park. The Intrepid Trail System is one of the most popular beginner and intermediate mountain biking networks in the Moab area, and it is a great way to get moving without committing to Moab’s most consequence-heavy lines.
Why it is a great ride
- Scenery per mile: You are basically riding a postcard.
- Approachable trails: Options for newer riders plus enough tech to keep intermediates happy.
- Good for mixed groups: It is easier to build a short loop that works for everyone.
Quick bike tips
- Start early: Sun and wind are real up here.
- Bring more water than you think: The mesa is deceptively dry.
- Know your edge: There are sections near drop-offs. Ride within your comfort zone and keep stops well back from the rim.
- Check current trail status: Weather and maintenance can affect which segments are open.
Camping and yurts
If you want to wake up already on the mesa for sunrise, Dead Horse has camping options that make that easy. The park is especially known for its yurts, which are a fun middle ground between “sleeping on the ground” and “I would like four walls, thanks.”
- Best for: Sunrise chasers, families who want a simpler morning, anyone who likes a cozy base with big views nearby.
- Plan ahead: These can book out, especially in peak season.
Dead Horse vs Island in the Sky
I love Canyonlands Island in the Sky, but it can feel like everyone else loves it on the exact same morning. Dead Horse Point often wins on simplicity, especially in peak season.
Dead Horse wins when
- You want a big view with a simpler visit. Entry is often quicker and the walk-to-wow ratio is excellent. Just remember peak sunset can still bring lines.
- You are traveling with kids or mixed-energy groups. Short walks, lots of payoff, plenty of places to pause.
- You want to bring your dog. Dead Horse is one of the easiest ways to get an epic Moab vista with a leashed pup.
- You want to photograph without fighting for rail space. Crowds can still happen, but you can usually spread out along the rim.
- You only have a half-day. You can get an iconic canyon experience in under two hours on site.
Island in the Sky wins when
- You want multiple distinct viewpoints in one park drive and the option to add longer trails.
- You want that national park variety like Mesa Arch, Upheaval Dome area hikes, or Grand View Point’s longer trail options.
My favorite strategy: Use Dead Horse for the sunrise or sunset anchor and Island in the Sky for a mid-morning to afternoon block, or vice versa depending on crowds and weather.
How long to budget
Dead Horse is easy to underestimate because the walks are short, but the viewpoints are sticky. You will keep saying, “Okay one more angle,” and suddenly you have been there an hour.
- 30 to 45 minutes: One main overlook plus a short rim stroll. Great as a scenic stop on a packed itinerary.
- 1.5 to 2.5 hours: Rim loop at a relaxed pace, multiple overlooks, time for photos and snacks.
- 3 to 4 hours: Rim loop plus extra spurs and a long linger for golden hour. This is the sweet spot for sunset.
- Half day: Add a mountain bike loop on the Intrepid Trail System plus a viewpoint stop.
Carry-on-only packing brain note: Bring a small daypack even for the “easy” walks. Water, a sun hat, and a light jacket cover most surprises up on the mesa.
Pairing with Arches and Canyonlands
Dead Horse pairs beautifully with both Arches and Canyonlands because it scratches the “epic vista” itch without requiring a full day of hiking legs. Think of it as your scenery dessert course.
Option A: Dead Horse sunrise + Arches
- Sunrise: Dead Horse main overlook and a short rim walk
- Late morning: Drive back, breakfast and coffee in Moab
- Midday: Head to Arches for a longer hike like Delicate Arch, or a shorter loop depending on heat
This works especially well in warmer months when you want to do the most exposed viewpoints early.
Option B: Arches early + Dead Horse sunset
- Morning: Arches hikes while it is cooler
- Afternoon break: Moab recharge and shade
- Golden hour: Dead Horse rim loop and sunset
This is my go-to when I want a big finish to the day without having to hike hard at the end.
Option C: Island in the Sky + Dead Horse sunset
- Morning: Sleep a bit later or explore Moab
- Late morning to afternoon: Canyonlands Island in the Sky overlooks and a short hike
- Sunset: Dead Horse for color and drama
If Island in the Sky feels busy, Dead Horse can feel like the calmer capstone even on a packed weekend.
Family tips
- Pick one anchor viewpoint. Start with the main overlook, then decide if energy is still good for the loop. It prevents a cranky forced march.
- Use snack stops strategically. The best tantrum prevention is a granola bar with a view.
- Plan for wind. A lightweight layer makes a huge difference for kids who get cold fast when the sun dips.
- Stay rim-aware. There are fenced areas, but not everywhere. Keep hands held near exposed sections.
Leave no trace
Dead Horse is popular because it is accessible. That also means the impacts add up fast.
- Stay on established trails and rock. Cryptobiotic soil looks like dusty crust, but it is living and fragile.
- Do not climb over walls or railings for a cleaner shot. There are endless compositions from safe spots.
- Pack out everything. Even fruit peels and “biodegradable” scraps do not belong on the rim.
- Dog add-on: Pack out pet waste. Bring bags and do not leave them “for later.”
If you are chasing sunrise or sunset, arrive early, pick a spot, and let the light come to you. The best photos happen when you stop rushing.
Mini checklist
- Day-use fee payment method ready
- 1 to 2 liters of water per person (more in summer)
- Sun hat, sunglasses, sunscreen
- Light jacket or wind layer
- Closed-toe shoes with decent grip
- Camera or phone plus a simple tripod if you love low-light shots
- Dog gear if needed: leash, extra water, waste bags
- Bike basics if riding: helmet, repair kit, more water than you think
Dead Horse Point State Park is proof that you do not always have to earn the view the hard way. Save your big-mile hikes for another day, and let this rim walk deliver the kind of scenery that makes Moab feel like a different planet.