Horseshoe Bend Logistics: Parking, Fees, Guardrails, and Best Light
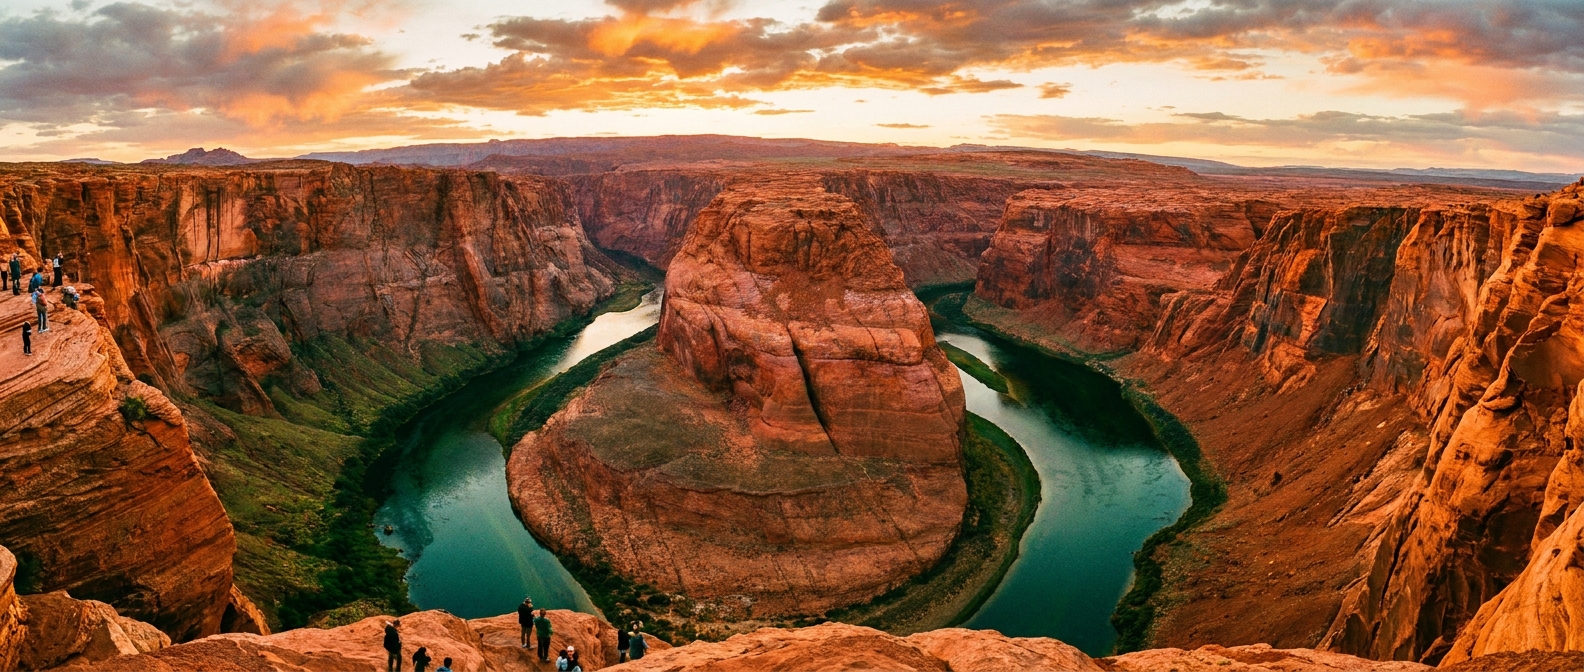
Horseshoe Bend is one of those rare “worth the hype” overlooks: a near 270-degree curve of the Colorado River carved into Navajo sandstone, just outside Page, Arizona. The good news is you do not need a guided tour to do it right. You do need to know a few logistics that can make the difference between a smooth, golden-hour visit and a sweaty midday shuffle.
This page is intentionally focused on the overlook only: parking and fees, the walk, safety and guardrails, when the light looks best, and how long to budget.

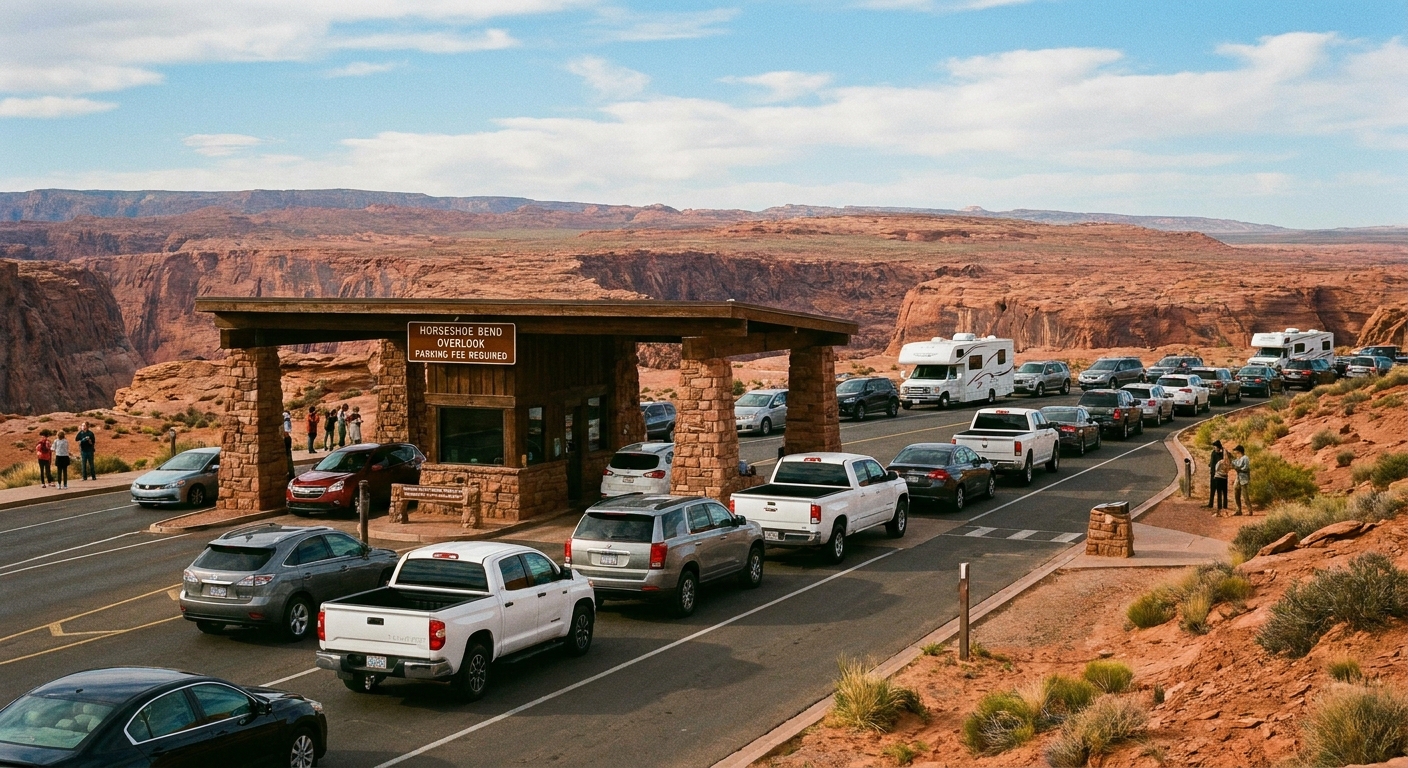
Parking and fees
Horseshoe Bend is a City of Page fee area with a dedicated parking lot right off US-89, about 5 to 10 minutes south of downtown Page. You pay to park, then walk to the overlook.
What the fee covers: Your parking spot and access to the maintained trail and viewing areas.
Current model
- Fee type: Parking fee per vehicle, paid at the entrance station to the parking area.
- Passes: This is not a National Park entrance, so America the Beautiful passes typically do not apply to the parking fee.
- Payment: Payment methods can vary by season and staffing. Some days feel very card-friendly, other days you will be glad you have a backup option. If you like certainty, check the City of Page or official Horseshoe Bend visitor info before you go.
How much is it? Fees can change, so I always recommend a quick check the morning you go (especially if you are traveling in peak season). If you are building a tight budget, plan for a paid parking fee as a baseline.
Hours and restrooms
- Hours: Lot hours can change seasonally. If sunrise or late-night timing matters to you, confirm current hours before you commit to a specific plan.
- Restrooms: Restrooms are typically at or near the parking area, not out at the overlook. Use them before you walk out, especially with kids.
When parking fills up
On spring and fall afternoons, the lot can feel like a magnet for every road trip between Zion and the Grand Canyon. The busiest window is usually late afternoon through sunset, plus weekends and holidays. If you can, arrive earlier in the day or aim for sunrise to make everything easier.
One more real-world note: after sunset, the exit can bottleneck. Build in a little patience for the drive out.
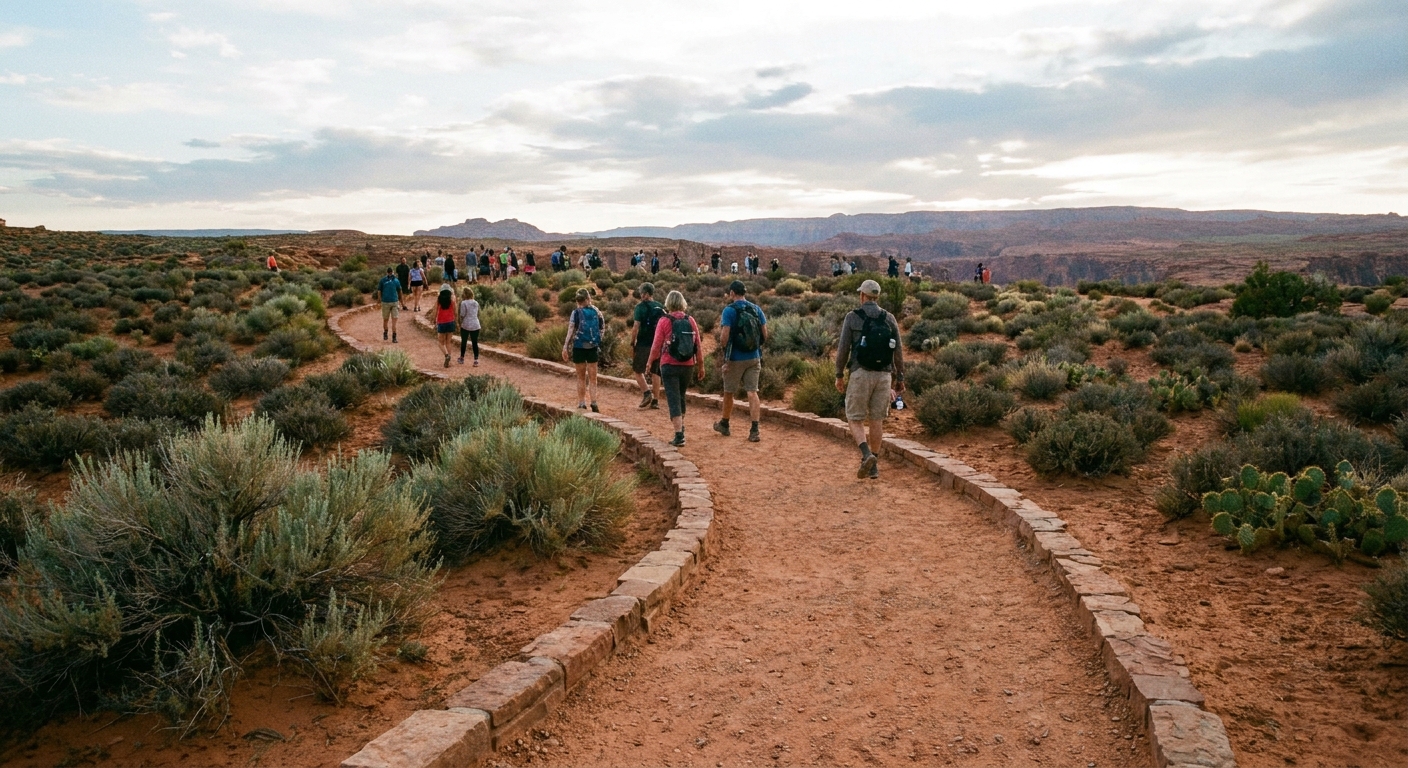
The walk
From the main parking lot to the overlook, the route is straightforward and well-worn. It is not long, but it is sunny and exposed, and the slight incline on the way back can still feel like a little tax in the heat.
The big update, if you have old info in your head, is this: the City of Page completed major trail improvements in 2019. The main route is now primarily a hardened surface leading to a railed viewing area. Many visitors find it stroller-friendly and more accessible than the old sandy route, but if you need true ADA assurance for a specific mobility device, it is worth checking current accessibility details before you go since grades, pinch points, and crowding can affect the experience.
Trail basics
- Distance: About 1.5 miles round trip (roughly 0.75 miles each way).
- Time: Most people take 30 to 60 minutes walking time total, depending on pace, heat, and crowd flow.
- Surface: A mostly hardened route (post-2019 improvements) rather than the old sand dune approach.
- Elevation: Mild rolling grades, with a slightly more noticeable climb on the return.
What to bring (even for “just a quick stop”)
- Water: In warm months, treat this like a mini desert hike. Bring more than you think you need.
- Sun protection: Hat, sunglasses, sunscreen. There is essentially no shade.
- Shoes: Sneakers are perfect. Stable shoes make the walk more comfortable.
Heat and weather
- Summer heat: Temperatures can be extreme. If it is a high-heat day, go early, go slow, and hydrate before you feel thirsty.
- Monsoon season: Sudden storms, gusty wind, and lightning are real risks on exposed overlooks. If weather looks sketchy, reschedule.
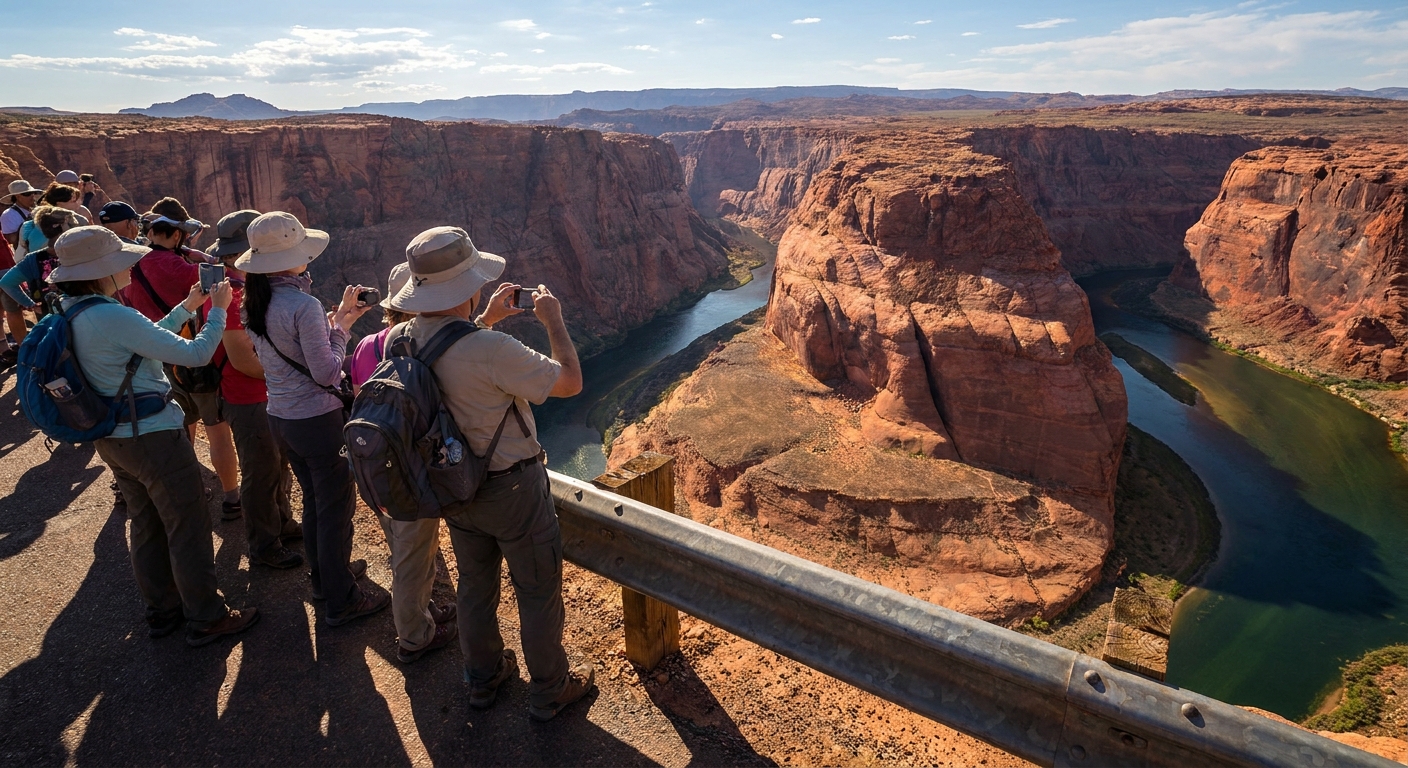
Guardrails and cliff safety
The overlook is dramatic because it is real, raw canyon edge. That also means it deserves your full attention, especially if you are traveling with kids, anyone nervous around heights, or a camera setup that tempts you to inch forward.
What the guardrails cover
There are guardrails in sections, especially in the most heavily trafficked viewing areas and along the primary viewing deck. But not every edge is fenced. You will still find open cliff sections where people sit, stand, and take photos close to the drop.
My personal safety rules here
- Stay back from unfenced edges. The rock can be uneven, and crowds make it easier to misstep.
- Skip risky “hero shots.” No photo is worth a fall.
- Watch for wind. Gusts happen, and wide-brim hats and tripods can turn into sails.
- Keep kids within arm’s reach. Not “nearby.” Literally close.
- Be patient with crowds. If you wait two minutes, you usually get a cleaner angle without squeezing past people near the edge.
Quick photo note
If you want the iconic view without the cliff-edge anxiety, aim for the railed viewpoints and use a wide lens or the wide setting on your phone. Panoramas can work well here too. And secure your phone or camera with a strap or a solid grip, especially if it is windy.
Best light
Light at Horseshoe Bend is everything. The river is far below, the canyon walls are tall, and shadows can either add drama or swallow the color.
Sunrise (my favorite for calm)
- Why go: Cooler temperatures, fewer people, and a peaceful vibe that feels more “desert morning” than “tour bus stop.”
- Light quality: Soft and gradually warming. Great for photos without harsh contrast.
- Trade-off: You will want a jacket in cooler months, and you will be walking in low light at first. Also, confirm parking lot hours if you are arriving very early.
Sunset (best color, biggest crowds)
- Why go: Warm canyon glow can be incredible, especially when the sandstone starts turning copper.
- Light quality: Often the most photogenic tones, but shadows deepen quickly.
- Trade-off: Expect a packed overlook and a busy parking lot. Arrive early and be ready to wait for a clear spot, then plan for slower exit traffic.
Midday (only if timing forces it)
- Why go: Convenience. If you are passing through, midday might be all you have.
- Light quality: Harsh, bright, and hot. Contrast can be intense, and you can lose detail in shadow.
- How to make it work: Use HDR on your phone, or expose for the highlights and lift shadows later. Wear sun protection and drink water before you feel thirsty.
If you are choosing between “best light” and “best experience,” pick sunrise. If you are choosing between “best color” and “best logistics,” pick sunset but arrive early.
How long to budget
Horseshoe Bend looks quick on a map, but crowds and heat can stretch your timeline. Here are realistic planning blocks that fit most travelers.
Time estimates
- Fast stop (tight schedule): 45 to 60 minutes total. This includes parking, walking out, a few photos, and walking back.
- Comfortable visit (recommended): 1.5 to 2 hours. Enough time to rest, wait for a photo opening, and enjoy the view without rushing.
- Sunset visit: 2 to 2.5 hours. Arrive early, claim a safe viewing spot, and plan for slower exit traffic.
Best tiny upgrades
- Go early or late for temperature. In hot months, the walk back can feel significantly harder.
- Bring a snack. Not because it is long, but because hunger plus heat is a bad combo.
Tips for going without a tour
Doing Horseshoe Bend independently is simple, which is why it is such a great “self-guided win” near Page.
- Navigate to the official City of Page parking area off US-89. That keeps things straightforward and reduces the temptation to stop in unsafe roadside areas.
- Arrive with a plan for light and hours. If your main goal is photos, pick sunrise or late afternoon. If sunrise matters, confirm the lot is open when you need it.
- Pack like it is a short hike. Water, sun protection, stable shoes.
- Respect the edge. Stay behind railings where available and give yourself space.
Pair it with Page
Horseshoe Bend is one of the easiest “big views” to stack into a Page day. It pairs especially well with Lake Powell viewpoints, a lazy lake afternoon, or a sunrise walk plus brunch in town kind of rhythm.
If you are building a full itinerary, think of Horseshoe Bend as the quick, high-impact stop that leaves room for slower experiences: a long coffee in Page, a shoreline walk, or an evening drive when the desert light goes soft.
Quick checklist
- Paying: Plan on a paid City of Page parking fee at the entrance. Payment methods can vary, so bring a backup option.
- Hours and restrooms: Check current parking lot hours if you are aiming for sunrise or late evening. Use restrooms at the lot before you walk out.
- Walking: About 1.5 miles round trip on a mostly hardened route with little shade. The route is much improved since 2019, but accessibility can depend on grades and conditions.
- Safety: Guardrails are present in some areas, not everywhere. Treat the edge seriously, especially in wind.
- Best light: Sunrise for calm, sunset for color, midday only if necessary.
- Time: 1.5 to 2 hours is a comfortable budget (more for sunset crowds and exit traffic).