Joshua Tree Stargazing: Etiquette, Pullouts, and Milky Way Basics
Joshua Tree at night feels like someone turned the volume down on the whole desert. The rock piles go black, the air cools fast, and the sky does that rare thing where it looks deep, not just dark. If you are visiting for one evening or you are camping inside the park, the best stargazing is not about having fancy gear. It is about being respectful with light and sound, parking safely, and letting your eyes and camera adjust long enough to actually see what you came for.

Night access basics
This is a policy-summary level overview for trip planning, not legal advice. Rules can change, and there are occasional temporary closures, so check the National Park Service site and any posted signs when you arrive.
Fees and passes still apply
Even at night, park entrance fees or a valid pass are still required. Entrance stations are not always staffed after hours, but fee requirements do not disappear when the sun goes down.
Camping vs one-night visit
The park is generally open 24 hours, which makes evening stargazing doable. The catch is that some areas, roads, trailheads, and parking lots can close or restrict parking, especially during maintenance, storms, special events, or resource protection efforts.
If you are camping in the park
- Campgrounds are the easiest way to stargaze late because you already have a place to be after dark. Your campsite becomes your base, which cuts down on nighttime driving.
- Quiet hours and generator rules apply (they vary by campground, so check posted rules). Even if you are not in a designated quiet hour window yet, desert sound carries. Assume your neighbors can hear most of your conversation.
- Headlights and lanterns matter more than you think in a campground. One bright white lantern can wipe out dark adaptation for dozens of people.
If you are visiting for one night only
- You can usually enter for evening stargazing and leave later, but you need to plan for a safe place to park and a clear, awake driver for the trip out.
- Day-use areas can have limits, and some pullouts may be signed for no parking. Do not assume a wide shoulder is a legal or safe overnight spot.
- Do not block roads or trailheads. Emergency access is not theoretical in the desert.
Bottom line: Camping gives you the simplest, lowest-stress stargazing logistics. A single-night visit can be fantastic too, as long as you treat parking and light discipline like the main event, not an afterthought.
Dark-sky etiquette
The desert night sky is a shared resource. The etiquette is simple, but it only works if everyone actually does it.
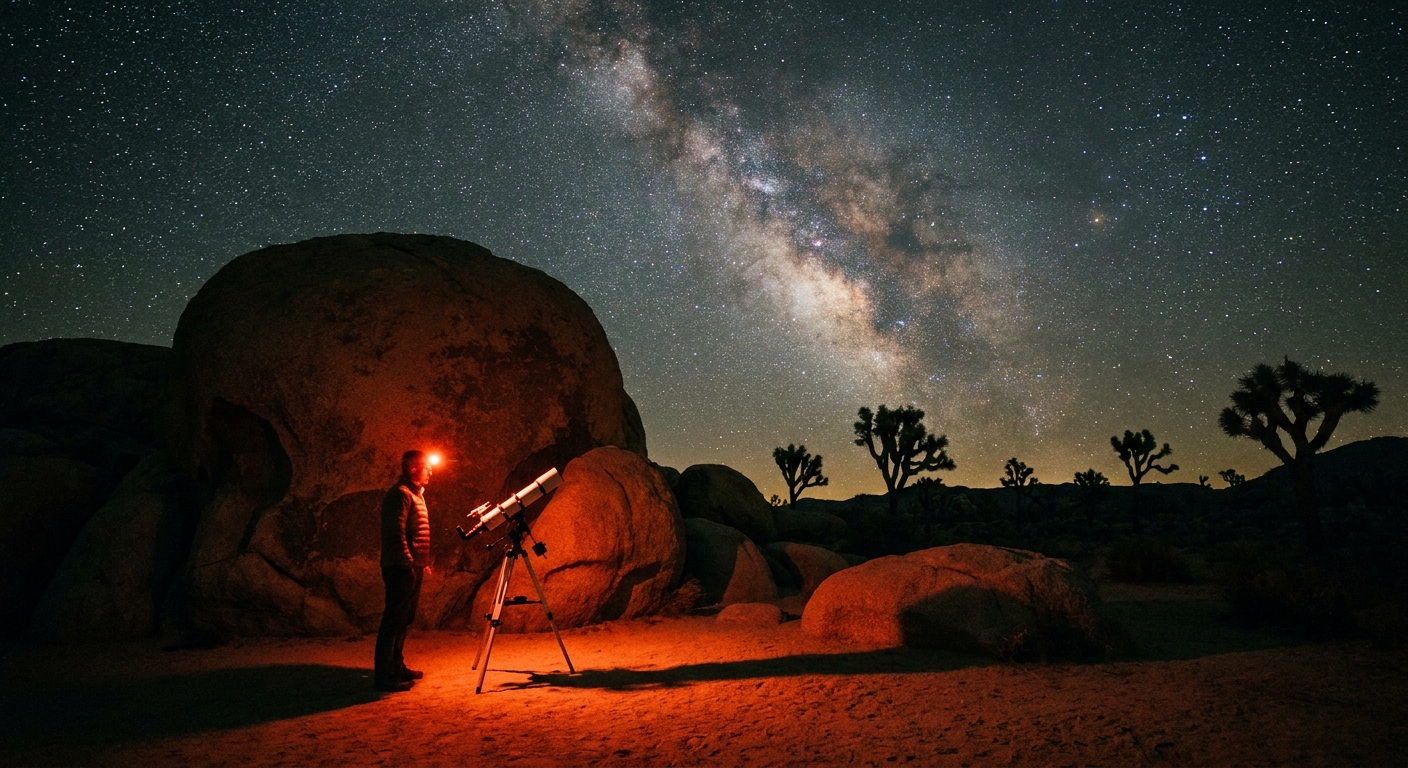
Use red light, use less
- Start with the dimmest setting on a red headlamp. If your headlamp blasts like a bike light, cover it with a layer of red film or tape, or angle it toward your feet.
- Avoid white light unless it is truly necessary for safety. Even a quick hit of bright light can take many minutes for night vision to recover, sometimes 10 to 30 minutes depending on intensity and duration.
- Phones are the biggest offender. If you must use yours, turn the brightness all the way down and use a red screen filter or accessibility color filter.
Headlights matter
- Arrive before full dark if you can. Parking and settling in while there is still a hint of light prevents repeated headlight sweeps.
- Once parked, stay parked. If you need to move, do it once and do it slowly.
- When leaving, be patient. Let people know you are pulling out, keep beams low, and avoid idling with lights pointed at a viewing area.
Sound and space
- Skip speakers. Even quiet music changes the vibe for everyone else.
- Give photographers room. Tripods spread out, and long exposures are easily ruined by a bright light or a bump.
- Keep it slow-travel calm. A good stargazing session is more like sitting by a campfire than checking off a list.
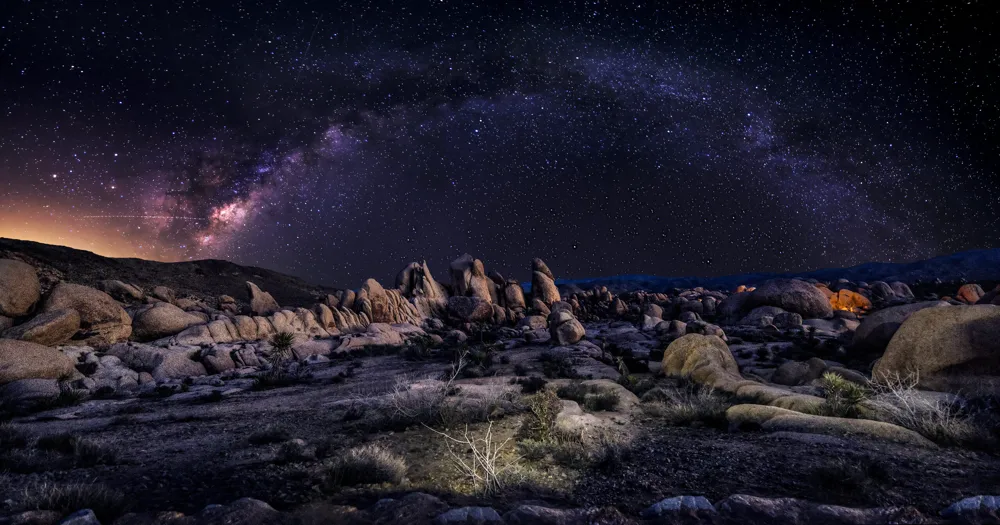
Where to stargaze
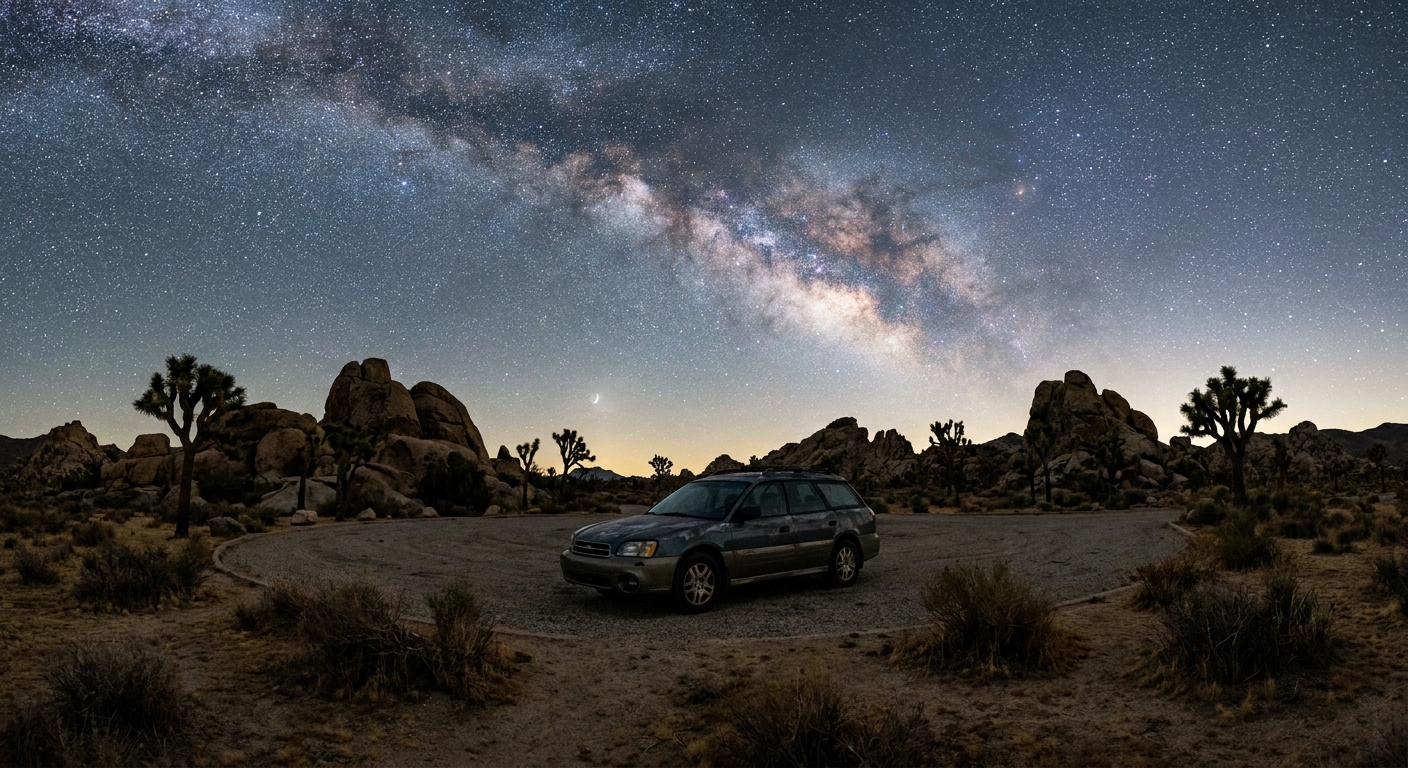
Joshua Tree has big, open skies, but not every dark spot is a safe spot. Your goal is a place where you are fully off the roadway, not blocking traffic, and not tempting a driver to drift onto a shoulder.
Safe pullout checklist
- Four tires fully off the travel lane with plenty of buffer from the white line.
- Good sightlines so other drivers can see the pullout well in advance.
- No “No Parking” signage, no closed gates, and no obvious restoration fencing.
- Enough room to turn around without backing into the road in the dark.
Low-stress options
- Campgrounds and picnic areas (when open) are predictable and designed for cars stopping.
- Established parking lots like major trailhead lots can be easier than a random shoulder, especially if you are new to desert footing at night.
- Designated viewpoints are often the least stressful option for first-timers.
Specific spots to consider
Conditions change with closures, crowds, and weather, but these are commonly used, beginner-friendly places to start:
- Pinto Basin Road corridor for darker skies and wide-open horizons, especially as you get away from the busiest entrances.
- Cap Rock area for easy access and classic Joshua Tree silhouettes.
- Keys View for big-sky drama, with the important tradeoff that it can be windy, colder, and sometimes crowded. Check access status and posted hours.
Crowds and timing
Some of Joshua Tree’s famous roadside stops can get busy around new moon weekends and during meteor showers. If you want that hushed, big-sky feeling, consider going on a weeknight, or stargazing during a moonlit night when the Milky Way is less bold but the park is often calmer.
Leave no trace at night
Night makes it easier to wander off without realizing it. A little discipline keeps the park wild and keeps you from getting hurt.
- Stay on durable surfaces like rock, wash bottoms, and established paths or lots when possible.
- Pack out every scrap, including bottle caps, snack corners, and tissues.
- Skip risky rock scrambling in the dark. The photos are not worth a twisted ankle in a boulder field.
Critter awareness
If you have done desert hikes in daylight, you already know the tone: stay aware, do not put hands and feet where you cannot see, and respect wildlife. At night, the same rules matter more because your visibility is lower and your reaction time is slower.
- Watch your step near rocks and brush. Scorpions and snakes often use the same sheltered edges humans like to sit near.
- Do not walk barefoot, even at camp. Closed-toe shoes are your simplest safety upgrade.
- Use a low, dim light for walking. Red is great for etiquette, but make sure you can still see the ground immediately in front of you.
- Do not reach into crevices to retrieve a dropped lens cap or phone. Use a light and look first.
- If you see an animal, give it space. Back up slowly and choose a different spot.
This is also why I like stargazing from established lots or campsites when I am traveling solo. Fewer surprise steps into the unknown, more time with the sky.
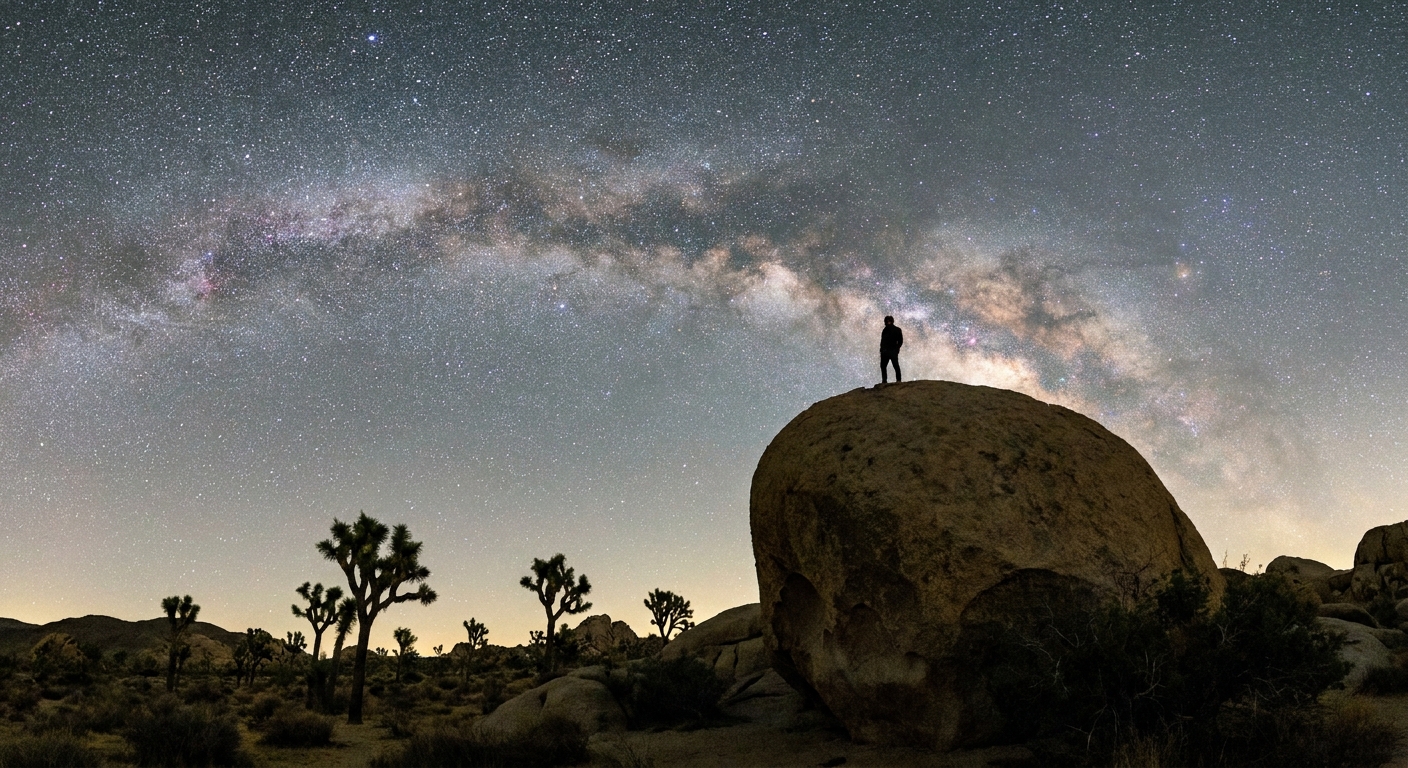
Milky Way basics
You do not need to know constellations to find the good stuff. Here is the beginner framing I wish someone had handed me my first desert night.
1) Let your eyes adapt
Give it 15 to 30 minutes with minimal light. The Milky Way is often there immediately, but your eyes need time to pull it out of the background.
2) Pick the right kind of night
- New moon or a slim crescent gives the darkest sky and the most visible Milky Way.
- Clear, low-haze conditions matter as much as moon phase. Desert dust and high clouds can wash everything out.
- Wind changes everything. High winds can make it feel colder fast, and can turn tripod work into a wrestling match.
- Winter air can be sharper even when nights are colder, which is great for crisp stars.
3) Know what you are looking at
To the naked eye, the Milky Way often looks like a soft, pale band or a slightly mottled “cloud” across the sky, not a neon ribbon. If you can see a dense scatter of stars and a faint brighter lane, you are on it.
4) Seasonal reality check
- Late spring through early fall is when you have the best shot at seeing the bright galactic core from Joshua Tree.
- Roughly November through January, the bright core is not visible in the Northern Hemisphere at night. You can still get beautiful star fields and a fainter Milky Way band, just not that bold “core” look.
5) Direction tip
When the core is in season, it tends to show up toward the southern half of the sky. You do not need a compass if you have a basic map app and you know where the sun set.
Photographers: plan the tradeoff
If you are shooting the Milky Way, you are also signing up for a classic desert decision: stay out late for the core, or save your energy for sunrise light on the rocks.
What you gain by staying up
- More dramatic sky detail, especially on moonless nights (and especially when the core is in season).
- Quieter roads after midnight, which means fewer headlight streaks and less ambient glow.
What you gain by sleeping
- Safer driving. Dawn fatigue is real, and the drive out can be long and dark.
- Golden light texture on Joshua Tree’s boulders and plants that is hard to beat.
- More energy for hiking if you have a big day planned.
A middle path
If you want both, plan a short, intentional night session: arrive before dark, shoot for 60 to 90 minutes, then sleep. You will get stars, you will keep your manners intact, and you will still have something in the tank for sunrise.
Carry-on-only kit
You do not need much, but the right few items make the night smoother.
- Red headlamp with a truly dim mode
- Warm layer because desert nights drop fast, even after hot days
- Closed-toe shoes for rocky ground and critter awareness
- Water and a snack because “just one more look” turns into an hour
- Small sit pad or blanket to keep you off cold rock
- Optional: binoculars for easy, wow-factor star clusters
- Optional but smart: offline maps (cell service can be limited)
One-night plan
- Late afternoon: Enter the park, pick your primary spot, and note nearby turnarounds and exits.
- Sunset: Eat early. Put your red light and layers somewhere you can reach without rummaging.
- After dark: Park once, turn off all interior lights, and let your eyes adjust.
- During stargazing: Keep voices low, keep lights low, and step carefully around rocks and brush.
- Before leaving: Do a slow gear check with minimal light, then drive out patiently and fully alert. Watch for wildlife on the road and do not push through drowsiness.
If you are even slightly tired, call it. Joshua Tree will still be here tomorrow, and the best souvenir is getting back safely with your photos and your sense of awe intact.