Lava Beds National Monument in One Day
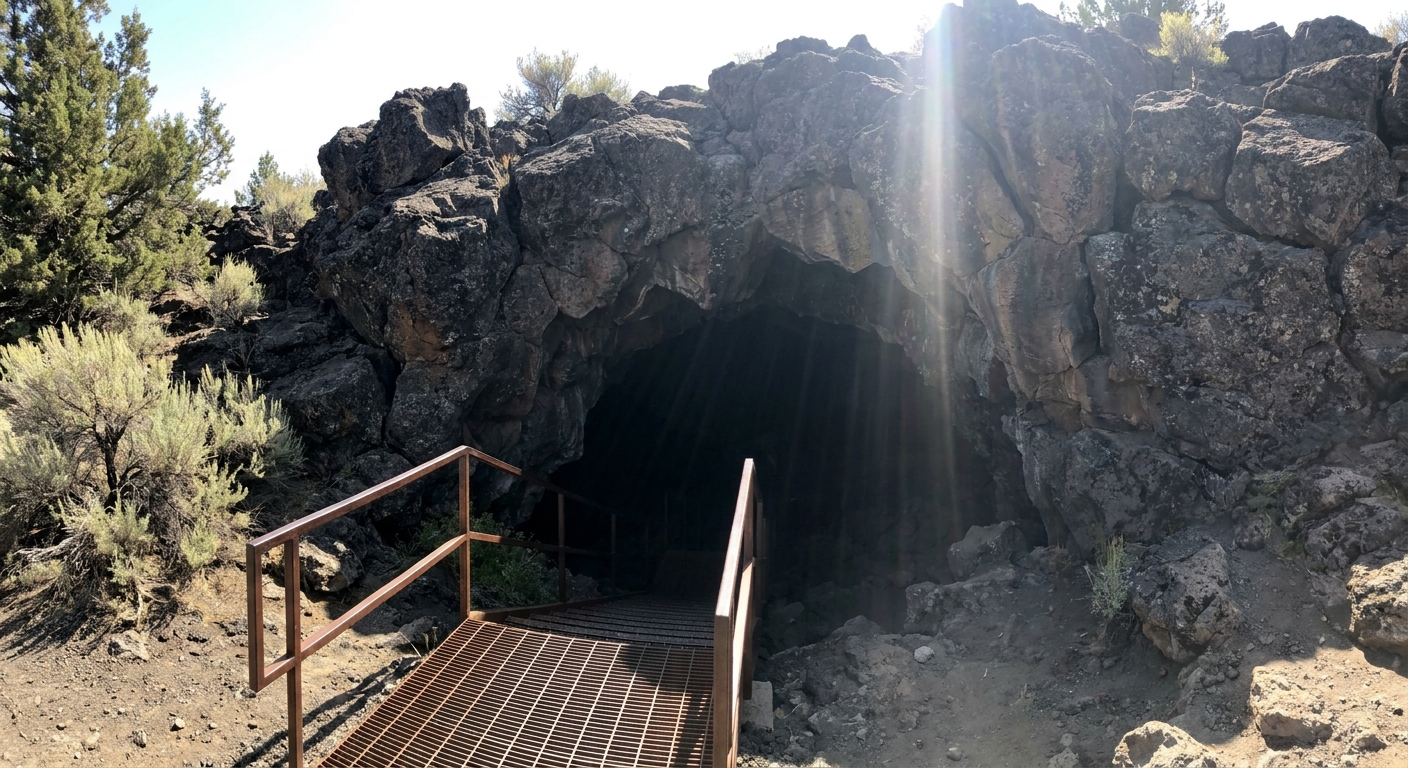
Lava Beds National Monument is one of those rare places where you can have a true underground adventure and still be back at your car in time for a late lunch. The secret is treating it like a choose-your-own cave day: you string together a few self-guided lava tubes that match your group’s comfort level, then sprinkle in one or two short surface stops for context. For the common self-guided, family-friendly picks, you generally do not need ropes or technical gear, but expect uneven footing, low ceilings, and the occasional hands-and-knees moment depending on the cave and current conditions.
Quick reality check before you go: policies, cave openings, and visitor center hours can change seasonally or with staffing. Confirm current requirements and closures on the NPS Lava Beds page the day before and the morning you visit.

First, how caving works here
Caving pass and WNS screening
Before you enter any cave at Lava Beds, plan to start at the visitor center if it is open. The park generally requires visitors to complete a White-Nose Syndrome (WNS) screening and get a free caving pass (sometimes called a permit or pass) to help protect bats and reduce disease spread. It is quick, it is worth it, and it is the easiest way to learn what is open today. If the visitor center is closed when you arrive, check posted instructions and current NPS updates for the day’s process.
Bonus: the visitor center often has practical gear help, too. They may have free loaner flashlights when available (first come, first served) and may sell bump caps or other basics. Inventory can vary, so treat this as a helpful backup, not your whole plan.
Self-guided caves
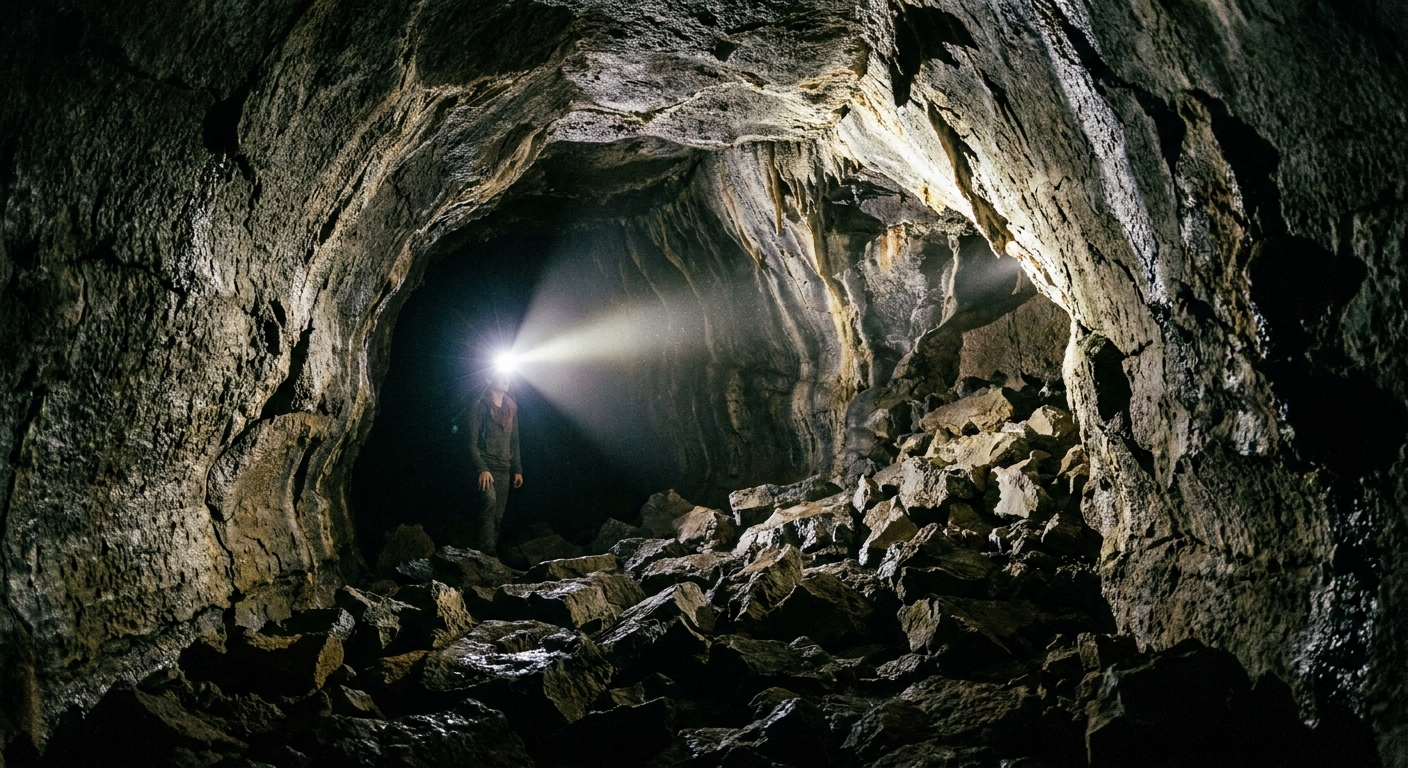
Many lava tubes at Lava Beds are open for self-guided exploration when conditions allow, once you have your caving pass. You still need to be prepared: proper lighting, steady footwear, and the willingness to turn around when a passage gets tighter, icier, or rougher than expected. Think of self-guided caving here like a rugged museum where the exhibits are dark, uneven, and occasionally dripping.
Ranger-led caves
Ranger-led programs, when offered, are a great fit if you want deeper interpretation, a controlled group pace, and extra confidence for first-timers. These trips are usually seasonal and can be capacity-limited. If a ranger-led tour is available during your visit, it can replace one of the longer cave blocks in the itinerary below, especially for families who want the experience without the navigation decisions.
Tip from my own trial-and-error: if you are traveling with someone who is nervous about enclosed spaces, start with a short, roomier cave in the morning. Confidence builds fast when the first cave ends on a high note.
Logistics to know
- Visitor center hours matter: build your day around being there early enough to get updates and complete screening and passes.
- Parking and navigation: most caves are accessed from pullouts and small lots along Cave Loop Road. Pick a cluster and work nearby rather than crisscrossing the monument all day.
- Maps: grab a paper cave map at the visitor center and download anything you want for offline use. Cave numbers and junctions are easier to manage when you have a reference in your pocket.
- Cell service: expect it to be limited or unreliable. Make your plan before you lose signal.
A one-day cave loop for families
This pacing assumes a normal day trip with kids, mixed fitness levels, or anyone who wants to see a lot without feeling rushed. You will get a satisfying range of experiences: open passageways, dramatic ceilings, and a taste of the cold-air microclimates that make Lava Beds feel like two seasons at once.
Morning: visitor center, then an easy cave
- Start at the visitor center for current cave status, closures, and bat-season guidance, plus your WNS screening and free caving pass (as required). Conditions change and cave access can be affected by wildlife protection, ice, or maintenance.
- Warm-up cave: Mushpot Cave. It is a classic first stop because it is historically the park’s well-known lit cave, beginner-friendly, and a great place to test your comfort level (and your kids’ attention span) before you commit to darker, rougher tubes. Confirm it is open when you arrive.
Late morning: your main cave block
Pick one longer self-guided cave (or a pair of medium caves) as the centerpiece of the day. Two popular options for many groups are Skull Cave (dramatic and memorable) and Valentine Cave (a solid intermediate adventure). Suitability depends on conditions. Some caves can hold ice or have slick sections seasonally, and what feels “fine” at the entrance can change fast a few minutes in. If rangers flag ice hazards or closures, believe them and pivot.
- Time buffer: give yourselves extra time for snack breaks, kid-paced navigation, and the occasional “nope” turnaround.
- Comfort rule: the moment the group starts stepping like they are walking on marbles, that is your cue to slow down or call it.
Early afternoon: quick surface reset
After a longer cave, stepping back into the bright high desert feels like hitting a reset button. This is a perfect time for a short surface stop that adds cultural and geological context without turning your day into a strenuous hike.
Mid-afternoon: one last short cave
Finish with a short cave that fits your group’s energy and comfort level. If everyone is happy and steady on their feet, add one final quick cave. If anyone is cold, tired, or headlamp-burned out, end on the surface and keep the day a win.
- Want short and roomy: ask rangers for a quick, stand-up-friendly option that is open today.
- Want short and adventurous: choose something with a little more squeeze or scramble only if your group is truly enthusiastic, not peer-pressured.
- Want the simplest button on the day: repeat Mushpot or stop after your surface break and leave on a high note.
Headlamp basics that matter
Underground, your lighting is your safety system. Phone flashlights are not enough for caves, even short ones. A good headlamp keeps both hands free, helps you spot ankle-twisting holes, and reduces the chance of slipping when the floor changes texture.
Bring three lights per person
- Primary: headlamp with a solid beam and fresh batteries or full charge.
- Backup: a second headlamp or a handheld flashlight.
- Emergency: a small light tucked in a pocket that you do not touch unless you need it.
If you are short on gear, ask at the visitor center. Loaner flashlights can be available on some days, but do not count on it.
Battery reality check
Cold air and long run times can drain batteries faster than you expect. If you are using rechargeable lights, start fully charged and still carry spares. If your headlamp has multiple modes, use a medium setting most of the time and save turbo for brief route-finding moments.
Hands-free is strongly recommended
You will want your hands for balance, especially when stepping down onto sharp blocks or ducking under low ceilings. A headlamp also keeps your light pointed where you are looking, which sounds obvious until you try to navigate with a phone in one hand and a nervous kid in the other.
Footing, helmets, and mistakes
Footwear: grip and ankles
The floor in lava tubes is often uneven and abrasive. Choose shoes or boots with real tread. Smooth-soled sneakers and casual slip-ons are asking for a slip. If you have lightweight hikers you love, this is their moment.
Helmet basics
A helmet is strongly recommended in lava tubes, even in caves that feel roomy at first. Ceilings drop unexpectedly, and it only takes one distracted step to meet a low rock nub. A bike helmet works in a pinch, but a climbing helmet is ideal. If you are traveling with kids, helmets lower the stress level for everyone. If you forgot yours, the visitor center may sell bump caps, which are far better than bare head confidence.
Move like you are on a boulder field
- Take smaller steps than you do on a trail.
- Keep three points of contact when stepping down ledges.
- Watch for loose rock underfoot and sharp edges at knee height.
One of the most common mistakes I see is people walking at parking-lot speed because the cave feels flat at the start. The first hidden dip or broken section is where ankles get tweaked.
Cold air and condensation
Here is the part that catches desert travelers off guard: caves have their own weather. You might walk in from warm sun and immediately hit a cold draft that feels like someone opened a refrigerator door. Some tubes also have condensation that makes rock slicker than it looks.
What it feels like inside
- Cold pockets: low areas can hold colder air.
- Drips and damp spots: slick rock shows up near entrances and in sections where air circulates.
- Fogged lenses: glasses and camera lenses can fog when you transition from warm to cold.
What to pack for comfort
- A light insulating layer, even in summer.
- Thin gloves for grip on rock and warmth if your hands run cold.
- A small towel or bandana for wiping condensation from hands or lenses.

Bats, WNS, and closures
Lava Beds is bat country, and responsible caving helps protect fragile populations. The park may close certain caves seasonally to reduce disturbance, especially during sensitive periods. Your job is simple: follow closures, keep distance, and keep your gear clean.
Golden rules when bats are present
- Do not touch bats, even if one is on the ground or looks still. Give it space and leave the area calmly.
- Keep voices low and avoid shining lights directly at bats.
- Do not linger in sections where bats are roosting.
Clean gear, clean conscience
WNS prevention is why the visitor center screening and caving pass matter. To reduce the risk of spreading wildlife disease, use clean clothing and gear that has not been in other caves. If you cave in multiple regions, follow current decontamination guidance and keep a dedicated set of cave gear when possible. Checking in at the visitor center and confirming current guidance on the NPS site is the easiest way to learn what is expected during your visit.
Two quick surface stops
If you only do caves, Lava Beds is still amazing. But the monument clicks into place when you take a couple short breaks above ground. These are low-effort, high-reward stops that give you story and scale without turning into a strenuous outing.
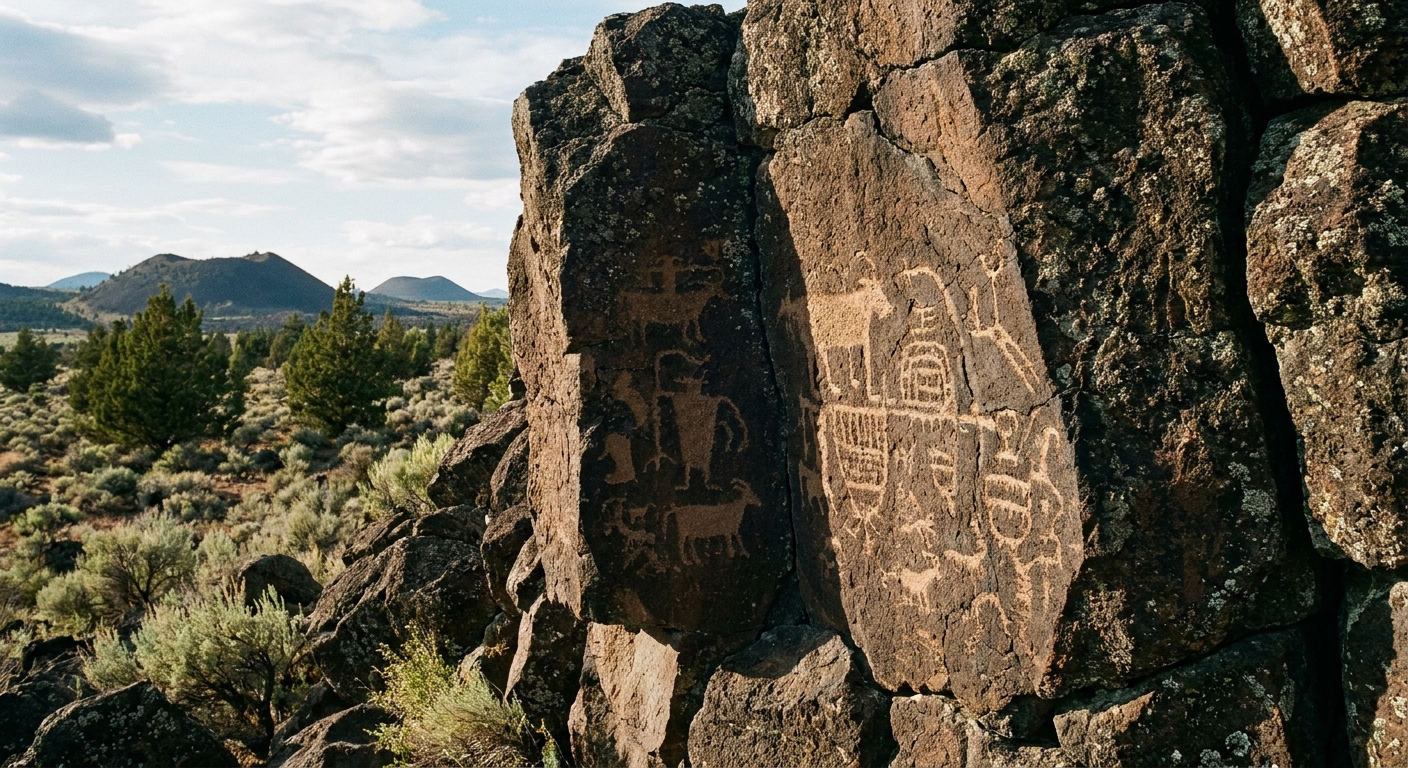
Petroglyph viewpoints
Look for designated areas where you can view rock art respectfully from established paths. The best mindset here is museum rules outdoors: admire, photograph, and keep your hands off the stone. Oils from skin and repeated contact can damage the surface over time.
High desert vistas
A quick viewpoint stop helps you understand what you are walking inside: ancient lava flows that hardened, drained, and left hollow tunnels behind. Take five minutes to scan the horizon, drink water, and let your eyes readjust to sunlight before your next cave.
Kid and family notes
Lava tube caving with kids can be pure magic, but the experience varies wildly by cave. Some are roomy and confidence-building. Others get tight fast. If you are unsure, ask a ranger for a “first cave” and a “second cave” recommendation based on your group.
- Size and comfort: if a child cannot comfortably duck-walk or step between rocks without panic, skip caves known for tight sections and choose roomier options.
- Stay close: keep kids within arm’s reach in rough sections and at drop-offs or ledges.
- Warmth: kids often get cold sooner underground. Pack the extra layer even if the parking lot feels hot.
Accessibility notes
Mushpot is the most approachable cave for many visitors, but it still involves stairs and uneven surfaces and is not wheelchair-accessible. If mobility is a concern, focus on viewpoints, petroglyph stops, and any ranger guidance on the most accessible options available that day.
What to pack for one day
I am a carry-on-only person, but caves have no sympathy for minimalism. Bring the basics and you will feel like you packed perfectly. Skip them and you will spend the day borrowing gear and worrying about batteries.
- Plan around the visitor center for WNS screening and the free caving pass if required that day
- Headlamp plus two backup light sources per person
- Extra batteries or power bank
- Helmet (or a bump cap as a fallback)
- Sturdy shoes with grip
- Light warm layer
- Water and snacks
- Small first-aid kit (blisters, scrapes)
- Bandana or small towel for condensation
- Paper map or offline map download
Quick safety notes
- Tell someone your plan if you are splitting up or doing longer caves.
- Stay oriented: if the cave has junctions, pause and visually memorize your return path.
- Respect your turnaround time: caves feel different on the way out when your legs are tired.
- Leave no trace: pack out everything and avoid touching formations or walls when possible.
If you keep the day cave-forward, add one or two surface stops, and treat your lighting like a real system, Lava Beds delivers an adventure that feels bigger than a single day. You will drive out dusty, a little chilled, and deeply satisfied. The best kind of souvenir.