Mount Rainier: Paradise vs Sunrise
Maya Lin
Maya Lin is a travel journalist and outdoor enthusiast who believes the best trips combine rugged adventures with urban comforts. After spending six years backpacking across four continents, she founded Trail & Town Guide to help fellow travelers navigate both hidden mountain passes and bustling city neighborhoods with confidence.
For a first visit to Mount Rainier National Park, you do not need to “do it all.” You need one great base area that matches your season, your energy level, and whether your crew is more stroll to a viewpoint or let’s earn it. The two most popular choices are Paradise (south side) and Sunrise (northeast side). Both deliver that unreal, glacier-carved, postcard mountain. They just deliver it differently.
This guide compares Paradise vs Sunrise on the things that matter most when you are planning a first trip: driving effort, seasonal opening, short walk options, visitor center services, and photography strengths. Then I will give you simple decision rules for one day vs two, kids, and wildflower timing.
Quick heads-up that saves trips: In peak season, Mount Rainier may require a Timed Entry Reservation to access the Paradise and Sunrise corridors during certain hours. If you show up without the right reservation when it is in effect, your perfect plan can turn into a very frustrating U-turn. Program details change year to year (corridors, dates, hours, and rules), so before you finalize dates, check the current official info and book as soon as your window opens: NPS timed entry reservations.
Also important: a timed entry reservation is separate from your park entrance fee or pass. You still need to pay the entry fee (or have an annual pass) unless the park states otherwise.
Paradise vs Sunrise
If you only remember one thing: Paradise is the classic, more accessible, longer-season choice. Sunrise is higher, wilder feeling, and more seasonal.
- Paradise (about 5,400 ft): Better shoulder season access, bigger visitor services, iconic close-up Rainier views, famous wildflower meadows.
- Sunrise (about 6,400 ft): Highest public drive-to area in the park, sweeping ridgelines, killer sunrise and sunset potential, a “top of the world” vibe when the road is open.
Driving and logistics
Paradise drive notes
Paradise sits on the south side of the mountain, most commonly reached via the Nisqually Entrance near Ashford. For many travelers coming from the Seattle–Tacoma corridor, Paradise often feels like the more straightforward first pick because it has multiple approach options and tends to be the most “default” stop on first-time itineraries.
- Road vibe: Paved mountain roads with curves and elevation gain, but generally comfortable for most drivers in summer conditions.
- Parking reality: Arrive early in peak season. Midday lots can fill and create a slow crawl near the main facilities.
- Best for: Visitors who want a reliable plan, big views, and a mix of short walks plus longer trails.
Sunrise drive notes
Sunrise is on the northeast side and is famous for being the highest place most people reach in the park by car. It is the highest public drive-to visitor area, which is the key distinction. The approach can feel longer and more committed because Sunrise is more “out there” and less naturally paired with other Rainier stops. Most visitors access it from the White River Entrance side, often via the Enumclaw area.
- Road vibe: Paved and curvy, with a dramatic final climb. The payoff is immediate when you step out of the car.
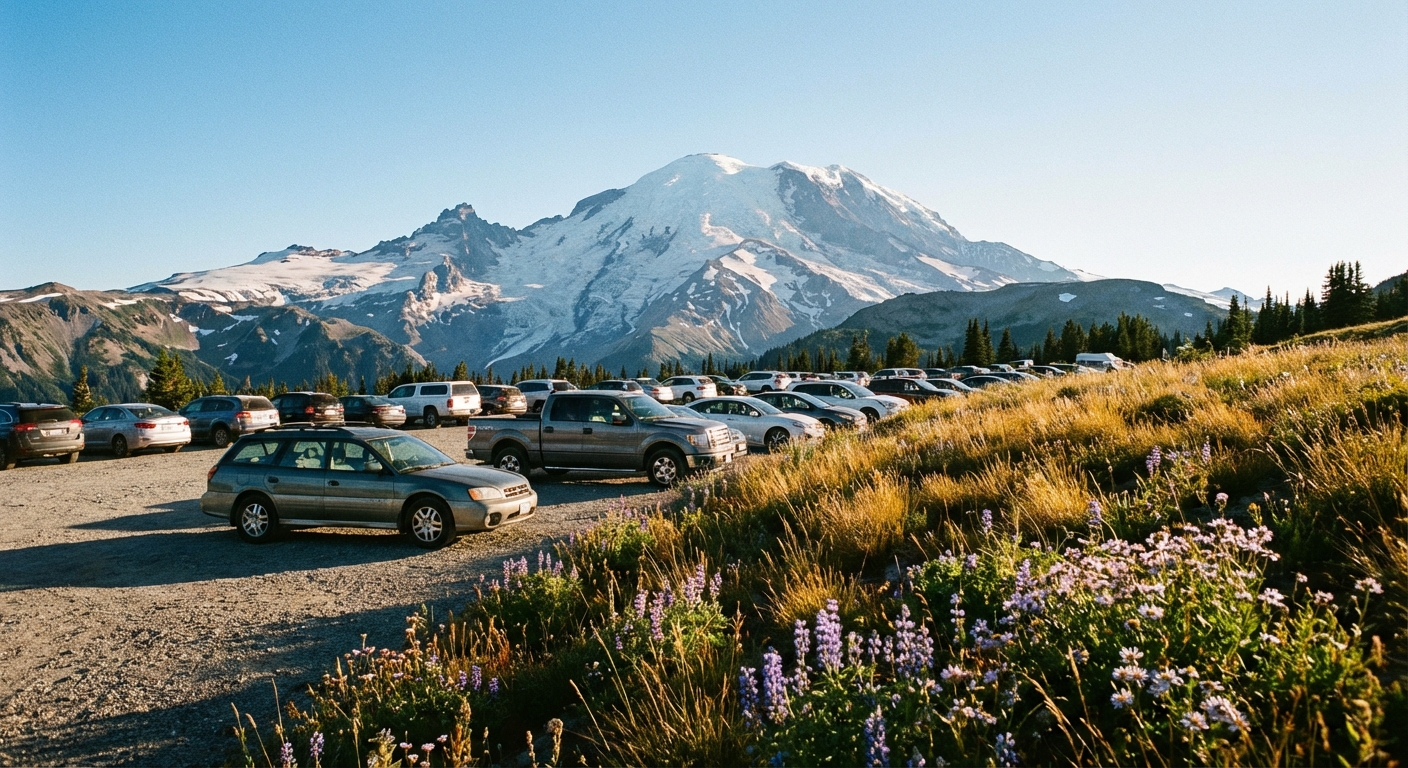
- Parking reality: The lot is not huge for how popular it is. Sunrise can feel busy fast on clear summer weekends.
- Best for: Travelers who want high-elevation views without a long hike and do not mind planning around a shorter season.
When to arrive: if you can, aim for early morning (or later afternoon) to reduce parking stress and to catch clearer skies and better light. If timed entry is in effect, let your reservation window guide your arrival time.
Timed entry
This is the missing puzzle piece for a lot of first trips.
- What it is: A reservation system the park uses during peak periods to manage congestion.
- Why it matters: It can apply specifically to the Paradise and Sunrise corridors during set hours on set dates.
- What changes: Details can shift annually, including which corridors are covered, exact dates, daily hours, and whether it is “required” all day or only during certain hours.
- How to plan: Confirm whether timed entry is in effect for your travel dates, which corridor you need, and what hours are covered. Then reserve early using the official NPS page: Timed entry reservations.
Simple rule: If you are visiting in peak summer, assume you need to verify timed entry before you do anything else. Build the rest of your day around the reservation window.
Season and access
This is where many first-time plans succeed or fail. Paradise is typically accessible for more of the year, while Sunrise is strongly seasonal.
Paradise season basics
Paradise Road is generally maintained and can be open much of the year, though conditions and temporary closures happen due to snow, storms, avalanche risk, and road work. Even in summer, you can hit fog, sudden rain, or a “where did the mountain go?” cloud situation.
- Best window: Late spring through early fall for snow-free trails and classic meadow hiking.
- Wildcard: Snow can linger on trails well into early summer. Traction can be helpful on early season mornings.
Sunrise season basics
The Sunrise Road typically opens later and closes earlier because it sits high and holds snow. Translation: Sunrise is a summer and early-fall only plan most years.
- Best window: Mid-summer through early fall for open road and prime hiking.
- Wildcard: If the road is not open yet, there is no “close enough” alternative that feels the same.
Plan like a local: If your trip is outside peak summer, Paradise is usually the safer bet.
Easy walks
Not every Rainier moment needs a sweaty summit push. These are the areas where you can step out of your car, take a short walk, and still feel like you earned the view.
Easy options at Paradise
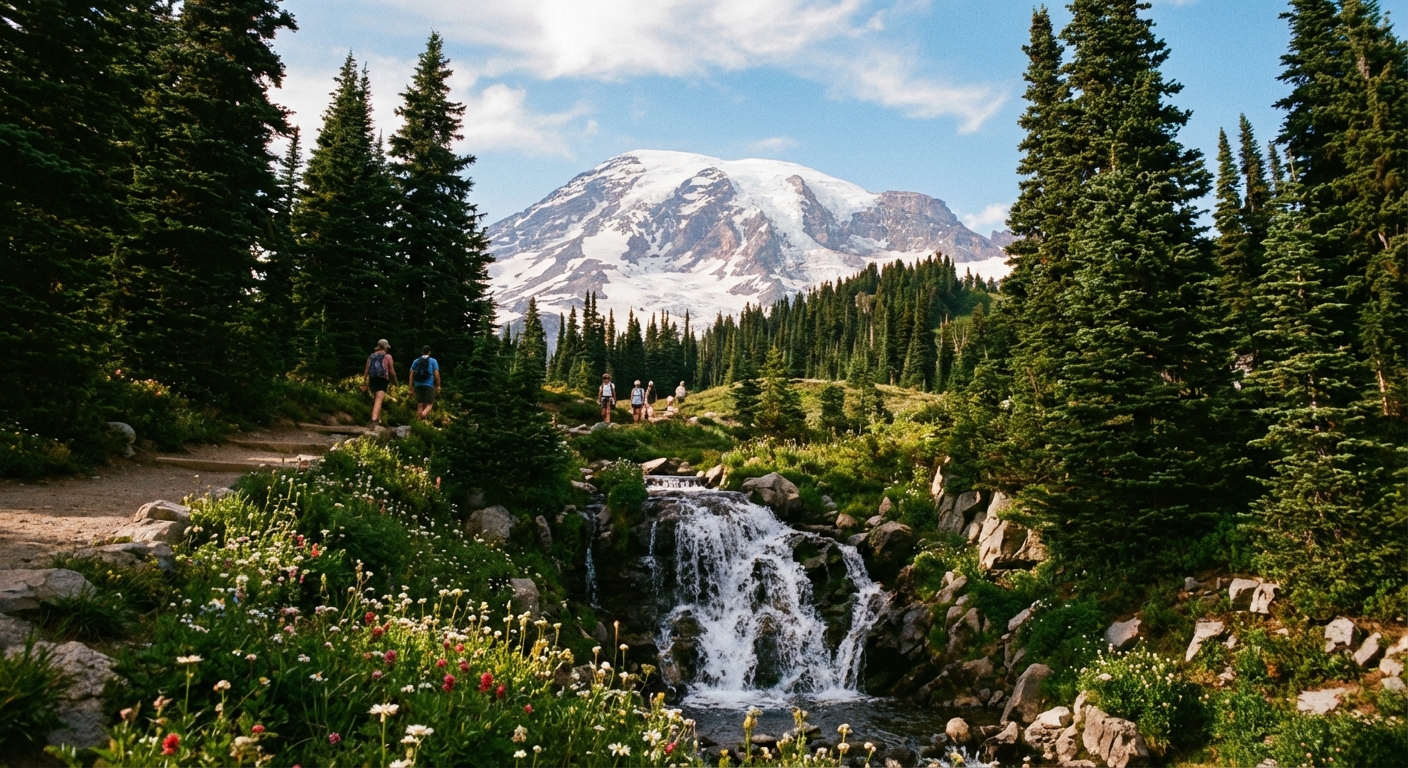
- Myrtle Falls: A classic short walk with a waterfall and a mountain backdrop on clear days.
- Meadow viewpoints near the main complex: In wildflower season, you can get that “alpine bowl of color” feeling with very little effort.
- Lower Skyline segments: You can sample Skyline Trail in bite-sized pieces and turn around whenever the vibes, weather, or kids dictate.
Easy options at Sunrise
- Sunrise viewpoint areas near the parking lot: Big ridgeline views almost immediately.
- Short stretches toward Sourdough Ridge: Even a quick out-and-back gives you that high-country panorama.
- Interpretive areas near the visitor facilities: Good for families and travelers easing into altitude and uneven terrain.
Services
Think of this section as: where can you easily refill water, grab a snack, find a restroom, and ask a ranger about trail conditions without turning it into a quest.
Paradise services
Paradise is one of the park’s most developed hubs. On a first visit, that can feel reassuring in the best way, especially when weather changes quickly or you are traveling with kids.
- Visitor center presence: Typically robust in peak season with ranger information and exhibits.
- Restrooms: Usually easier to find and more plentiful than in smaller areas.
- Food and lodging: Paradise is also where you are more likely to be near major in-park services, depending on seasonal operations.
Sunrise services
Sunrise has services, but the overall feel is more compact and seasonal. It is a “get up high, soak it in, hike a ridge” kind of place.
- Visitor center presence: Seasonal and more limited.
- Restrooms: Available, but plan ahead and do not assume off-peak hours will mirror peak summer.
- Food: Do not count on a full meal plan here. Pack snacks like you mean it.
Carry-on only tip, applied to day hiking: pack a small day bag the same way every time. Water, layers, a salty snack, and a warm backup layer, even when the parking lot feels sunny.
Photography
Mount Rainier is ridiculously photogenic, but different parts of the park favor different compositions.
Paradise photography
- Close-up mountain drama: Rainier can feel huge and immediate from Paradise when skies are clear.
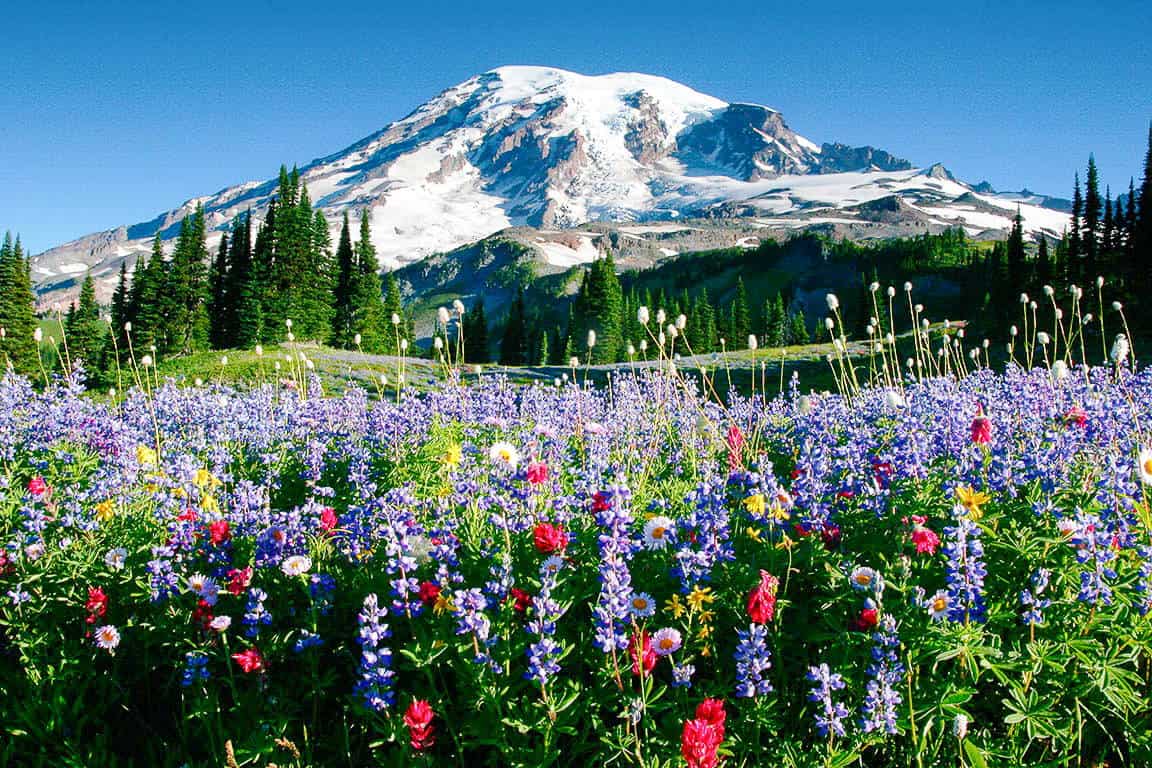
- Wildflower foregrounds: This is one of the best places in the park for that classic “flowers with a glacier giant behind them” shot.
- Water features: Short walks can give you waterfalls and streams that add motion and texture to photos.
Sunrise photography
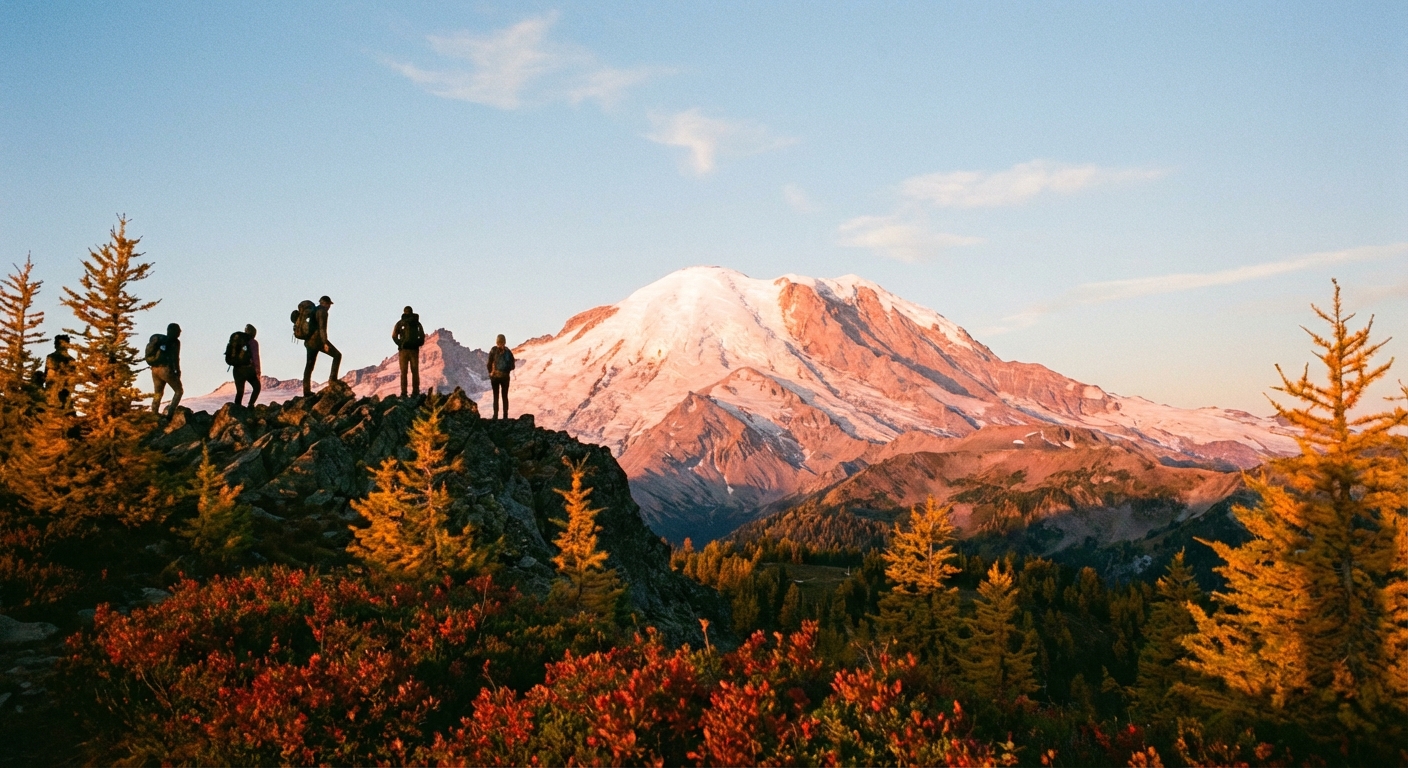
- High ridgelines and depth: Sunrise is about layers, sweeping horizons, and long sightlines.
- Golden hour: The name is not subtle. Early and late light can be spectacular when the weather cooperates.
- Less “meadow bowl,” more “alpine spine”: Expect strong leading lines from trails and ridges, plus distant peaks on clear days.
First-timer picks
If you have one day
- Choose Paradise if you want the most reliable blend of services, short walks, and classic Rainier views, especially outside peak summer.
- Choose Sunrise if your visit falls squarely in the Sunrise Road open season and you want immediate high-elevation scenery with minimal hiking.
If you have two days
- Do both, one per day, and do them in a way that respects driving time and energy. Paradise day for meadows and waterfalls. Sunrise day for ridgelines and big sky views.
- Weather hedge: If one side is socked in with clouds, the other side can be clearer. Having two days increases your odds of actually seeing the mountain.
If you are traveling with kids or mixed mobility
- Paradise usually wins for a first visit because it offers more short, rewarding walks close to major facilities and tends to be easier to adapt on the fly.
- Sunrise is still great for kids who love wide-open space and ridge walks, but pack layers and snacks and plan around limited services.
If wildflowers are your main goal
Wildflower timing shifts year to year based on snowpack and weather, but as a general rule:
- Paradise is the headline act for iconic, dense meadow blooms close to the main hub.
- Sunrise also has gorgeous blooms, but the overall experience leans more ridgeline and panorama than “carpet of flowers.”
If you are traveling specifically for peak bloom, check current conditions with the park before you lock in a one-day plan.
My pick
If you are visiting Mount Rainier for the first time and you want the highest chance of a smooth, satisfying day, I would start with Paradise. It is the most forgiving choice when weather shifts or plans change, and it gives you those signature Rainier scenes with a nice mix of comfort and adventure.
If you are visiting in mid-summer and you crave that “on top of the world” feeling, I would make Sunrise your priority, especially if you are willing to wake up early and lean into the light.
Final practical note: if timed entry is in effect during your visit, let the reservation decide your day. Lock in the corridor and time first, then pick your hikes and photo stops around it. And remember: timed entry is separate from your entrance fee or pass.
Next: pick a hike
Once you choose your side of the mountain, the next question is simple: How far do you actually want to walk? To keep planning easy, jump into our curated trail roundups:
- Mount Rainier best hikes collections on Town Wander (choose by difficulty, distance, and views)
- More Washington day hikes and weekend itineraries (trail time + great town stops)
And if you are like me and measure a day’s success partly by caffeine, reward yourself afterward with a local coffee stop in Ashford (for Paradise) or the communities nearer the northeast entrance (for Sunrise). Rugged morning, cozy afternoon. That is the Town Wander sweet spot.
Publishing note: The links above are placeholders. Swap in the final URLs before this goes live.