Natural Bridges After Dark
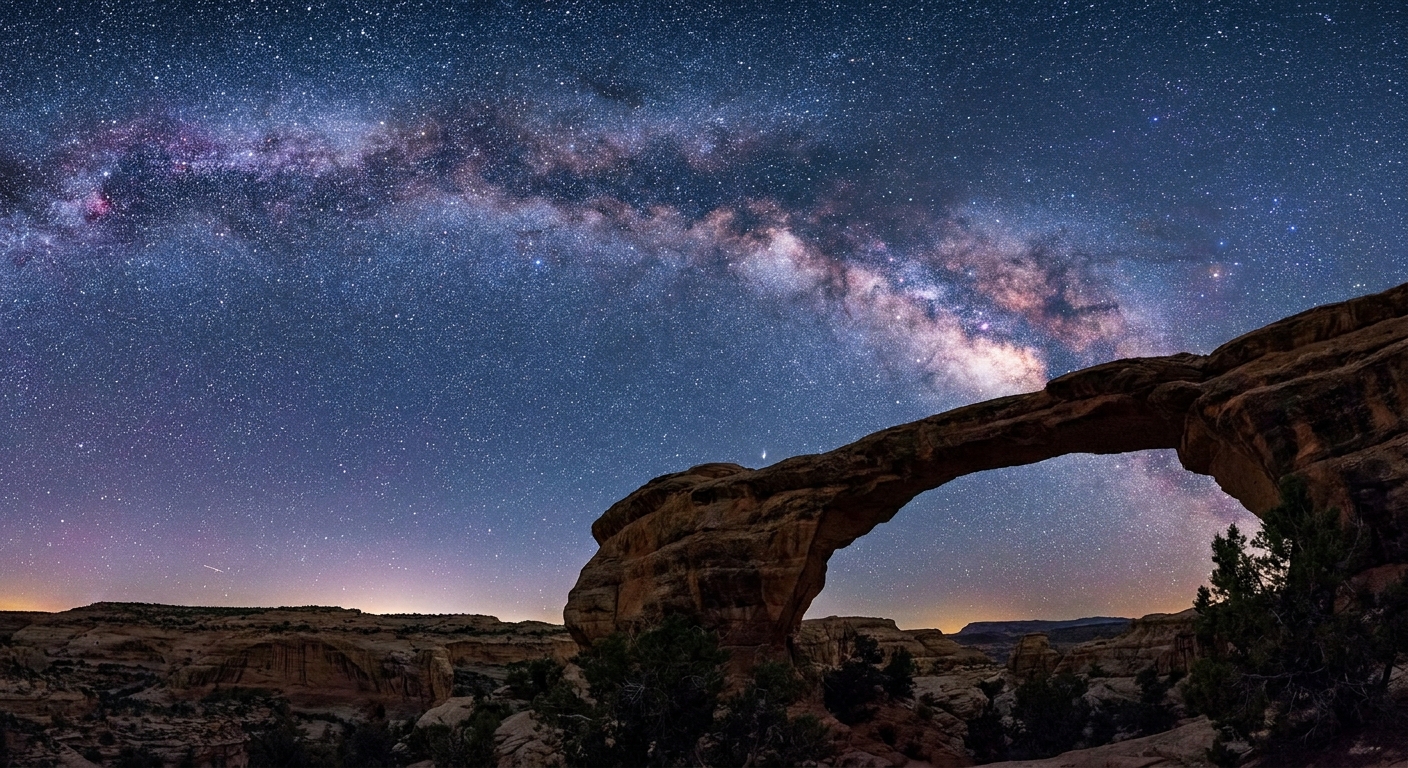
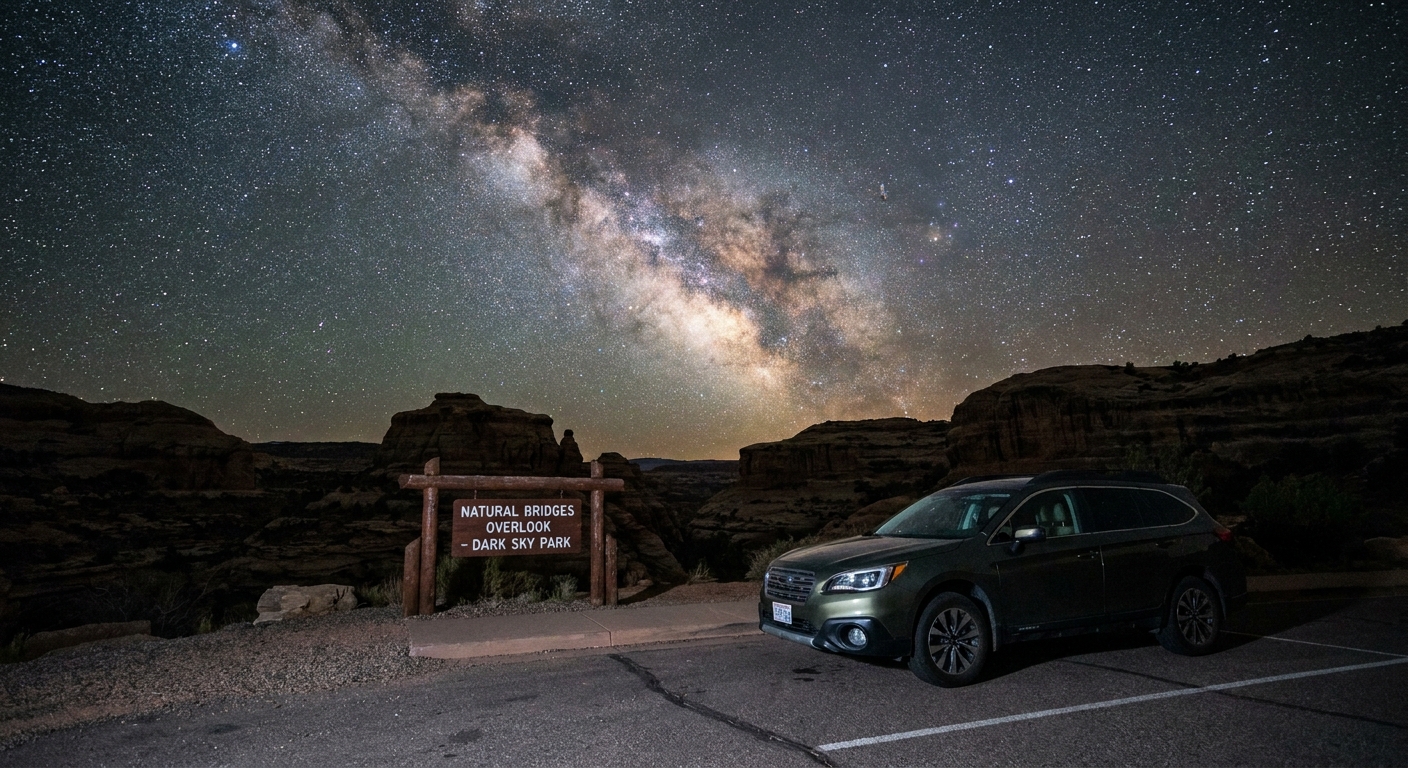
Natural Bridges National Monument is one of those rare places that feels purpose-built for nightfall. By day, the sandstone bridges and canyon views earn the spotlight. But after dark, the monument’s status as an International Dark Sky Park is the real show. It was also the first International Dark Sky Park ever designated, a bragging right that fits the landscape. If you have ever wanted to see the Milky Way as a textured band instead of a faint idea, this is a seriously good place to try.
This guide is for the after-dark experience: where to stop on the loop, how to handle night driving, what the sky looks like season by season, and how to pair an easy afternoon loop with a stargazing night. (Day hiking is summarized so you can keep using the monument’s daytime guide for the details.)
Note on designations and schedules: Dark Sky status and ranger programs are managed and updated through the International Dark-Sky Association (IDA) and the National Park Service (NPS). Check the official NPS park page for current program times, road notes, and any temporary restrictions before you go.

Why the dark sky feels different
Natural Bridges sits in Utah’s canyon country, far from major city light domes. That distance matters. On clear nights, you get:
- Higher contrast skies where dim stars and dust lanes in the Milky Way are easier to see.
- Better naked-eye astronomy, especially on moonless nights or when the moon sets early.
- A calm, quiet viewing environment where your eyes can actually adjust, if you let them.
Quick tip: Give your eyes 20 to 30 minutes to dark-adapt. One bright phone screen can significantly reduce your night vision and set you back.
Plan your evening
If you are coming from Moab, Blanding, Bluff, or points farther, you will enjoy the night more if you do not sprint into it. This is my favorite low-stress sequence.
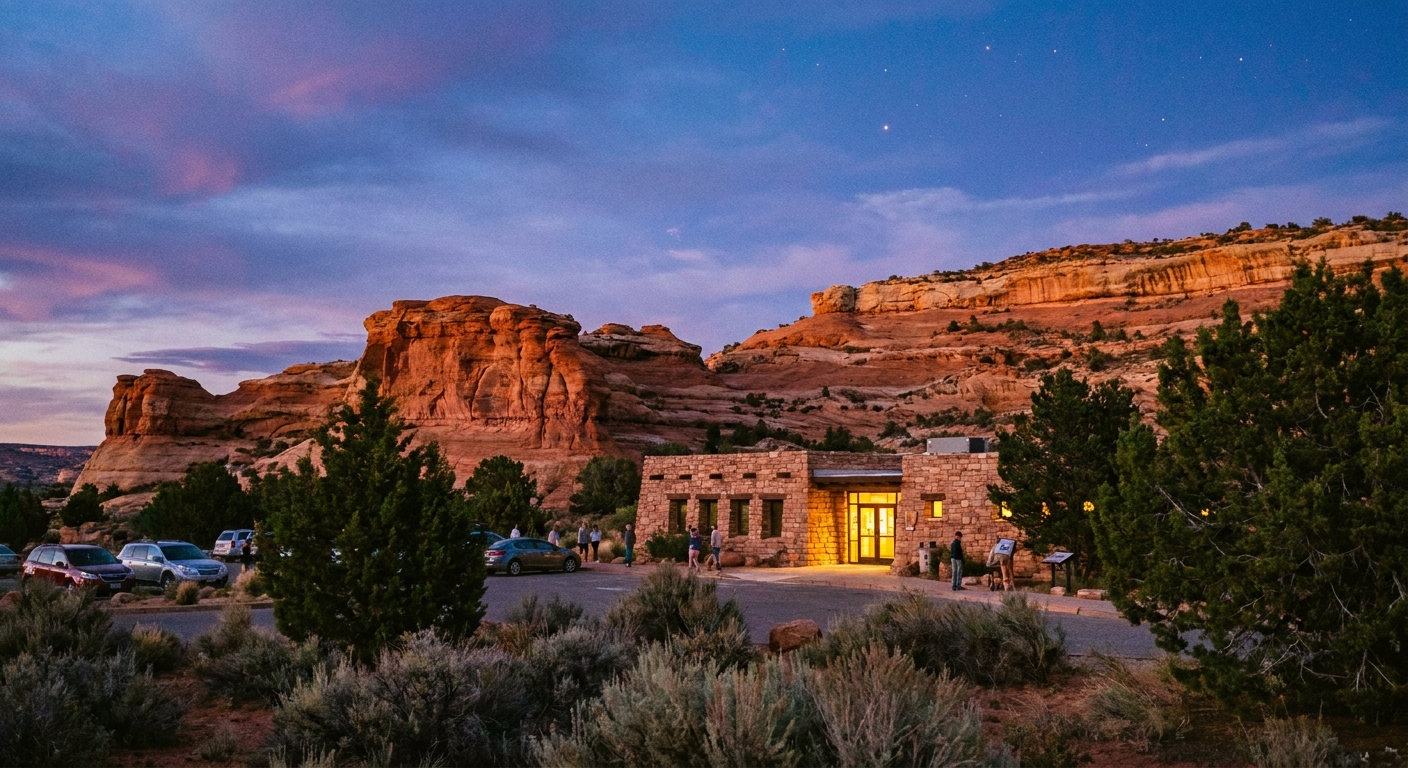
3 to 5 pm: Arrive and get oriented
- Stop at the visitor center (hours vary by season) to ask about current conditions, program times, and road notes.
- Confirm the basics: entrance fees or pass info , restroom availability after hours, and whether any areas have limited access at night due to wildlife, weather, or operations.
- Ask where rangers recommend setting up for the night. Conditions change, and they know what is working right now.
Late afternoon: Drive the loop and choose your night spot
The monument’s main road is a scenic loop with overlooks and trailheads. Use daylight to decide where you want to be when it is truly dark. Look for pullouts with:
- A wide, safe place to park fully out of the roadway
- A clear view of the sky (less canyon wall blocking the horizon)
- Enough space that your group can sit away from other cars’ headlights
Classic stops to know by name: the loop features the three big headliners, Owachomo Bridge, Sipapu Bridge, and Kachina Bridge. For many visitors and photographers, Owachomo is the iconic Milky Way pairing, especially on a moonless night when you can frame sky and stone without fighting canyon walls.
Sunset to full dark: Start easy
Arrive at your chosen viewing spot before darkness settles in. You can set out chairs, a blanket, extra layers, and a red-light headlamp without rushing. If a ranger night sky program is offered that night, plan to attend it first, then return to your quieter viewing spot afterward.
Night driving on the loop
The loop road is generally paved, but it is still remote, dark, and shared with wildlife and other visitors who may be walking near viewpoints. Current conditions can change due to weather, construction, or temporary closures, so confirm road status at the visitor center or on the official NPS site.
Drive like you are a guest
- Go slower than you think you need to. Your headlights compress your reaction time and animals blend in.
- Scan the road edges for deer and smaller wildlife. If you see one animal, assume there are more.
- Avoid last-second pullouts. Choose your night spot while it is still light so you are not hunting for parking in the dark.
- Keep your fuel situation conservative. This is not the place to roll in with a near-empty tank. Services are limited in the region, so top off before you enter the monument.
Headlights and parking etiquette
Headlights are the number-one stargazing mood-killer. You do not need to be perfect, just considerate.
- Park facing away from where people are sitting, if possible.
- When you arrive or leave, do it quickly and quietly. Avoid idling with lights on.
- Use your interior light sparingly and turn off dome lights if your vehicle allows.
- Never use high beams near viewpoints.
- Do not block traffic, park outside marked areas, or stop in the road for photos.
If you want to be the quiet champion of the night: bring a red-light headlamp. It protects your night vision and everyone else’s.
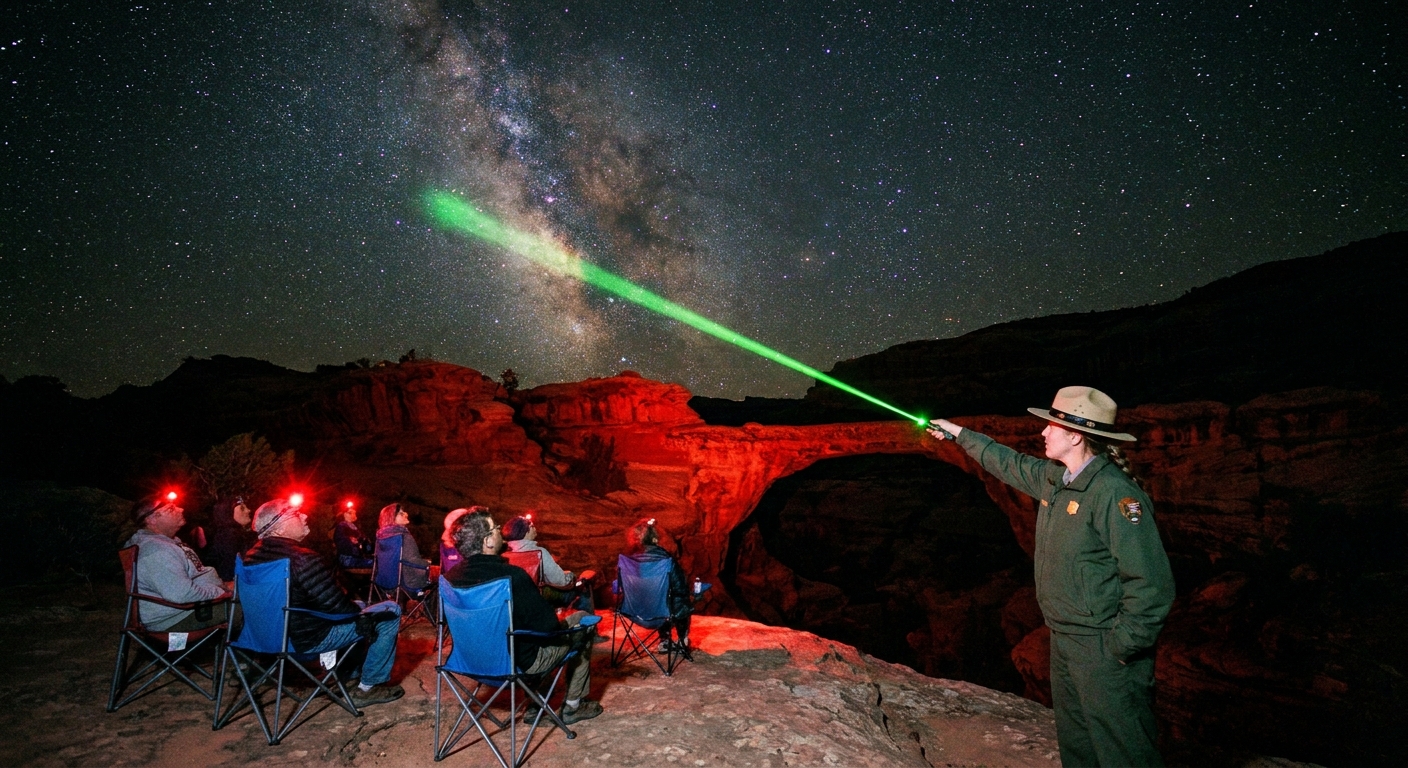
Ranger night programs
When ranger-led night sky programs are offered, they are one of the best ways to learn what you are looking at, especially if you are new to astronomy. Programs vary by season, staffing, and conditions. Confirm times and locations at the visitor center or on the official NPS site before you build your whole evening around one.
What programs may include
- A short talk about dark skies and why they matter
- Constellation spotting (often with a laser pointer)
- Sometimes telescope viewing, depending on the program and partners
How to show up ready
- Arrive early so you are not walking in with bright lights mid-talk.
- Silence screens and dim devices, or keep them away entirely.
- Ask what is best tonight. A ranger’s “look here” tip can save you an hour of guessing.
What you can see by season
Your exact sky depends on moon phase, clouds, smoke, and how late you stay out. But there are reliable seasonal personalities in the night sky. The best way to see more is to pick a moonless window and give yourself time.
Spring
- Leo and Virgo are prominent, and many deep-sky objects live in this part of the sky (binoculars help).
- Temperatures swing. Bring layers even if the afternoon felt warm.
Summer
- The Milky Way is often at its most dramatic, especially later at night when the galactic core is higher.
- Expect more visitors. Etiquette matters extra on busy weekends.
Fall
- Comfortable nighttime temps and darkness arrives earlier, which is great if you do not want a midnight session.
- Look for Pegasus and Andromeda as the season shifts.
Winter
- Orion takes over, with bright stars that pop even if you are a total beginner.
- It can get genuinely cold and windy. Pack like you are going to watch a game in freezing weather.
Moon phase shortcut: For the darkest skies, aim for a few days around the new moon. A bright moon is beautiful, but it will wash out faint stars and the Milky Way.
Best loop stops at night
You can stargaze from several pullouts and viewpoints, but a little naming helps you plan. Use daylight to check sightlines and safe parking, then come back after dark.
- Owachomo Bridge Overlook: the go-to classic. It is the iconic pairing for Milky Way photos when conditions line up.
- Sipapu Bridge Overlook: big, dramatic canyon geometry. Great sky, but some horizons can be blocked by walls depending on where you sit.
- Kachina Bridge Overlook: another strong option on the loop with a different angle and a quieter feel on some nights.
Small reality check: The best spot can shift with wind, clouds, and other visitors. If a viewpoint is busy or headlights are constant, it is fine to pivot to a calmer pullout with more open sky.
Pick-your-own stargazing plan
Think of these as low-stress options you can combine based on energy level. Each one assumes you drove the loop in daylight and identified safe parking.
Option A: Quick look (60 to 90 minutes)
- Watch the last light fade at a viewpoint near the visitor center area, or choose Owachomo if you want a bridge silhouette
- Stay put through full dark
- Drive back to camp or out of the monument slowly and deliberately
Option B: Ranger night (2 to 3 hours)
- Drive the loop in late afternoon and choose a primary stargazing pullout
- Attend the ranger program (if offered)
- Return to your pullout for quiet viewing and photos
Option C: Deep night (3 to 5 hours)
- Start at dusk with casual sky watching
- Take a warm-up break in your vehicle without turning on bright lights
- Go back out once your eyes re-adjust for the wow moment, often later at night
Night-sky etiquette
Dark-sky parks work because visitors cooperate. Here is the low-friction etiquette that keeps the vibe respectful and the sky visible.
Light discipline
- Use red light for walking and gear.
- Point lights down, never into faces or across the viewpoint.
- Avoid flash photography near other groups.
- Skip light painting if anyone else is viewing or photographing nearby, unless you have clearly asked and gotten a yes.
Sound and space
- Keep voices low. Sound carries surprisingly far at night.
- Do not set up directly in front of someone else’s view, especially if they are photographing.
Leave no trace
- Pack out everything, including tiny stuff like snack corners and bottle caps.
- Stay on durable surfaces around viewpoints and pullouts.
What to pack
Stargazing is basically stationary hiking. The trick is to bring the comfort items you would never carry on a long trail.
- Warm layers, including a hat and gloves in shoulder seasons
- Chair or blanket so you can look up without neck regret
- Red-light headlamp
- Thermos drink and snacks
- Binoculars for star clusters and brighter deep-sky objects
- Offline star map or a star app set to night mode
- Extra water because dry air is sneaky
If you are camping, consider a quick warm reset plan: a hot drink in the campground, then back out for one more viewing session.
Simple night photo tips
If you want a keeper Milky Way shot without turning the viewpoint into a light show, keep it simple.
- Bring a tripod. This matters more than almost anything.
- Start settings: wide lens (as wide as you have), aperture wide open, 10 to 20 seconds, ISO 1600 to 6400, then adjust based on your camera and how much star trailing you see.
- Focus: use manual focus and zoom in on a bright star to fine-tune.
- Keep screens dim and review images sparingly so you do not torch your night vision.
- No flash near other groups, and avoid lighting up the bridge unless you are alone and it is allowed where you are standing.
Day hiking, summarized
Natural Bridges is absolutely worth daylight hours, but you do not need a marathon to earn the night sky. If your goal is stargazing, here is the sweet spot:
- Do one short-to-moderate hike in the afternoon to get a sense of the landscape.
- Save energy for the evening. Sitting outside for hours is its own kind of endurance.
- Finish hiking before dark unless you are specifically equipped and experienced for night hiking.
Use the monument’s daytime guide for trail-by-trail details, then come back here for your night plan.
Safety notes
- Weather flips fast. Wind and temperature drops are common after sunset.
- Cell service can be limited. Download maps and program info ahead of time.
- Watch your footing. Viewpoints can have uneven surfaces. Keep lights low and deliberate.
- Know your drive-out. If you are tired, leave earlier. Drowsy driving is the quiet risk in remote parks.
- After-hours access: Policies can vary by area and season. Follow posted signs, do not cross closures, and ask at the visitor center if you are unsure about nighttime use of specific viewpoints or facilities.
Make it a Town Wander kind of night
My favorite way to do Natural Bridges is to embrace the contrast: a rugged, silent sky show paired with small comforts. Pack a thermos of good coffee for the pre-dawn drive or a warm drink for the post-program wind-down. Keep your setup simple, your lights dim, and your plan flexible enough to follow the clearest patch of sky.
If you do it right, you will leave with that rare souvenir that fits in a carry-on: a recalibrated sense of scale.