Strollers in National Parks
I love a good trail day, and I also love ending it with a real espresso and zero mud in my socks. Traveling with a stroller is basically that same philosophy in gear form: it is amazing when conditions line up, and absolutely miserable when they do not.
Here is the honest truth: many (and in a lot of parks, most) hiking trails are not stroller terrain. The why is simple: natural surfaces, erosion control steps, rock features, and narrow corridors are common by design. But many parks do have short, scenic routes that are paved, on boardwalk trails, or hardpack enough to feel like a win for everyone, including nap schedules. The trick is learning how to read surfaces, grades, and choke points before you drive two hours to discover “easy” means rocky steps.
TL;DR
- Best surfaces: continuous pavement, wide boardwalk trails, well-compacted crushed gravel.
- Biggest pitfalls: sand, steps, steep grades, narrow pinch points, and peak-hour crowds.
- Best stroller type: a jogging stroller with air tires for parks, plus a compact travel stroller if shuttles and tight spaces are a big part of your trip.

Quick reality check
Strollers work best on
- Continuous pavement (asphalt or concrete) with gentle grades and predictable edges.
- Boardwalk trails that are wide enough for passing and have minimal gaps at transitions.
- Hardpack, crushed gravel, or decomposed granite when it is well maintained, not deeply rutted, and not crowned like a roof.
- Short distances where you can turn around quickly if crowds, wind, or surfaces get tricky.
Strollers fail fastest on
- Sand (beaches, dunes, desert washes) unless you have wide balloon tires or a dedicated beach stroller.
- Rocky “sidewalk” trails that look smooth in photos but are actually embedded stone and toe-catchers.
- Steps, boulders, and narrow bridges where you cannot safely pass other visitors.
- Steep sustained grades, especially in heat or at elevation. Downhill can be just as sketchy as uphill.
- Shuttle lines and viewpoints at peak hours, where a stroller becomes more work than help.
If you remember one mantra, make it this: “Paved” is a surface. “Easy” is a vibe. You need the surface details.
What trail terms really mean
Different parks (and concession-managed areas) use the same words to mean different things. Here is how I translate common descriptions into stroller reality.
Paved
Usually asphalt or concrete, often truly stroller-friendly. The gotchas are steep grades, broken edges, and winter frost heave that creates big bumps. In older parks, pavement can also narrow down to a shoulder-width strip near viewpoints.
Boardwalk
Often great, sometimes stressful. Look for width, passing areas, and railings. Boardwalks can be slick when wet, and transitions can have lips that stop small wheels cold. They can also include short stair-only spurs to a viewpoint.
Hardpack
This is the wild card. It can mean a dreamy, smooth, compacted path or a rutted track with sand pockets. If a park says “hardpack,” I assume you need big wheels and patience, and I plan a backup.
Gravel or crushed stone
Crushed gravel can roll beautifully if it is fine and compacted. Chunky gravel (loose, larger aggregate that shifts under wheels) is stroller misery. If your stroller wheels sound like maracas, you are probably on the chunky kind.
Accessible
In parks, “accessible” typically means a route was designed to meet ADA/ABA-based accessibility guidelines for things like width, slope, and surface firmness. What varies most is which segments are built and maintained to those standards, plus whether temporary conditions (snow, washouts, construction) affect usability. Also, stroller reality is its own thing: an accessible route can still include steep sections, tight turns, or crowded pinch points that make it unpleasant even if it is technically navigable.
Three things people underestimate
1) Width and passing space
A path can be smooth and still be a headache if it is narrow. Two strollers meeting on a boardwalk with a railing on one side and a drop on the other is not my idea of a relaxing morning. Look for routes that are consistently wide or have frequent pull-outs.
2) Grade, not distance
A half-mile can feel like five if you are pushing uphill at altitude with sun reflecting off pavement. When parks publish slope information, take it seriously. When they do not, assume viewpoints near canyon rims and waterfalls can have short but punchy climbs.
3) Crowds and shuttle logistics
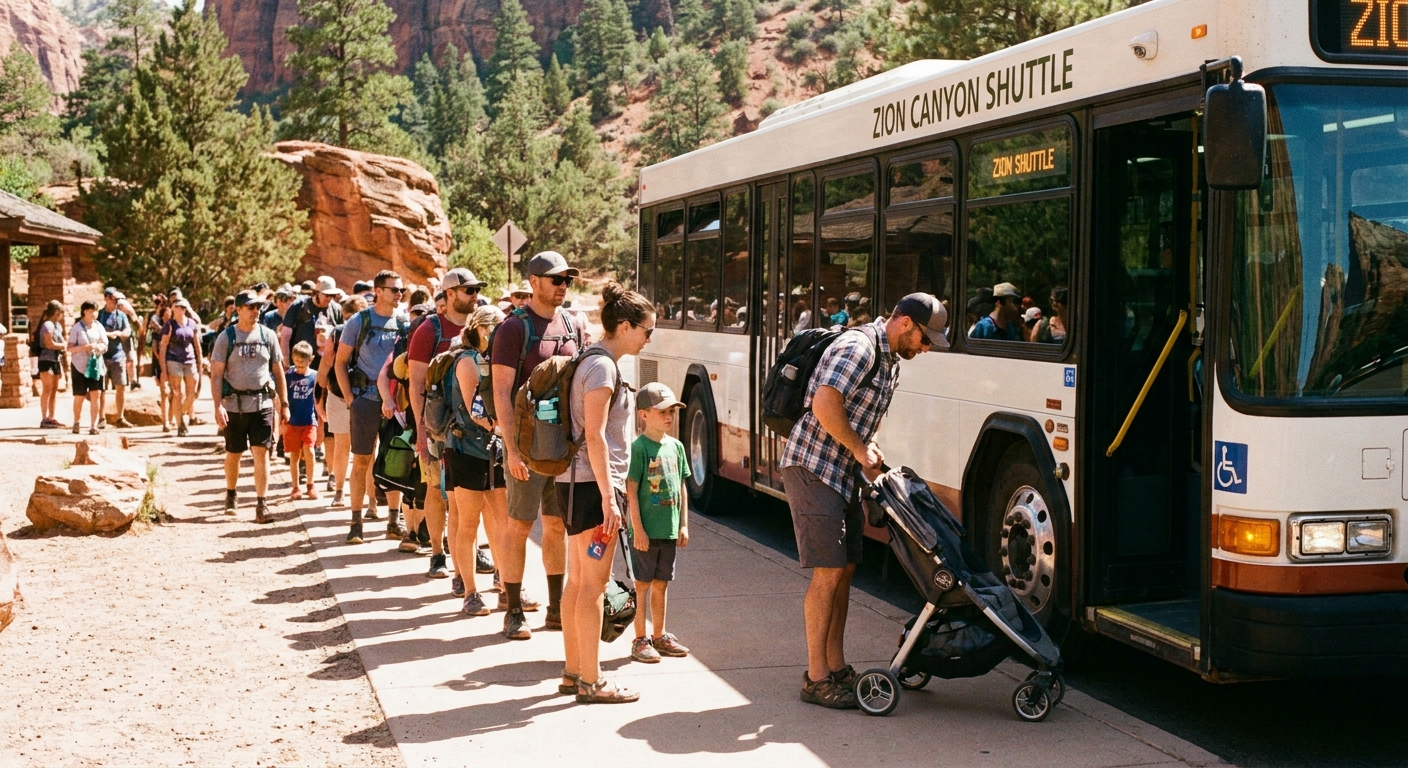
Many of the most stroller-friendly surfaces are also the most popular. Add shuttles, and you have a whole new layer. Rules and layouts are highly park-specific, so always check the park shuttle FAQ before you go.
- Boarding time: folding, holding a kid, and keeping wheels out of the aisle is a juggling act.
- Storage rules: some systems require strollers to be folded, some allow them if they fit, and some vary by bus crowding.
- Stop design: gravel pads, curbs, and tight queues can be more challenging than the trail.
My practical tip: if a park relies heavily on shuttles in peak season, consider doing stroller outings early morning or late afternoon, and plan one “carrier hike” midday when queues are longest.
Stroller types that matter
Jogging stroller (best all-around)
If you are going to bring one stroller to a national park, this is usually it. Big air-filled tires handle boardwalk transitions, cracked pavement, and hardpack better than small plastic wheels. Check your model’s wheel width if you expect narrow gates or tight shuttle aisles.
Travel stroller (best for shuttles and towns)
Light, compact, and easy to fold. Great for visitor centers, paved promenades, and town days. The tradeoff is comfort and stability on anything bumpy.
All-terrain wagon (best for gear, tricky in crowds)
Wagons can be fantastic on wide paved paths and for hauling picnic gear, but they are awkward in crowds and often a bad fit on tight boardwalk trails. Some parks or shuttle operators restrict them, or they may simply be impractical when it is busy. Check local policy and consider the human traffic, not just the trail surface.
Beach tires or sand wheels (niche but magical)
If your itinerary includes dunes or sandy coastal paths, wide tires change the experience. For most families, renting locally near a beach destination makes more sense than flying with one.
Wheel size and suspension (fast rule)
If you want one simple gear rule: 8 to 12 inch air tires plus real suspension beats tiny double wheels on almost every park surface that is not perfectly paved.
The overlooked add-ons
- Wrist strap and reliable brakes for viewpoints and slopes.
- Sunshade and clip-on fan for desert parks and reflective pavement.
- Rain cover for misty waterfalls and sudden mountain weather.
- Tire pump and patch kit if you are relying on air tires far from town.
How to vet a trail
Instead of searching “best stroller hikes,” use a surface-first checklist. You will get better answers and fewer disappointments.
Step 1: Start with the park accessibility page
Most parks list accessible trails and viewpoints with surface notes, grade, and length. Even if you are not using a wheelchair, this is the best place to find reliably smooth routes, and it often includes the most accurate surface descriptions.
Step 2: Scan for keywords that signal trouble
- “Uneven” or “natural surface” often means rocks or ruts.
- “May be flooded” means mud, which means you may end up carrying the stroller.
- “Narrow” or “drop-off” means stressful passing.
- “Stairs” means end of discussion.
- “Detour” or “construction” can mean temporary gravel, curb lips, or a route that is technically open but no longer smooth.
Step 3: Use recent photos, not just descriptions
Look at visitor photos from the last 6 to 12 months. Zoom in on the ground. You are hunting for:
- Gaps between boardwalk planks
- Rock edges and step-ups
- Deep gravel
- Sand patches
- Temporary barriers like cones, fencing, or closed spurs
Step 4: Call the visitor center with one specific question
Instead of “Is it stroller-friendly?” ask: “Is the entire route paved or boardwalk the whole way, or does it turn into dirt, loose gravel, or stairs?” Rangers and staff can usually answer that clearly.
Where strollers usually work
I cannot promise a universal list because conditions change with maintenance, storms, and seasonal closures. But these categories are consistently your best bets across the system.
1) Scenic drives with paved overlooks
Many parks have paved paths from parking to overlooks. These are perfect for short walks, snack breaks, and quick nature hits between drives.
2) Visitor center loops and historic districts
Think: paved promenades, interpretive paths, and old fort or lodge areas. They are often smooth, have bathrooms, and give you the urban-comfort side of a park day.
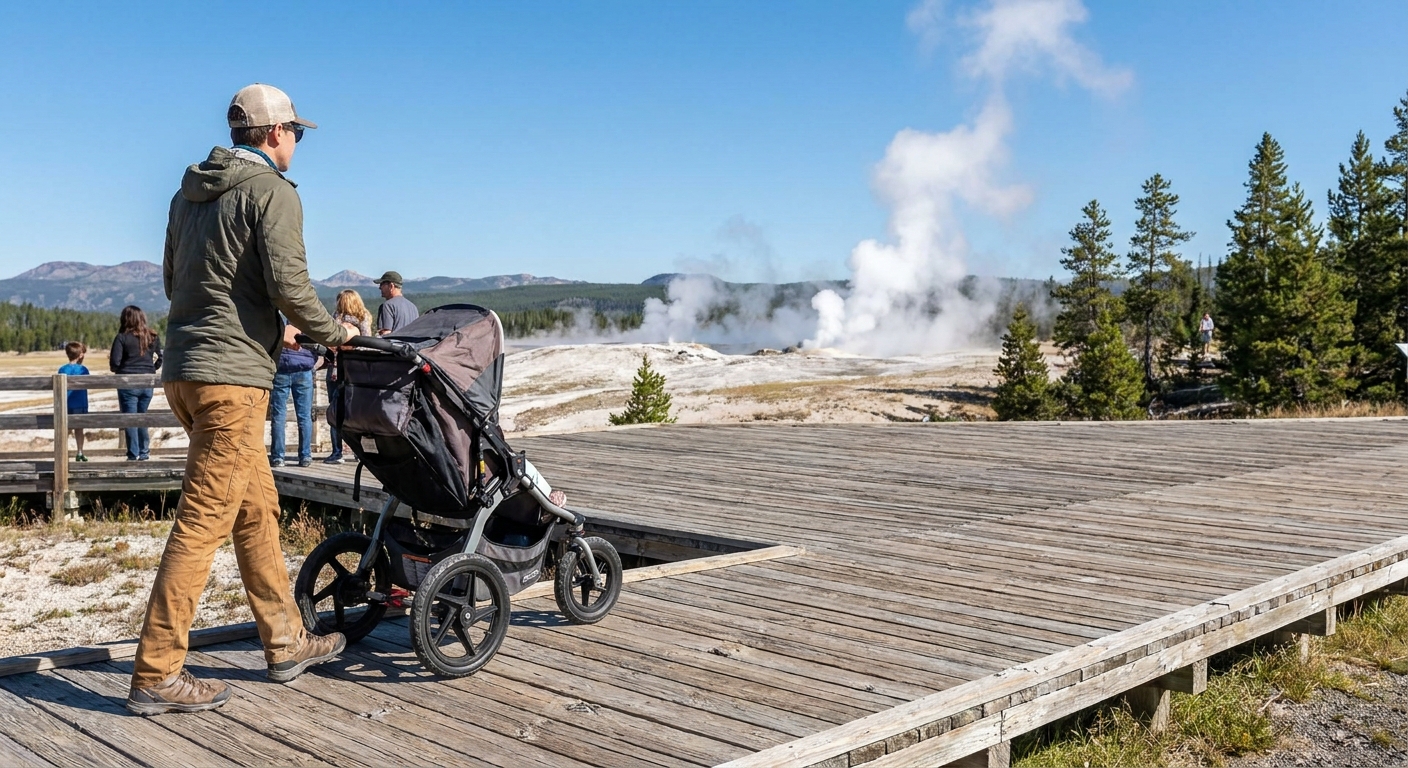
3) Geothermal and wetland boardwalk networks
Boardwalk trails are common in places with delicate ground or thermal features. They can be stroller-friendly if wide, but they are also prime crowd zones. Go early.
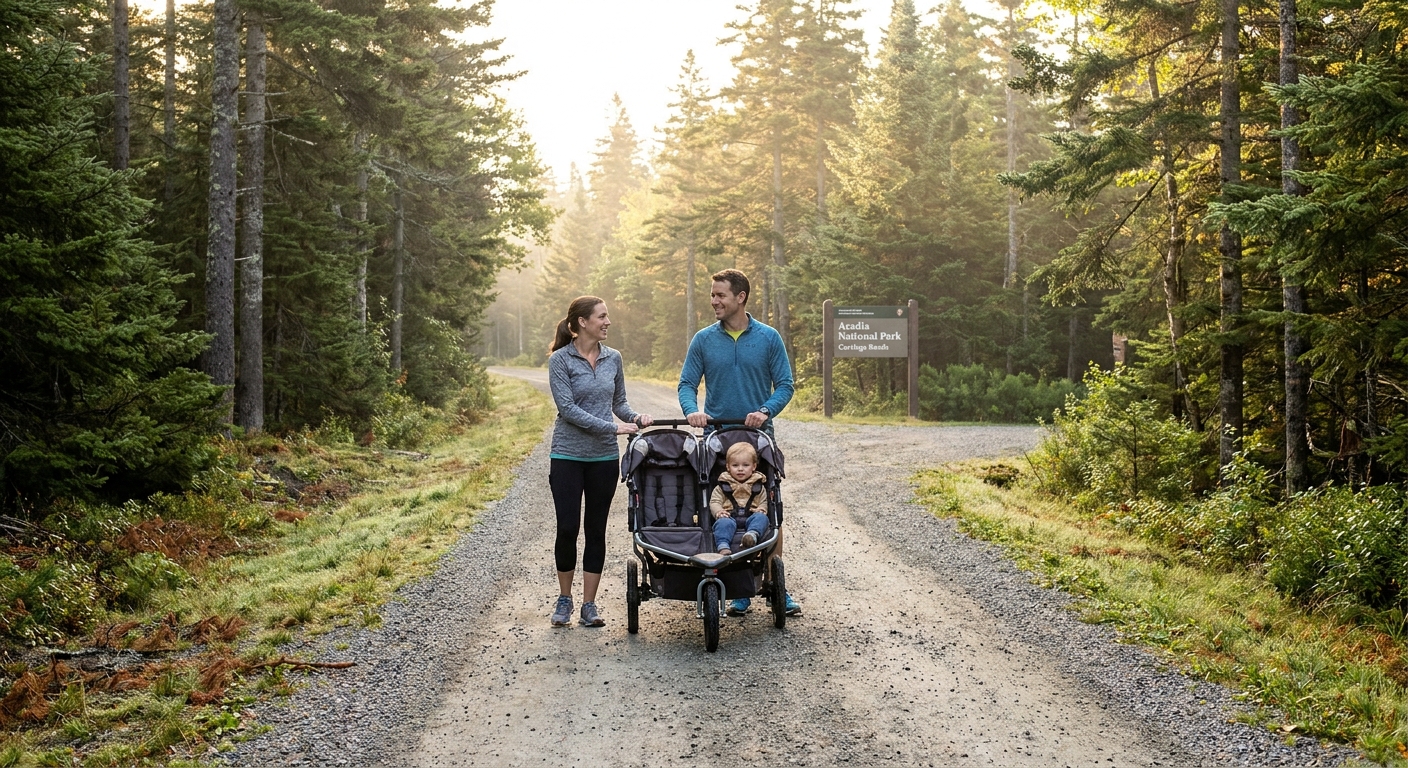
4) Rail-trails and multi-use paths inside park boundaries
Some parks and recreation areas include long paved paths that feel like a greenway. These are excellent for stroller mileage, especially if you want a longer outing without technical terrain.
Where strollers usually do not
1) Iconic “easy” hikes that are rocky
Many famous trails are rated easy because they are short, not because they are smooth. If the attraction is a waterfall, arch, or canyon viewpoint, expect stone steps, slickrock, and uneven surfaces.
2) Desert washes, dunes, and beaches
Sand is a wheel killer. Even with bigger tires, sand drains your energy and time fast. If sand is central to your day, plan on a carrier for the main walk and use the stroller for paved areas.
3) Anything with ladders, chains, or “scramble” language
This sounds obvious, but I have seen families try. If the park warns about hands-on climbing, leave the stroller behind.
4) Backcountry trailheads
Even if the first quarter mile looks smooth, backcountry routes rarely stay that way. And once the surface changes, turning around with a stroller is rarely graceful.
Shuttles and busy hubs
National parks are not just trails. They are also transportation systems, lodges, restaurants, and high-traffic pinch points. Strollers can be either your best friend or your biggest obstacle here.
Shuttle stop tips
- Check the shuttle FAQ before you arrive so you know whether strollers must be folded and how storage works.
- Park the stroller parallel to the line, not perpendicular, so you are not blocking flow.
- Know your fold before you arrive. Practice one-handed if possible.
- Pack small: giant diaper bags hung off handles tip strollers backward on ramps.
- Plan a no-stroller leg: sometimes it is easier to do one section with a carrier, then use the stroller in a walkable hub area.
Concession areas
Hotels, camp stores, and restaurants in parks often have older ramps, tight doorways, and busy patios. A compact travel stroller can be better here than a wide jogging model. This is where my “trail and town” compromise shines: use the stroller where it is smooth and crowded, and switch to a carrier when you want real trail time.
Safety notes you should not skip
A few environments deserve extra caution, even on beautiful, smooth routes.
- Cliff edges and narrow rims: if the path is narrow, crowded, or has big drop-offs, a stroller can put you in a bad passing situation. Choose wider promenades or go at off-peak times.
- Thermal areas: stay on boardwalk trails, keep kids buckled, and keep hands and wheels away from edges and runoff channels. Do not park a stroller where someone might need to step around it quickly.
- Wildlife zones: do not leave strollers unattended, and do not let a stroller become the thing that blocks your exit route if an animal moves closer than expected.
- Temporary barriers: closures, detours, and washed-out connectors happen. If the smooth route is interrupted, switch to a carrier rather than forcing a stroller onto an unsafe surface.
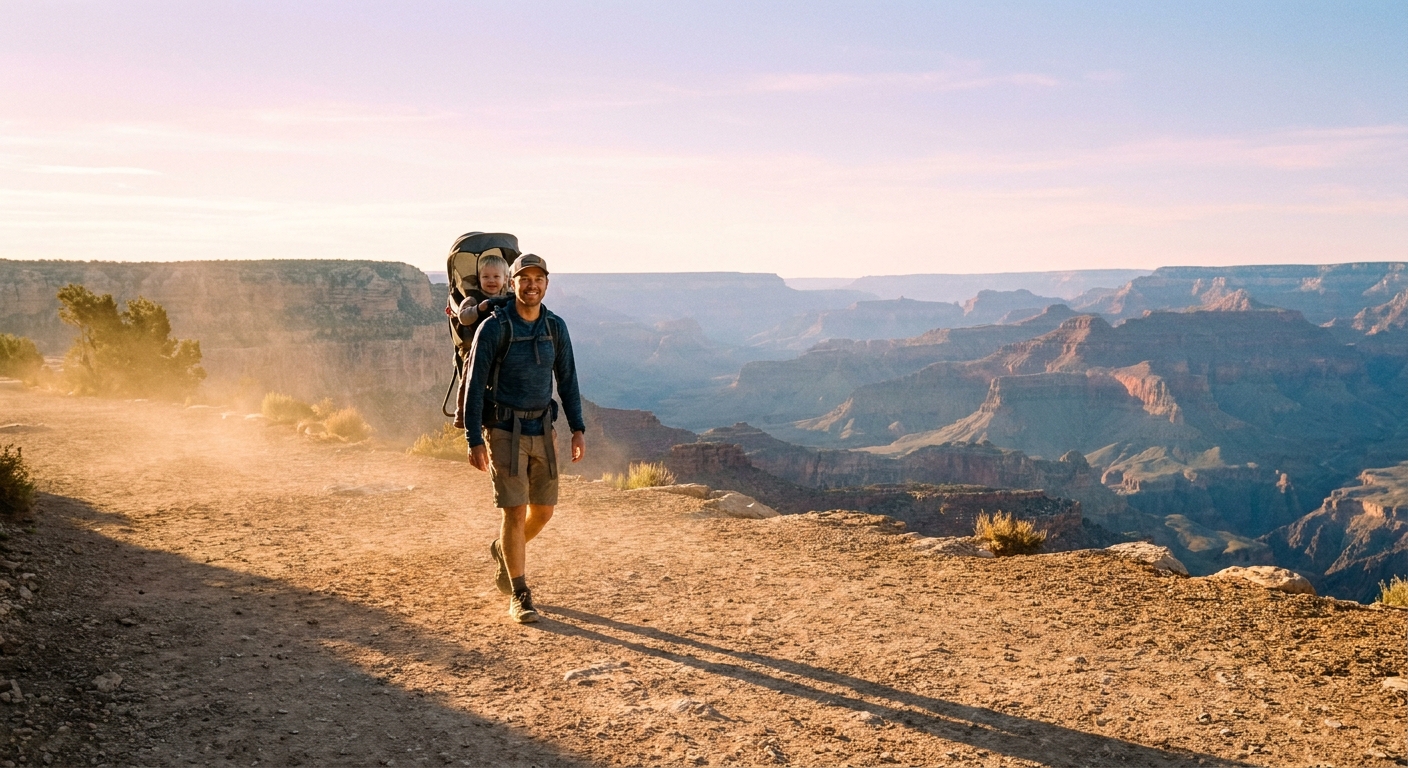
When a carrier beats wheels
If you want to do genuine trail miles, a soft carrier is usually the upgrade, not a sacrifice. I have pushed strollers far past their comfort zone, and I can tell you: carrying a kid is often easier than dragging wheels over rocks for two hours.
Choose a carrier day when
- The route includes stairs, narrow ledges, or stream crossings.
- The surface is sand, cobbles, or chunky gravel.
- You expect crowds and do not want to stress about passing.
- You want to hike at sunrise or sunset when lighting is magic and you do not want to wake everyone with rattling wheels.
Carrier comfort notes
- Sun and heat: carriers run warm. Prioritize shade, water, and breathable fabrics.
- Altitude: go slower than you think you need to.
- Balance: if you are not used to a back carrier, start on flatter terrain first.
My planning framework
When I am building a family park day, I plan around surfaces the same way I plan around weather.
Option A: Stroller-forward day
- One paved or boardwalk “feature” walk
- One visitor center or historic area
- One picnic with bathrooms nearby
- One scenic drive with paved overlooks
Option B: Mixed day
- Morning stroller stroll on smooth surfaces
- Midday carrier hike for the real trail experience
- Late afternoon town stop for coffee and a playground reset
Option C: Carrier-first day
- One primary hike on natural surface
- Stroller only for campgrounds, lodges, and paved viewpoint connectors
This approach keeps expectations realistic and prevents the classic family travel spiral: “We brought the stroller so we have to use it,” even when the terrain says no.
Trail examples to look for
Instead of giving you a roundup that will age poorly, here are examples of trail types that commonly have truly stroller-usable surfaces, plus how to confirm before you go.
Paved rim walks and promenade paths
Found in many canyon, lakefront, and iconic viewpoint areas. Verify: look for “paved,” “multi-use,” or “shared path,” and confirm there are no stair-only segments to viewpoints.
Geothermal basin boardwalk networks
Often wide and continuous, with frequent pull-outs. Verify: check if the route is “boardwalk throughout” and look for recent photos showing width at pinch points.
Historic districts and fort loops
Sidewalks, ramps, and short interpretive routes. Verify: check site maps for sidewalks and accessible entrances, especially if buildings are historic.
Carriage roads and rail-trails (crushed stone)
These can be stroller-gold if well maintained. Verify: look for “crushed gravel” plus user reports mentioning strollers, bikes, and wheelchairs.
Safety and courtesy
- Yield smart: if you are on a narrow boardwalk, step into a pull-out rather than forcing a squeeze.
- Brake at viewpoints: always set the brake before leaning over a railing for photos.
- Mind the edges: cracked pavement can drop a small wheel suddenly.
- Pack out what you pack in, including wipes and snack wrappers. Stroller baskets make it easy to forget what is accumulating.
Sustainable travel note from me: staying on paved and boardwalk routes is not only convenient, it also protects fragile habitats. If a stroller tempts you to cut corners off trail, switch to a carrier instead.
Before you go
- Surface: paved, boardwalk, or compacted gravel the whole way?
- Grade: any sustained steep sections?
- Width: can two strollers pass comfortably?
- Crowds: what time of day is busiest?
- Shuttles: are strollers allowed, and do they need to be folded? Check the shuttle FAQ.
- Closures: any temporary detours, construction, or seasonal limitations?
- Plan B: carrier packed and ready if conditions change?
If you build your day around surfaces and pinch points, national parks can absolutely be stroller-friendly in the best way: everyone gets outside, nobody is miserable, and you still make it to that local coffee shop after.