The Narrows Hike in Zion: Gear and Flash-Flood Safety
Maya Lin
Maya Lin is a travel journalist and outdoor enthusiast who believes the best trips combine rugged adventures with urban comforts. After spending six years backpacking across four continents, she founded Trail & Town Guide to help fellow travelers navigate both hidden mountain passes and bustling city neighborhoods with confidence.
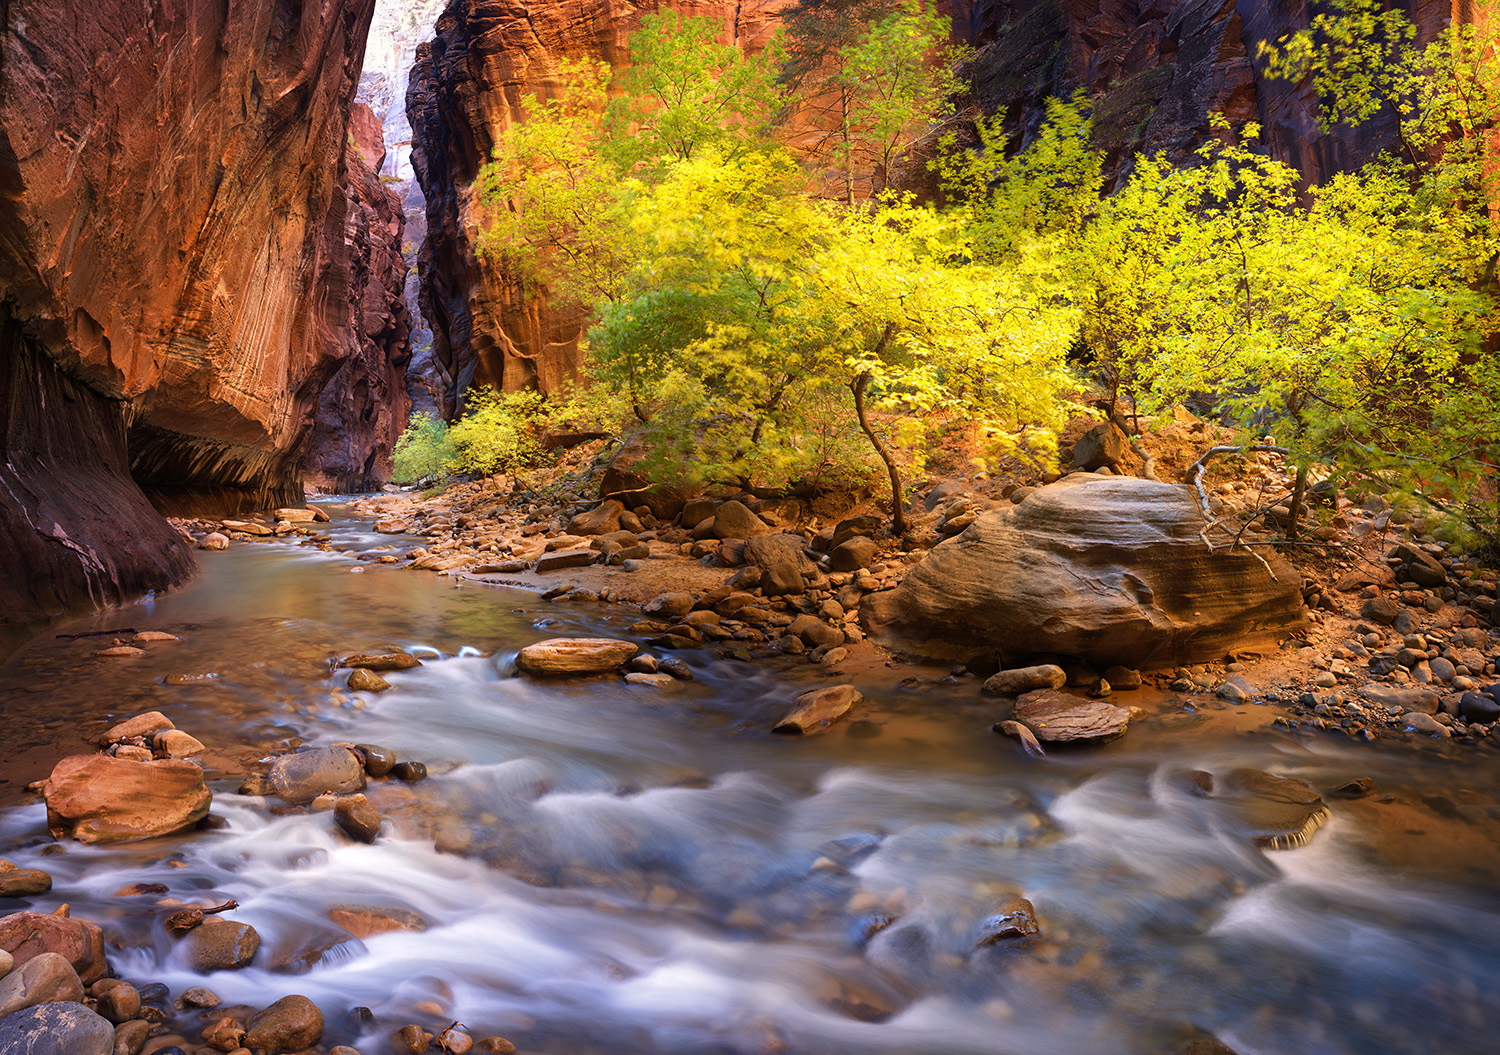
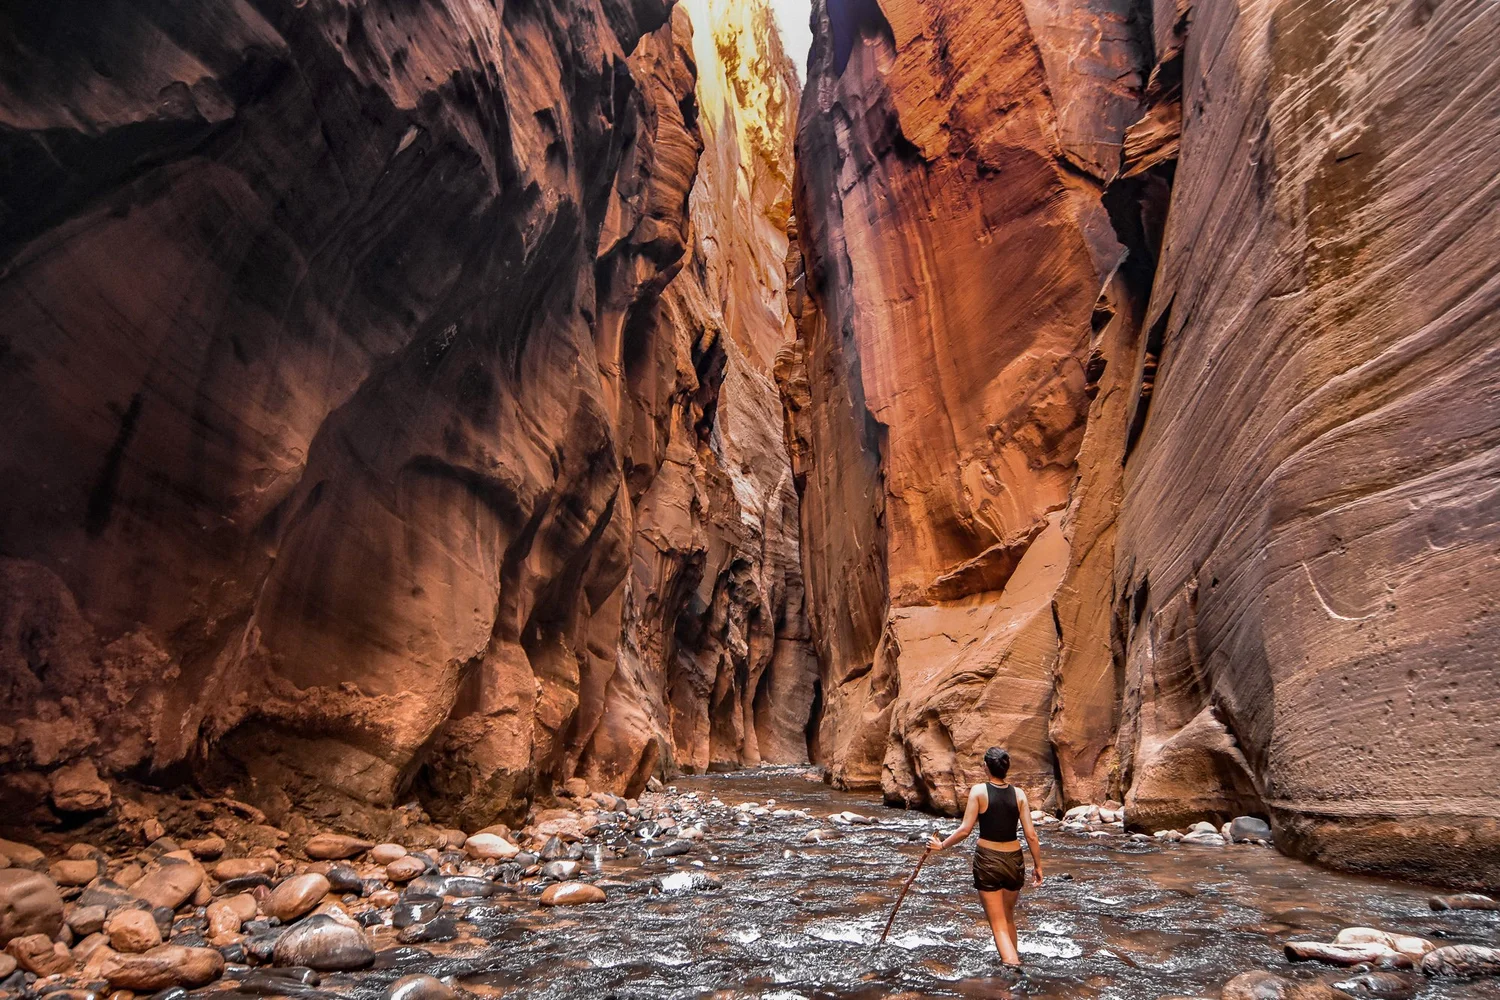
The first time you step into the Virgin River, it is equal parts magic and humbling. One minute you are on a normal trail. The next, you are wading between towering walls with current tugging at your shins, then your knees, then sometimes your thighs, depending on the day.
This guide stays laser-focused on the classic bottom-up Narrows hike (starting at the Temple of Sinawava and walking upstream in the river). You will learn footwear that actually grips, whether you should rent gear, when dry bibs are worth it, how to read conditions like a local, and how to keep flash-flood risk as low as reasonably possible. Conditions can change fast here, so the goal is smart decisions, not false certainty.
Quick reality check
If you have not done a river hike before, here is what surprises most first-timers:
- It is not a “walk beside the river” hike. You are in the river for most of it. Expect wet feet for hours.
- Balance is the whole game. The riverbed is round rocks, sand pockets, and occasional submerged ledges. You move slower than your brain wants to.
- Water depth changes constantly. One step is ankle-deep, the next is knee-deep. After storms or during snowmelt, it can be much deeper.
- Cold matters. Even on warm days, the water can feel shockingly chilly, especially in spring.
- Turning around is normal. There is no shame in a short Narrows day. The “best” distance is the one where you stay safe, warm, and steady.
Getting there
The bottom-up Narrows hike starts at the Temple of Sinawava. In peak season, access is typically via the Zion Canyon Shuttle (private vehicles are often restricted in the canyon then). In the off-season, the shuttle schedule can change, and private vehicle access may be allowed.
- Check the day-of shuttle status and last shuttle times. Your turnaround time should respect both weather and transportation.
- Start early. You get cooler temps, fewer crowds, and more margin if conditions shift.
Permits and route scope
This article covers the bottom-up day hike from the Temple of Sinawava, out-and-back.
- Bottom-up day hiking is typically non-permitted, but always confirm current Zion rules before your trip since policies can change.
- Top-down Narrows and through-hikes require permits and different planning. If you are not explicitly doing that, stay within the day-hike rules.
- Big Springs is the standard turnaround limit for bottom-up day hikers. Past that is generally reserved for permitted top-down travel. Verify current boundary language with the park before you go.
Riverside Walk basics
Before the river part even begins, you do the Riverside Walk, a 1-mile paved trail (one way) that follows the Virgin River to the spot where most people step into the water.
- Why it matters: your Narrows day starts with a pleasant paved warm-up, then immediately shifts into slow, balance-focused wading.
- Time reality: your pace in the river will be much slower than on the paved path. Plan for “river miles,” not regular trail miles.
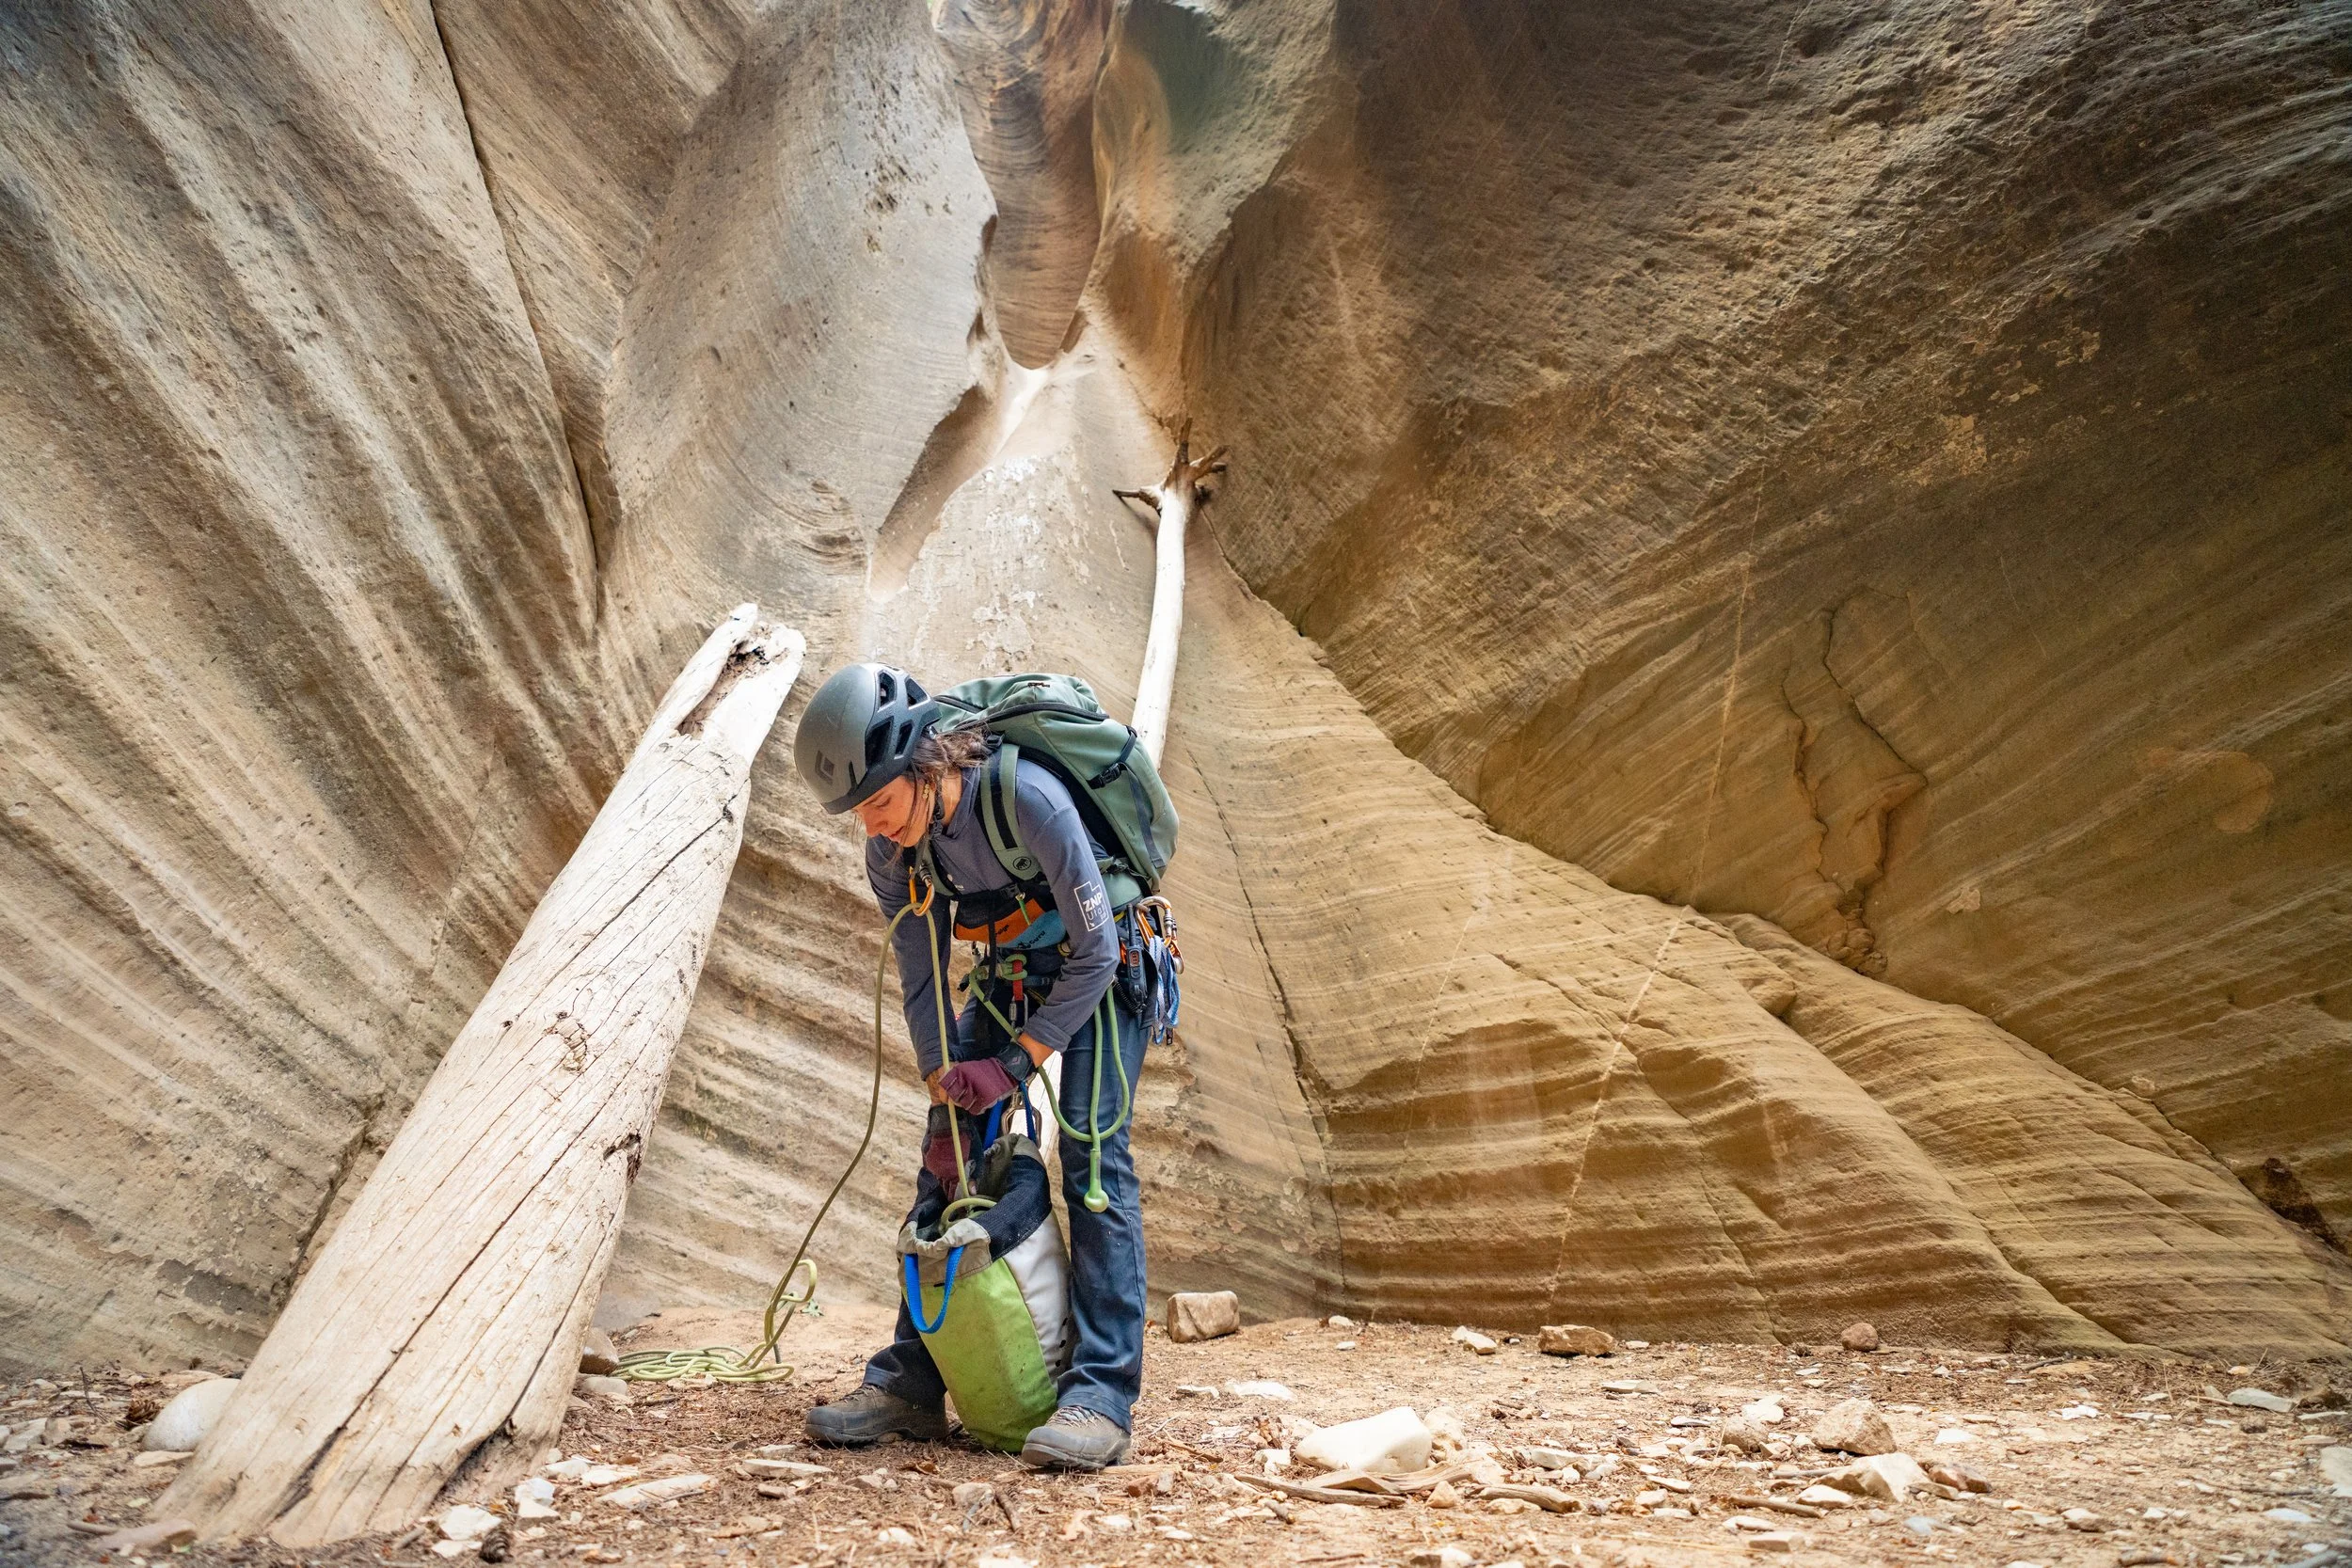
Seasonal gear
You will see people in everything from old sneakers to full dry bibs. Some of that works. Some of it turns into a miserable, blistery lesson by the time you hit Wall Street.
Spring (March to May)
Spring is when the Narrows can be spectacular and also most demanding. Snowmelt can push flows up, and the water temperature is often the biggest limiter.
- Best call for most people: rent canyoneering boots + neoprene socks + a wooden stick. Add dry bibs when water is cold and air is cool, or if you run cold easily.
- Why rentals shine: neoprene socks + proper boots dramatically reduce foot numbness and slipping. You can focus on the canyon, not on surviving it.
- Bring if you own: breathable rain shell, warm layers for after, dry bag for phone and car key fob.
Summer (June to September)
Summer is the easiest for comfort and the hardest for weather risk. Hot days make the water feel refreshing, but monsoon storms can turn the drainage into a danger zone fast.
- Footwear: canyoneering boots are still the gold standard. If you bring your own, choose closed-toe shoes with strong grip that you do not mind soaking.
- Socks: regular hiking socks work for many people in warm conditions, but neoprene can reduce abrasion if you are prone to blisters.
- Dry gear: dry bibs are usually unnecessary in summer unless conditions are unseasonably cold.
- Important: check flash-flood risk before you go, and be willing to bail even if the sky above you looks “fine.”
Fall (October to November)
Fall often brings that sweet spot: fewer crowds than peak summer, cooler air, and generally more stable weather patterns than monsoon season.
- Best call: canyoneering boots + stick. Neoprene socks depend on your cold tolerance.
- Dry bibs: a smart upgrade once mornings get crisp and you plan to be in the water for several hours.
- Why fall is beloved: you can hike longer without overheating, but you still need to manage cold if you stop for long breaks.
Winter (December to February)
Winter Narrows days can be stunning and uncrowded, but this is when the wrong setup becomes dangerous fast. Cold stress is real when you are standing in cold water for hours.
- Typical recommendation: rent dry bibs or a full dry suit plus canyoneering boots, neoprene socks, and a stick.
- Watch for ice: not just on the path to the river, but on shaded rocks at the waterline.
- Have a warm exit plan: dry clothes in the car, warm drink, and no lingering in wet gear.
Renting vs buying: If you are doing the Narrows once, renting is usually cheaper and better. If you are a frequent canyon or river hiker, investing in canyoneering boots, neoprene socks, and a good stick can make sense over time.
Footwear that works
What you want
- Closed toe. You will kick rocks. It is not a matter of if.
- Sticky, confidence-inspiring traction. River stones are slick, especially when algae is present.
- A secure fit when wet. Shoes loosen in water. Laces matter.
- Drainage is a bonus, not a requirement. Many canyoneering boots drain well, but traction and stability matter more than “quick dry.”
What to skip
- Flip-flops or open sandals. Toe injuries and ankle twists are common outcomes.
- Old running shoes with smooth soles. They turn into slick skates on rounded rocks.
- Bulky waterproof hiking boots. They fill with water, get heavy, and can rub your feet raw.
My practical rule: if you would not happily walk a rocky creek bed for two hours in that shoe, do not bring it to the Narrows.
The stick
The Narrows is a balance hike disguised as a scenic stroll. A sturdy stick is your third point of contact, which means fewer slips and less leg fatigue.
Wooden stick vs trekking poles
- Wooden hiking stick: excellent stability, easy to plant between rocks, simple and strong. Most renters love this option because it is set-and-forget.
- Trekking poles: work well if you are experienced with them, but tips can wedge between rocks, and wrist straps can be a hazard if you fall in current.
If you use trekking poles: keep straps loose or off, plant carefully, and be ready for poles to slip on rounded stone. Many people still prefer one solid stick over two poles in the Narrows.
Neoprene and dry gear
Let’s de-mystify the gear you will see at the outfitter. Terminology varies, but most shops mean the same things.
Neoprene socks
Neoprene does not keep you dry. It keeps you warmer in water by trapping a thin layer of water that your body heats up. It also reduces friction, which helps prevent blisters for many hikers.
- Worth it when: water is cold, you are hiking for hours, you are prone to numb feet, or you want extra blister protection.
- Less necessary when: it is hot out, flows are low, and you are doing a shorter out-and-back.
Dry bibs (often called dry pants)
Dry bibs are waterproof on the outside and usually worn over insulating layers. They can reduce heat loss and keep you more comfortable in cold seasons. But they are not magic. If you wade deep or sit in water, you can still get wet, especially around openings.
- Worth it when: spring or fall cold snaps, winter hiking, or anytime you run cold.
- Not worth it when: warm summer conditions and you are fine being wet.
Full dry suit
This is the top-end option, usually most relevant in winter or very cold shoulder-season conditions. It is designed to keep water out so your insulating layers stay dry. This is about cold safety, not comfort vanity.
- Worth it when: winter temps, very cold water, longer hikes, or if you have low cold tolerance.
- Still not a license to ignore conditions: a dry suit does not make high flow safer.
Comfort gear is only helpful if you can still move well. If you feel clumsy, overheated, or restricted, scale back and focus on steady footing and safe decisions.
Water safety and cyanobacteria
Zion National Park has periodically issued warnings about toxic cyanobacteria in the Virgin River. Even when the water looks clean, do not treat it like a reliable drinking source.
- Follow current park guidance first. Advisories can vary by season and location.
- When cyanobacteria advisories are active: do not drink or filter Virgin River water. Typical backpacking filters do not reliably remove dissolved cyanotoxins.
- Avoid submerging your head. Try not to swallow water, and keep splashing to a minimum.
- Keep kids and pets extra cautious. Smaller bodies are affected faster, and dogs tend to drink without thinking.
If you need water for a longer day, carry what you need from the start, per your comfort and the forecast. Many hikers are happy with 1.5 to 3 liters per person depending on season, pace, and how long they plan to be out.
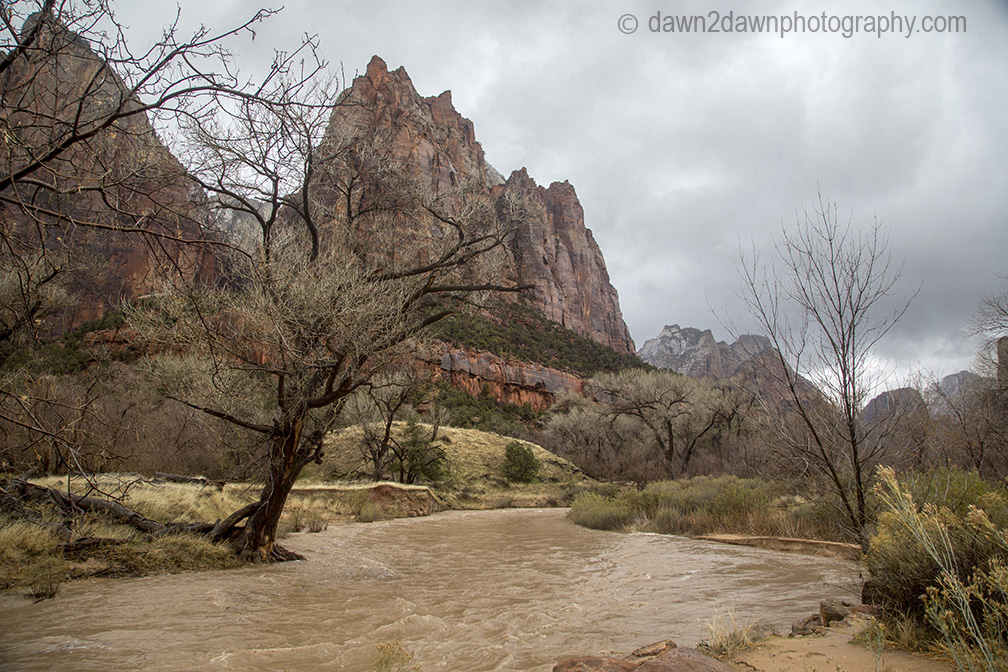
Flash-flood safety
Flash floods are the Narrows’ real hazard. They can happen even when it is sunny where you are standing because storms upstream dump water into the drainage.
What danger looks like
- Water rising noticeably. If a calm section starts creeping up your legs, pay attention.
- Water turning muddy, debris-filled, or suddenly faster. Floating sticks and foam are not cute. They are signals.
- Distant roaring sound. In narrow walls, you may hear trouble before you see it.
- Rain you can see upstream. If you can see dark curtains of rain in the direction of the upper canyon, treat it as urgent.
Before you go
- Check the official forecast. If thunderstorms are possible in the broader region, reconsider. “Chance of storms” matters more here than on a typical trail.
- Ask a ranger the day-of. Conditions and closures can change quickly.
- Start early. Morning often buys you calmer weather windows and fewer crowds.
If the river changes
If the water starts rising, turning muddy, or accelerating, do not wait for confirmation. Move toward higher ground immediately and get out of the main flow. The Narrows has limited escape options, so your best move is early movement, not late heroics.
Turnaround rules
Pick a firm turnaround time before you step in the river. For many day hikers, that means turning back no later than early afternoon, even if you feel great. Weather can build later in the day, and the return trip is always slower when your legs are tired.
Also, there is a hard boundary for bottom-up day hikers: Big Springs is the standard turnaround point. Going beyond is generally tied to permitted top-down travel. Confirm current rules with Zion before your trip.
Simple decision framework:
- If you hear thunder, see building storm clouds, or notice the river changing, turn around immediately.
- If you are getting cold, your footing is deteriorating, or you are slipping more often, turn around.
- If you are unsure, treat uncertainty as your answer and turn around.
Gauges and closures
There is a difference between “can I physically wade this” and “should I.” Zion manages Narrows access based on conditions, and that is your first filter.
What to look for
- Official status first: if the Narrows is closed, do not negotiate with yourself. Closures are based on safety thresholds for flow and flash-flood risk.
- Flow trend: even if the hike is open, notice whether flow is rising or falling compared to the previous day. Rising often signals recent rain or melt.
- Recent storms: rain in the last 24 to 48 hours can keep the river high and silty.
On-the-ground clue that matters: if the river feels like it is pushing your feet sideways in knee-deep water, that is your body telling you conditions are serious. High flow turns small mistakes into big swims.
Distance goals
Most bottom-up Narrows hikers do an out-and-back that fits their comfort, daylight, and conditions. You do not need to “finish” anything to have an incredible day.
Common goals
- Riverside Walk + a short wade: perfect if you want a taste of the canyon without committing to hours in current.
- Mystery Falls area: a popular first big milestone for many hikers.
- Wall Street: the iconic narrow stretch. Reaching it depends heavily on conditions, pace, and how often you stop to take it all in.
- Big Springs: the standard day-hike turnaround point for the bottom-up route. Treat it as a firm limit, not an aspirational milestone.
My favorite mindset: pick a goal, but commit to being delighted even if you turn around sooner. The Narrows is not about mileage. It is about moving through a living river corridor.
Crowd tactics
The Narrows is famous. You will rarely be alone. But you can absolutely find breathing room.
Timing
- Start early. The first wave is calmer, cooler, and often safer in summer weather patterns.
- Avoid peak midday. That is when day-trippers stack up near the start, creating bottlenecks in shallow sections.
Etiquette
- Do not stop in narrow chokepoints. Step to the side on a wider gravel bar to adjust gear or take photos.
- Pass with care. Let faster groups by when the river widens. Everyone is working with slippery footing.
- Keep voices low. The canyon amplifies sound. A little goes a long way.
Photo strategy
If you want those serene shots, be patient. Wait for a natural lull, step into shallower water off the main line of travel, and let a group pass before you raise your camera.
Packing list
This is what I would pack for a comfortable, low-fuss Narrows day.
Wear
- Quick-dry layers (avoid heavy cotton)
- Appropriate footwear (preferably canyoneering boots or grippy closed-toe water hikers)
- Socks: hiking socks in warm weather, neoprene in cold conditions
- Light insulating layer for shoulder seasons
Bring
- Sturdy stick or trekking pole setup you trust
- Dry bag or waterproof pouch for phone, wallet, keys
- Small first-aid basics (blister care is the big one)
- Snacks that still taste good when you are cold
- Water and a way to carry it that you do not mind getting splashed
- Sun protection (hat, sunscreen) even in the canyon
Leave behind
- Anything you cannot get wet
- Heavy backpacks that throw off your balance
- Big camera setups unless you are prepared to protect them properly
Bathrooms and Leave No Trace
One very practical detail: restrooms are available at the Temple of Sinawava area, but there are no restrooms once you enter the Narrows. Plan accordingly.
- Use the restroom before you start. Do it at the trailhead area and do not “save it for later.”
- Pack out solid waste. Carry a WAG bag and use it if you need to go in the canyon.
- Do not bury toilet paper. It does not disappear in a river corridor. Pack it out.
Leave No Trace in the Narrows is not abstract. It is what keeps this place from turning into a problem that ruins it for everyone else.
First-timer technique
The stance that saves your ankles
Face slightly upstream, take shorter steps than normal, and keep knees soft. Plant your stick first, then step. Think: three points of contact, slow and steady.
Where to step
- Aim for stable, flatter rocks or firm sand pockets.
- Avoid dark, slimy-looking stones when you can. Algae can be slick.
- When in doubt, shuffle and test.
Deeper sections
In waist-deep water, current matters more. Turn sideways, keep your feet wide for stability, and move diagonally toward shallower zones. If a section looks beyond your comfort, wait for others to pass and watch their line, or simply turn around.
After the hike
The rookie mistake is staying in wet gear too long because you are “still having fun.” Cold creeps in fast once you stop moving.
- Change into dry clothes as soon as you can.
- Check your feet for hot spots and grit. A little sand can become tomorrow’s blister.
- Clean and dry rental gear as directed so it does not turn into a funky science experiment in your car.
Bottom line
If you do one thing for your Narrows day, make it this: prioritize traction, stability, and flood awareness over speed and distance. You cannot make outdoor risk disappear, but you can stack the odds heavily in your favor with good gear, early starts, and an eager willingness to turn around. Your job is to have a beautiful day and get out safely, with your feet intact and your confidence higher than when you stepped in.