The Ultimate Travel First Aid Kit
Maya Lin
Maya Lin is a travel journalist and outdoor enthusiast who believes the best trips combine rugged adventures with urban comforts. After spending six years backpacking across four continents, she founded Trail & Town Guide to help fellow travelers navigate both hidden mountain passes and bustling city neighborhoods with confidence.
I have carried a first aid kit in Patagonian wind, on sweaty metro platforms in Taipei, and into more budget hotel bathrooms than I can count. The lesson is always the same: the best kit is the one you actually bring, and the smartest kit is the one that covers both “I scraped my knee on a scree field” and “my stomach is protesting street noodles.”
This guide walks you through building one compact, comprehensive travel first aid kit that handles remote trails and urban jungles without turning your pack into a pharmacy.
Step 1: Choose your kit base
Your container matters because it sets the size limit and determines whether you will keep it stocked. Aim for something you can open one-handed and sort in seconds.
- Size target: roughly the size of a paperback book for solo travel, or a small toiletry bag for two people.
- Material: water-resistant zip pouch or small clamshell organizer. Clear pouches can make inspections easier and speed up quick checks.
- Organization: 2 to 4 inner pockets or a few mini zip bags inside. You want “grab the blister stuff” fast, not “dump everything in the dirt.”
My rule: If it does not fit in the top of your daypack or the outer pocket of your carry-on, it is too big for the trips where you need it most.
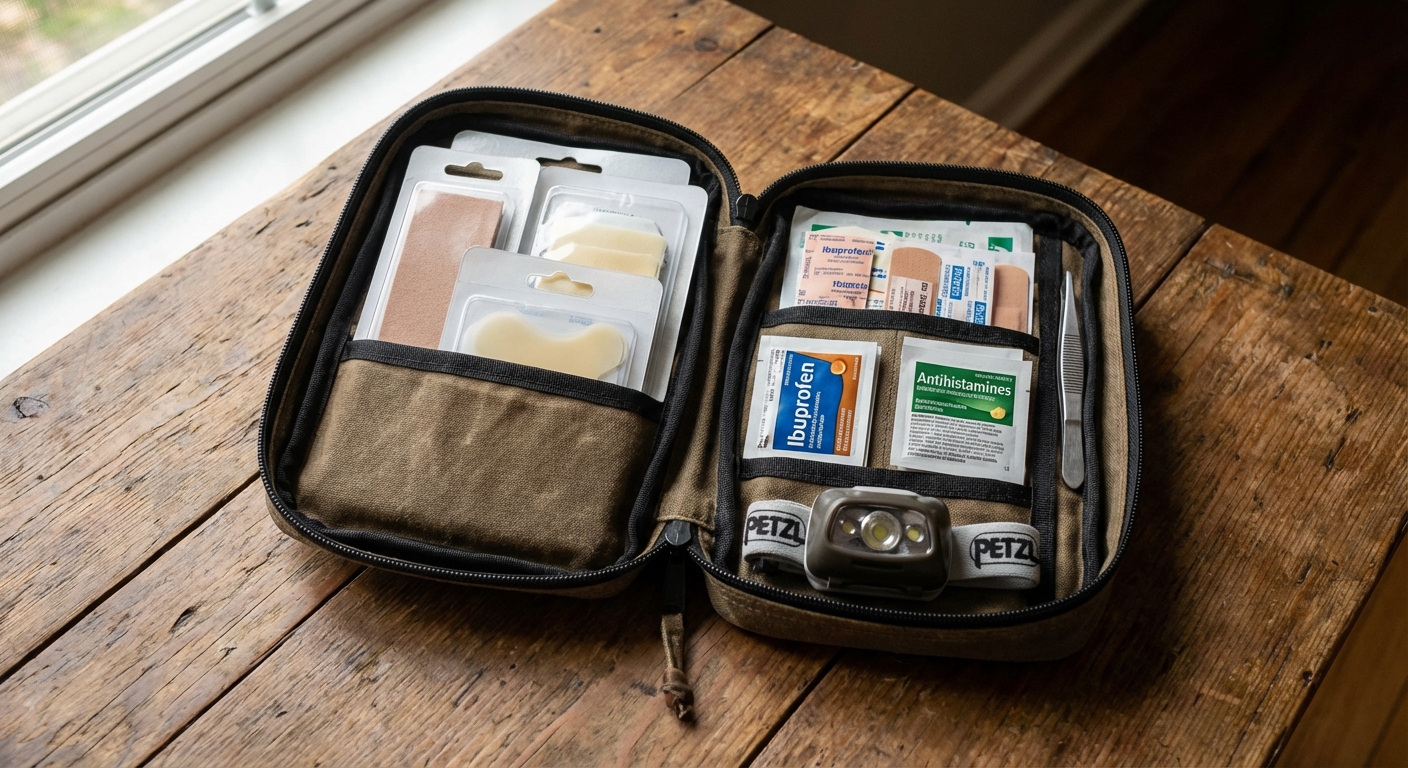
Step 2: Build the core kit (works anywhere)
This is the foundation. It covers the everyday injuries that happen on trails, sidewalks, and hostel staircases.
Note on quantities: The counts below are a strong starting point for 1 to 2 people for about a week. Scale up for longer trips, groups, and remote routes.
Wound cleaning and infection prevention
- Alcohol-free antiseptic wipes (6 to 10): easier on skin and useful for cleaning around scrapes.
- Saline pods or a mini irrigation syringe (optional but excellent): especially helpful for gritty trail cuts. Clean water works in a pinch if that is what you have.
- Antibiotic ointment (single-use packets if possible): compact and sanitary. Use if appropriate for you and your destination. Some people get irritation or allergies, and some places restrict OTC antibiotic creams. For clean minor cuts, plain petroleum jelly can be a solid alternative for moist wound healing.
- Hand sanitizer (small bottle): you will use this constantly, including before treating someone else.
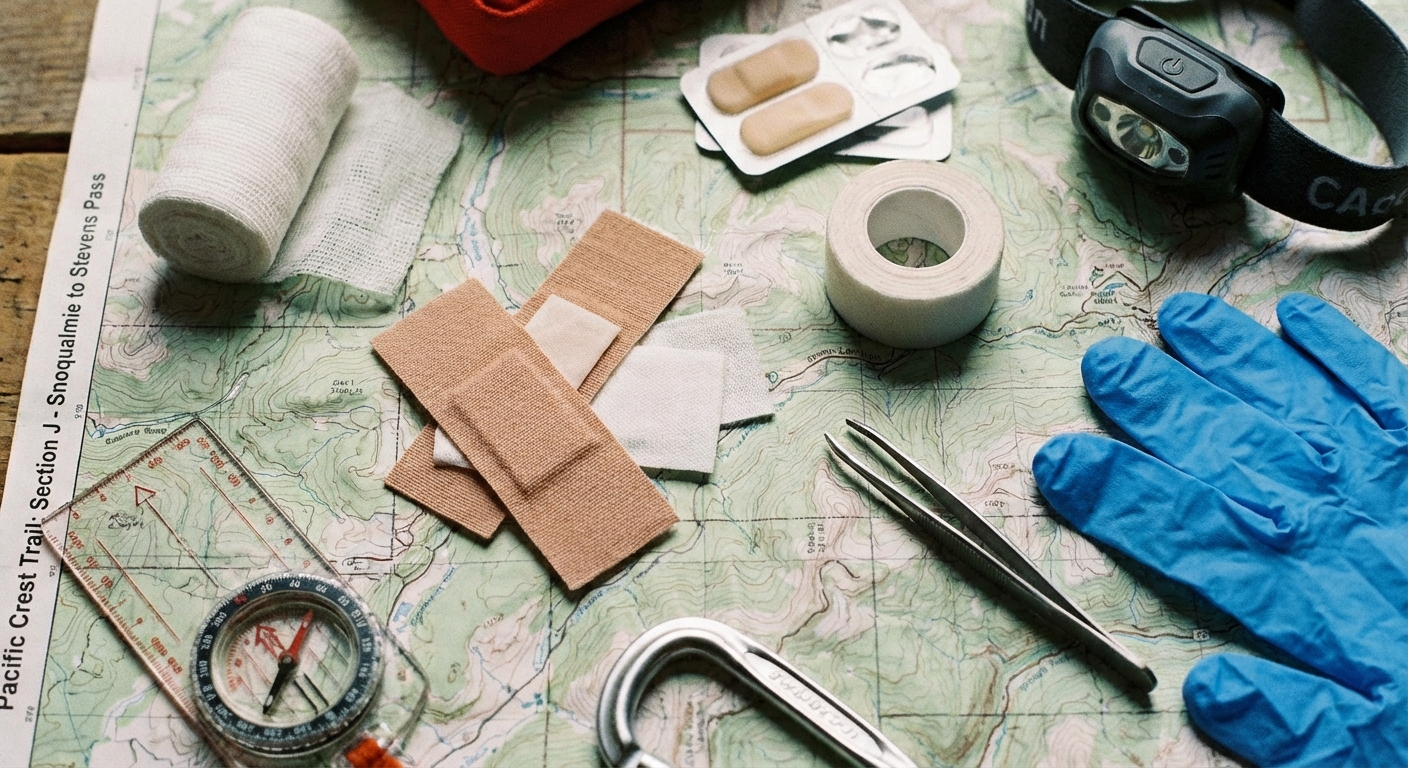
Bandages and dressings
- Assorted adhesive bandages (10 to 15): include fingertip and knuckle shapes.
- Sterile gauze pads (4 to 6): for larger abrasions.
- Non-stick pads (2 to 4): for wounds you do not want stuck to a dressing.
- Medical tape (1 roll): choose a strong, tearable tape. It fixes blisters, secures gauze, and patches gear in a pinch.
- Elastic wrap bandage (1): for sprains and compression. Pick a compact self-adhering type.
- Butterfly closures or Steri-Strips (5 to 10): for small, clean cuts that need the edges supported.
Tools
- Tweezers: for splinters, ticks, and debris.
- Tick removal tool (optional): very small, very useful in tick country.
- Small scissors or trauma shears: check your airline and airport rules. In the U.S., TSA generally allows scissors with blades under 4 inches from the pivot, but rules vary internationally. If in doubt, pack in checked luggage.
- Nitrile gloves (1 to 2 pairs): for treating others and for messy situations.
- Safety pins (2 to 4): surprisingly useful for slings, gear fixes, and securing wraps.
- Thermometer (optional): helpful for longer trips or family travel, but not essential for ultralight kits.
- CPR face shield (optional): tiny, lightweight, and worth considering for group travel.
Quick tick note: Use fine-tip tweezers or a tick tool, grab as close to the skin as possible, and pull straight out steadily. Clean the area after. Seek care if you develop fever, a spreading rash, worsening headache, or flu-like symptoms after a bite.
Step 3: Add blister and foot care (non-negotiable)
If you do one thing beyond a basic bandage kit, do this. Blisters are the fastest way to turn a dream hike or a city day into a miserable limp.
- Hydrocolloid blister dressings (2 to 6): great for heels and hot spots. Apply on clean, dry skin.
- Moleskin or blister prevention tape: pre-tape known trouble spots before long walk days.
- Antifriction balm (small stick or mini jar): for toes, heels, and anywhere your pack rubs.
- Small alcohol pads (a couple): for cleaning skin before tape. Use sparingly if you are sensitive.
- Optional: a sterile needle for blister draining. Only if you know how to do it cleanly and safely, and only for specific situations. Many travelers skip this and do just fine with hydrocolloid.
Trail & Town tip: In cities, blisters happen when your shoes are “cute but new.” Pack the prevention supplies even if you are not doing a single mountain mile.
Step 4: Pack meds for common travel problems
This is the part that saves trips. Keep everything in original packaging when possible, and bring only what you will realistically use. For flights and border crossings, labeled blister packs and pharmacy labels make life easier.
Pain, fever, inflammation
- Acetaminophen (paracetamol): pain and fever.
- Ibuprofen: pain and inflammation. Avoid if you have been told not to use NSAIDs.
Stomach and hydration
- Oral rehydration salts (2 to 6 packets): great for diarrhea, heat, and long travel days, plus any time travel or altitude leads to dehydration. ORS does not treat altitude illness itself.
- Anti-diarrheal (like loperamide): useful for transit days. Not for high fever or bloody diarrhea, and do not use to “power through” serious illness.
- Bismuth tablets (optional): can help with mild upset, and there is some evidence it can reduce traveler’s diarrhea risk in certain dosing routines. It is not for everyone. Avoid if you are allergic to aspirin, pregnant, on blood thinners, or have kidney issues, and ask a clinician if you are unsure. It can also cause black stool or tongue.
- Antacid (chewables): street food wins sometimes, reflux wins other times.
- Mild laxative (optional): long flights and changing diets can slow things down.
Allergies, skin, and bites
- Antihistamine (non-drowsy for daytime, optional drowsy for nighttime): for allergies and mild reactions.
- Hydrocortisone cream (small tube): itch, mild rashes, bug bites.
- Insect bite relief (optional): especially in humid cities or trekking areas.
Cold, cough, and sore throat
- Throat lozenges: dry airplane air and pollution are real.
- Decongestant (if you tolerate it): helpful for flights and sinus pressure. Check local restrictions before traveling since rules vary by country.
Motion and altitude
- Motion sickness meds: buses in the Andes and ferries in rough water can humble anyone.
- Altitude meds (only if prescribed or advised by your clinician): pair with a slow ascent plan and hydration.
Optional tests
- COVID or flu rapid tests (optional): useful for longer trips, family travel, or anywhere access to testing is limited.
Safety note: Medication needs vary by person. If you are pregnant, have chronic conditions, take blood thinners, or have known allergies, ask a clinician for a personalized list before you go. This article is travel guidance, not medical advice.
Step 5: Remote add-ons
If you will be hours from a road, your kit should handle stabilization and communication, not just boo-boos.
Bleeding and sprains
- Extra gauze and one larger absorbent dressing: for bigger scrapes and deeper cuts.
- Hemostatic gauze (optional, training recommended): primarily for life-threatening bleeding, not routine cuts. If you pack it, learn how to use it.
- Extra elastic wrap or support tape: ankles are the classic trip-ender.
Exposure and survival support
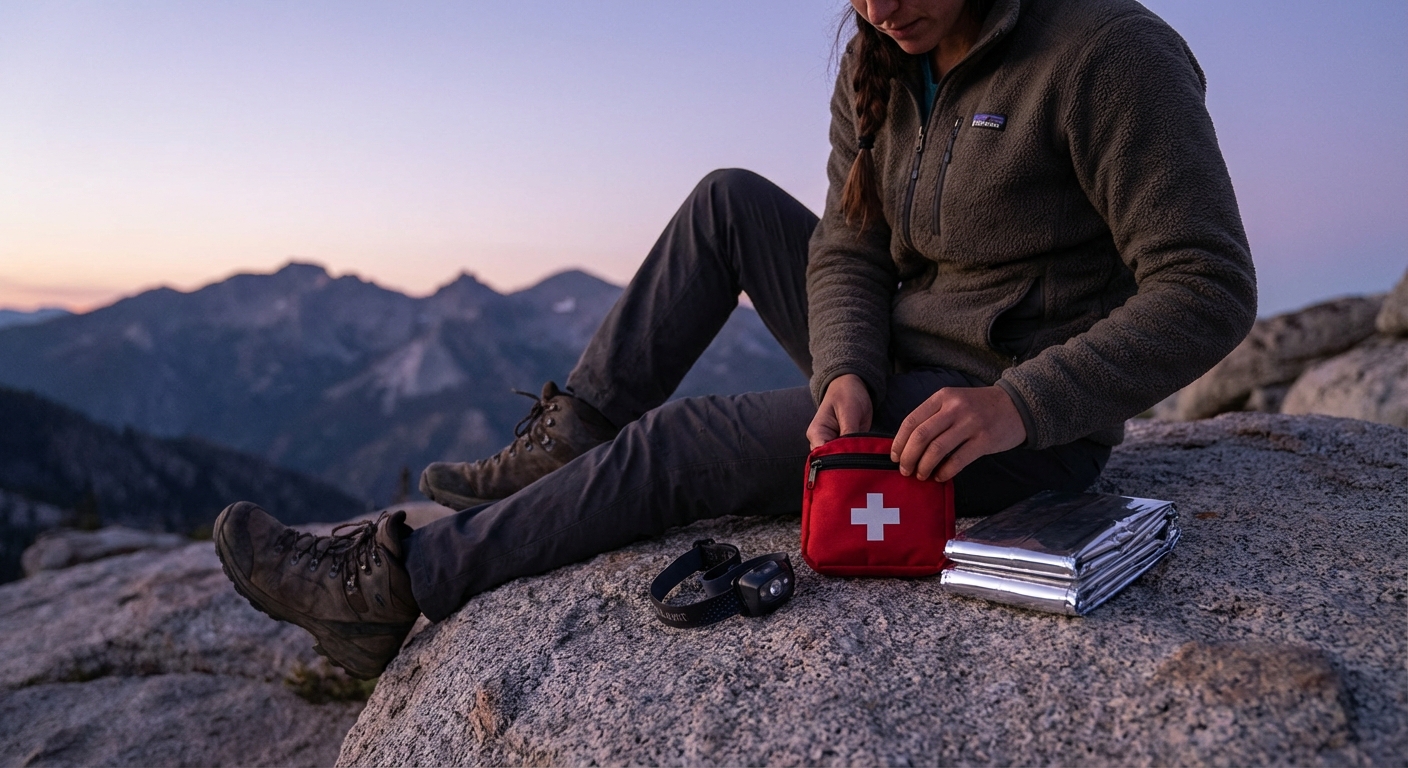
- Emergency blanket: tiny weight, huge warmth value.
- Water purification backup (tablets or drops): not first aid, but dehydration is a medical problem fast.
- Headlamp: treating anything in the dark without light is a comedy you do not want to star in.
Navigation and emergency contact
- Whistle: for attracting attention.
- Offline maps and backup battery: urban and wild both.
- Satellite messenger (optional but powerful): for truly remote routes.
Skill beats gear: Even a compact first aid class pays off quickly. If you travel remote often, consider a wilderness first aid course.
Step 6: Urban add-ons
Cities have their own hazards: transit germs, minor burns, and small mishaps when you are moving fast.
- Extra hand sanitizer or sanitizing wipes: for markets, trains, and public restrooms.
- Burn gel or aloe (small): for kitchen mishaps, hot ramen splashes, or sun exposure.
- Eye drops: dry air, pollution, long screen days.
- Electrolyte tablets (small packet): heat waves in cities can be brutal.
Reality check: In cities, pharmacies are often close. Your goal is to cover the first 12 to 24 hours and avoid paying tourist prices at midnight.
Step 7: Prescriptions and personal items
This is where “comprehensive” becomes “actually useful.” Build this section around you, not a generic list.
- Your prescriptions: bring enough for the full trip plus a buffer (many travelers aim for 3 to 7 extra days). Keep in original labeled containers when possible.
- Copies of prescriptions and generic names: helpful if you need a refill abroad.
- EpiPen or emergency allergy meds if prescribed.
- Inhaler if you have asthma.
- Personal pain relief (for migraines, cramps, etc.) as advised by your clinician.
- Small medical info card: allergies, conditions, emergency contact, blood type if you know it.
Step 8: Pack it smart (airline-friendly)
A great kit is equal parts contents and system. Here is my carry-on-only approach.
Make it modular
- Mini bag 1: Wound care (wipes, ointment or petroleum jelly, bandages, gauze, tape).
- Mini bag 2: Blister care (hydrocolloid, tape, balm).
- Mini bag 3: Meds (in labeled blister packs).
Prevent spills and mystery pills
- Keep meds in original packaging when possible.
- Add a small note listing what each med is and how you use it.
- Check country-specific restrictions for decongestants, strong pain meds, and controlled substances.
Weight-saving swaps
- Choose single-use packets (ointment, wipes) over big tubes.
- Wrap a few feet of medical tape around a pen or trekking pole section if you are truly tight on space.
- Skip duplicates unless you are in a group or remote for multiple days.
Step 9: Restock and replace
Do this once and your kit stays trustworthy.
- After every trip: replace used items immediately, even if you only used one bandage.
- Every 6 months: check expiration dates on meds and ointments.
- After wet trips: inspect for moisture damage and replace any compromised packaging.
- Before big hikes: top up blister dressings and gauze.
Quick checklist
Screenshot this section or copy it into your notes app.
Core
- Antiseptic wipes
- Antibiotic ointment or petroleum jelly
- Assorted adhesive bandages
- Sterile gauze pads + non-stick pads
- Medical tape
- Elastic wrap bandage
- Butterfly closures or Steri-Strips
- Tweezers + small scissors
- Nitrile gloves + safety pins
Feet
- Hydrocolloid blister dressings
- Moleskin or blister tape
- Antifriction balm
Meds
- Acetaminophen and/or ibuprofen
- Oral rehydration salts
- Anti-diarrheal
- Antacid
- Antihistamine
- Hydrocortisone cream
- Motion sickness meds (if needed)
Remote add-ons (as needed)
- Emergency blanket
- Extra gauze and larger dressing
- Headlamp, whistle
- Water purification backup
Personal
- Prescriptions with buffer
- Medical info card
- EpiPen, inhaler if prescribed

Know when to get help
A kit is for the small stuff and for buying time. Do not let it delay real care. Seek urgent medical help if you notice:
- Uncontrolled bleeding, blood that soaks through dressings, or a deep wound you cannot clean well
- Head injury red flags: worsening headache, repeated vomiting, confusion, fainting, seizure, or new weakness
- Severe allergic reaction: trouble breathing, swelling of lips or face, widespread hives, or feeling faint
- Dehydration: dizziness, confusion, very dark urine, inability to keep fluids down, or no urination for many hours
- High fever that persists, especially with stiff neck, severe pain, or a very ill appearance
- Diarrhea with blood, severe abdominal pain, or signs of dehydration
- Infection signs: spreading redness, warmth, swelling, pus, red streaking, or increasing pain after day one
What not to pack
Some items sound useful but rarely earn their space, or they create more problems than they solve.
- Too many bulky bottles: decant or use single-use packets.
- Unlabeled pill organizers for international trips: they can cause hassles at borders and are easy to mix up.
- Gear you do not know how to use: if you pack specialty items like hemostatic gauze, learn the basics first.
- “Just in case” duplicates of everything: prioritize the items that solve the most common problems first.
Final thought
Your first aid kit is not a fear kit. It is a freedom kit. It lets you say yes to a sunrise ridge walk and a late-night food market, because you know you can handle the small stuff and buy time for the big stuff.
If you want, tell me where you are going and what type of trip it is, and I can help you trim this list into a kit that fits your exact route and your carry-on rules.