Wilderness First Aid on the Trail
Maya Lin
Maya Lin is a travel journalist and outdoor enthusiast who believes the best trips combine rugged adventures with urban comforts. After spending six years backpacking across four continents, she founded Trail & Town Guide to help fellow travelers navigate both hidden mountain passes and bustling city neighborhoods with confidence.
Most trail injuries are not dramatic. They are the quiet kind that start as “I’m fine” and end as “Why are we still going?”: a hot spot becoming a blister, a small cut turning gritty and hard to clean, a rolled ankle that gets worse with every uneven step. The goal of wilderness first aid on a day hike is not to play medic. It is to make good decisions with limited tools, keep the situation from spiraling, and get everyone home.
This article focuses on assessment and decision making in the field: what to do first, what matters most, and when it is time to turn back. It complements our dedicated blister deep-dive and our travel first-aid kit roundup by staying tightly focused on trail response, minimal gear, and evacuation judgment.
The first 2 minutes: stop, think, assess
When someone gets hurt, the most useful skill is slowing the moment down. Panic burns time and judgment. Use a simple, repeatable sequence.
1) Make the scene safe
- Move away from rockfall, water edges, bike traffic, lightning exposure, or unstable snow if needed.
- Add warmth early if anyone is sitting still in wind, shade, or wet conditions.
- Do a quick headcount and keep the group together unless sending two people for help.
2) Primary check: life threats first
For day hike injuries, this is usually fast. Still, check:
- Airway and breathing: Are they talking normally? Any trouble breathing?
- Major bleeding: Blood soaking clothing or pooling needs immediate pressure.
- Anaphylaxis: Sudden hives, facial or lip swelling, wheezing, vomiting, or a “something is very wrong” reaction after a sting or food is time-sensitive. If they have an epinephrine auto-injector (EpiPen) and are prescribed it, help them use it and call for rescue.
- Severe mechanism: Big fall, head impact, chest pain, or altered mental status changes everything. When in doubt, treat as serious.
Field rule I live by: treat what you see, not what you hope. “It will probably be fine” is not a plan.
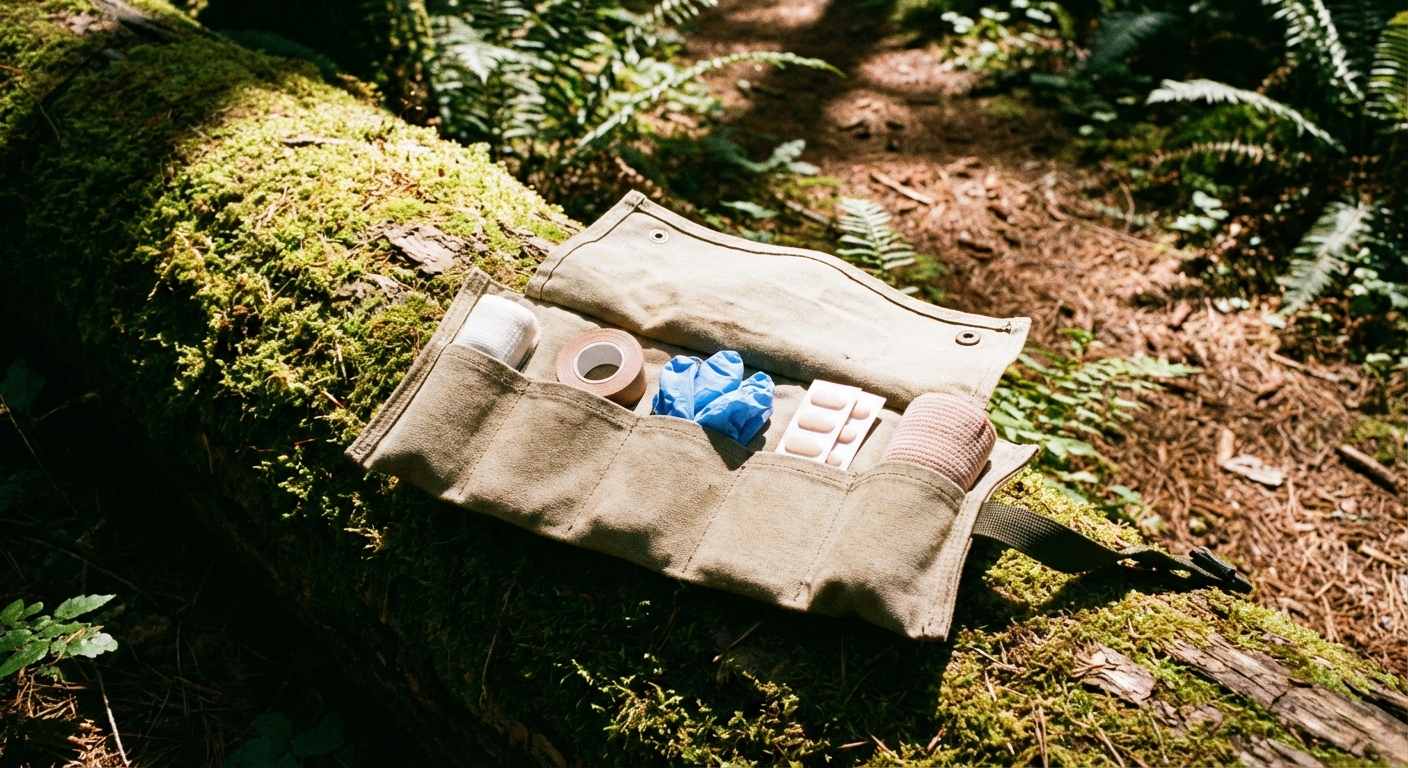
Minimal kit versus fantasy packing
You do not need a mini urgent care in your pack. You need a few high-value items that let you control bleeding, protect wounds, stabilize a sprain, and manage pain until you hike out or get help.
Minimal day hike kit (high impact, low bulk)
- Nitrile gloves (1 to 2 pairs) for wound care and hygiene.
- Antiseptic wipes (a few) or a small bottle of hand sanitizer for your hands before you touch a wound.
- Sterile gauze pads (2 to 4) and rolled gauze or a small wrap.
- Medical tape (a short roll) or cohesive wrap.
- Elastic bandage (ACE-style) for compression and support.
- Blister prevention: a strip of leukotape or kinesiology tape and a small piece of moleskin or hydrocolloid.
- Ibuprofen and acetaminophen (if you can take them) plus any personal meds.
- Personal allergy meds: carry your prescribed epinephrine auto-injector if you have one. Consider an antihistamine for mild reactions if it is appropriate for you, but do not treat it as a substitute for epinephrine in anaphylaxis.
- Small tweezers for splinters or debris.
- Emergency layer (light puffy or rain shell) because cold makes injuries worse.
- Light source (headlamp) because “we’ll be back before dark” is a classic trap.
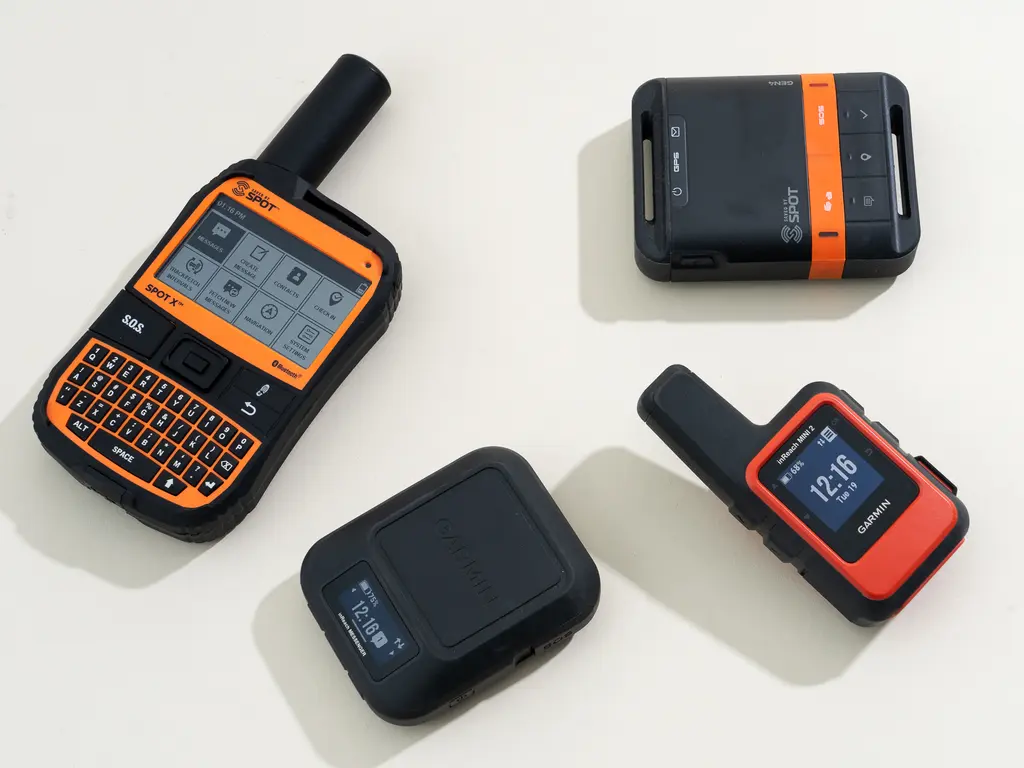
- Communication: fully charged phone, and ideally a satellite messenger on remote routes.
Nice-to-have additions
- Small irrigation syringe or a sport-cap water bottle for rinsing dirt from cuts.
- Triangle bandage or a small sling.
- Sam splint if you routinely hike far from trailheads or with higher-risk terrain.
- A commercially made tourniquet if you are trained to use it, or you hike in places where delays to care are likely.
What is usually fantasy packing
- Large bottles of multiple solutions, bulky cold packs, heavy trauma shears, or a pile of single-purpose gadgets.
- Too many tiny bandages and not enough gauze and tape, which are what you actually use.
Sprains and strains: ankle and knee checks
On day hikes, ankle sprains are common, and knees are not far behind. The aim is to reduce pain and swelling, support the joint, and decide whether walking out is safe.
Step-by-step response
- Stop and expose the area. Take the shoe off if swelling is starting, but do it early. If you wait, swelling can trap the foot in the shoe.
- Look and feel. Deformity, a bone that looks “out,” or rapid swelling after a twist raises concern for fracture.
- Check circulation and sensation. Warm toes? Normal color? Can they feel light touch? Can they wiggle toes?
- Compression and support. Wrap with an elastic bandage in a figure-eight pattern around the ankle and foot, snug but not numb. Re-check toes after wrapping.
- Stabilize for hiking. If they must walk, add tape over the wrap for extra stability, and tighten the shoe carefully once swelling is controlled.
- Reduce load. Redistribute pack weight, shorten stride, use trekking poles, and slow down. “Gentle and steady” beats “push through.”
Walking test: can they hike out?
Here is a practical field heuristic, not a fracture rule-out tool. If pain is mild to moderate and they can take several careful steps without collapsing or sharp, escalating pain, many sprains can walk out with support. If every step spikes pain, or their gait becomes unsafe, your plan should shift to turning back early and considering assistance.
If you suspect a fracture, use recognized guidance (for example, Ottawa ankle rules) when you are trained to do so, and do not let a “maybe” become a long, ugly walk.
When a sprain is a turn-back injury
- They cannot bear weight or cannot take a few controlled steps.
- There is numbness, tingling, or toes are pale, blue, or cold.
- Obvious deformity or a “pop” with immediate major swelling and instability.
- Knee injury with locking, giving way, or inability to straighten.
Practical call: If you are debating whether to continue, do not. Turning back early preserves daylight, energy, and options.
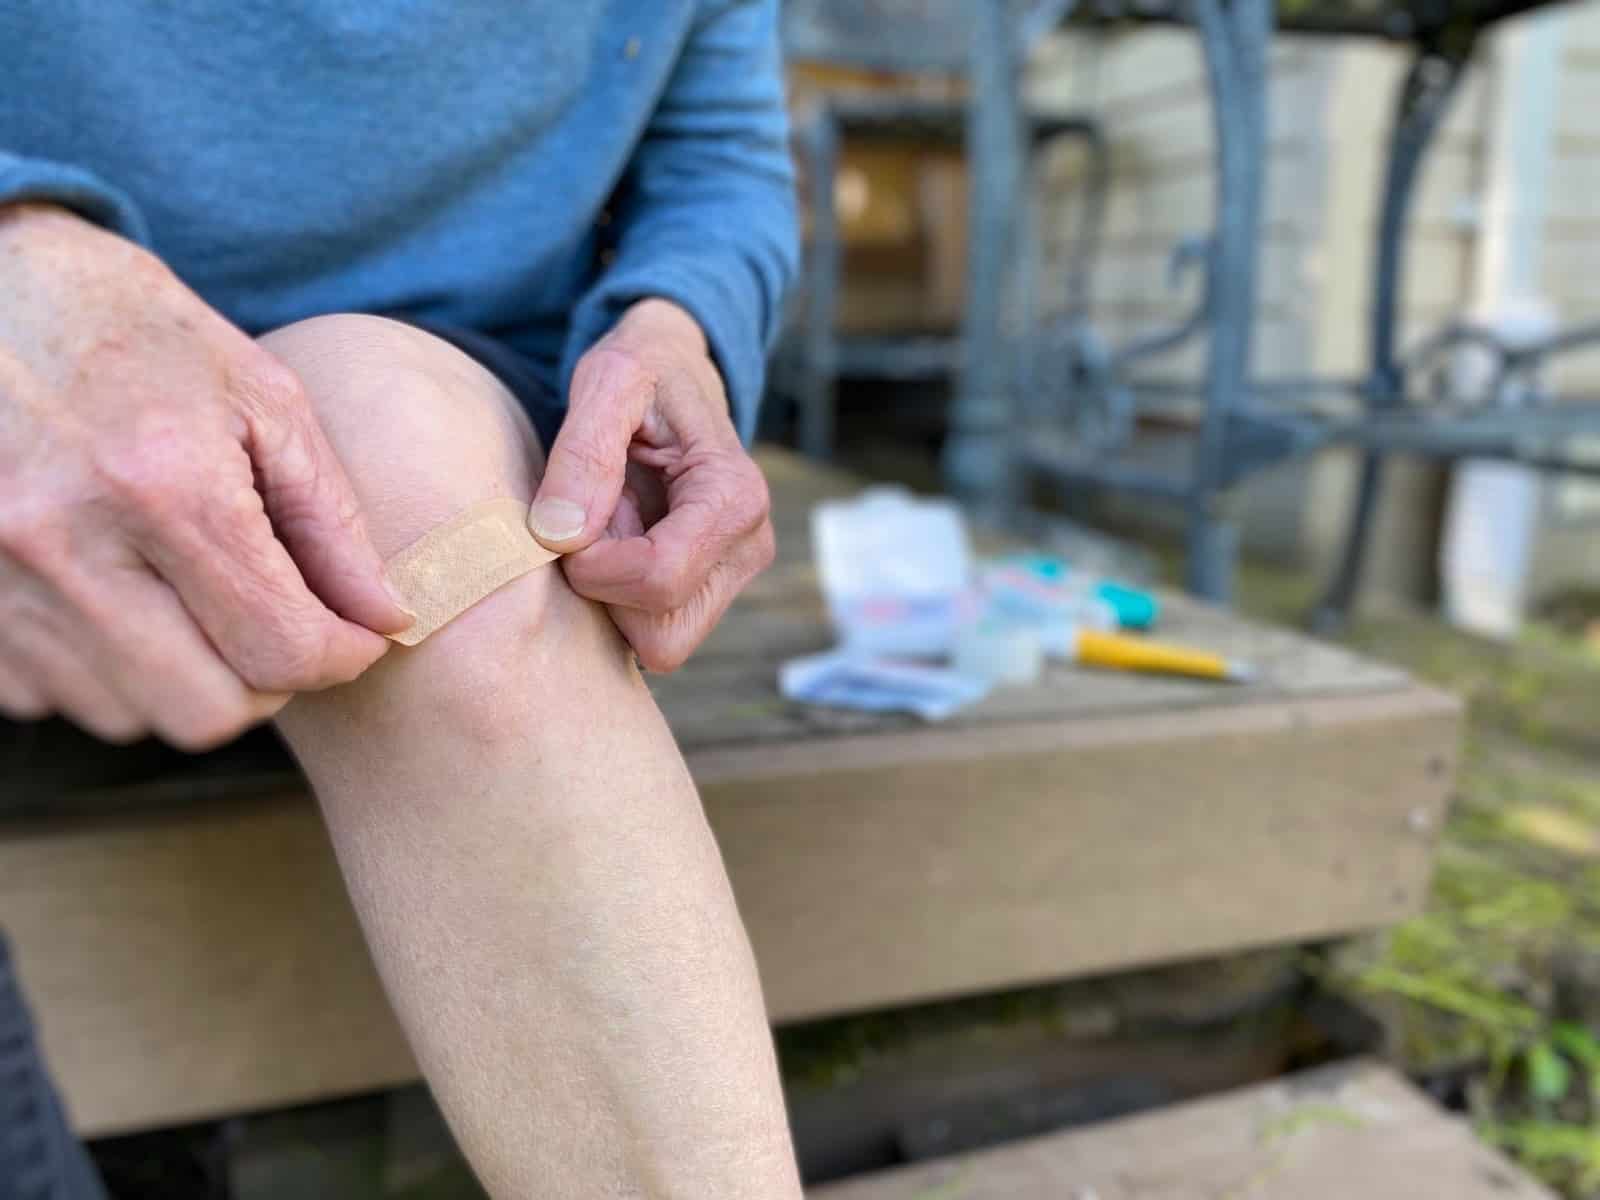
Cuts and scrapes: clean is king
Most trail lacerations are manageable if you control bleeding and clean them well. In the backcountry, infection prevention matters more than perfect bandage aesthetics.
Step-by-step response
- Gloves on if possible. At minimum, sanitize hands.
- Stop the bleeding. Direct pressure with gauze or a clean cloth for a solid few minutes without peeking. Elevate the limb if it helps.
- If bleeding will not stop: Keep firm pressure. If it is life-threatening extremity bleeding and you have a tourniquet and are trained to use it, use it and call for rescue.
- Rinse thoroughly. Use clean water. The volume matters more than the antiseptic. Flush dirt out until the wound looks clean.
- Remove debris. Use tweezers for gravel or plant material you can grasp. If grit is embedded and you cannot remove it, protect the wound and plan for medical care.
- Dress it. Use a nonstick dressing if available, then gauze and tape or rolled gauze to keep it covered and clean.
- Re-check. If blood soaks through, add more gauze on top and maintain pressure.
When a cut is beyond a simple field fix
- Bleeding that does not slow with sustained direct pressure.
- Gaping edges, visible fat, or wound length that likely needs closure.
- Deep punctures, animal bites, or dirty wounds you cannot irrigate well.
- Loss of function: they cannot move fingers or toes normally.
- Signs of shock: clammy skin, confusion, faintness.
Even if you hike out, seek medical care the same day when any of the above is true. Also consider tetanus status if the wound is dirty and it has been years since the last booster.
Blisters and hot spots: treat early
Blisters ruin a lot of hikes, mostly because we ignore the first whisper. This is not our full blister guide, but here is the decision-first version.
Hot spot protocol (the moment you feel rubbing)
- Stop immediately. Two minutes now saves a long limp later.
- Dry and de-grit. Shake out sand, adjust sock wrinkles, consider a sock change.
- Apply tape to reduce friction. Leukotape works well on clean, dry skin. Round the corners so it does not peel.
- Check shoe fit and lacing. Heel slip causes heel blisters. Too-tight forefoot lacing causes toe rub.
If a blister has formed
- Small and intact: pad around it to offload pressure, then tape over the pad to hold it in place.
- Large and painful: some hikers choose to drain it, keep the roof intact, and cover it to reduce friction. Only do this if you can clean your hands and tools well. If you cannot, protect it and hike out gently.
- Extra caution: if you are diabetic, immunocompromised, or have poor circulation, avoid field drainage and treat blisters as a higher-stakes wound. When in doubt, leave it intact and focus on offloading.
- Torn blister roof: rinse, lay the skin back down if it is viable, cover with a nonstick dressing, and keep it clean.
When blisters become a turn-back issue
- Pain changes gait significantly, risking ankle or knee injury.
- You cannot keep a dressing in place and every step worsens skin loss.
- Wet conditions plus multiple hotspots suggest a rapid cascade.
If you want the full deep-dive on blister prevention, taping methods, and shoe and sock strategy, use our dedicated blister article. This page is about what to do when the trail has already voted.
Pain, swelling, and meds
Managing pain is not about masking symptoms so you can keep pushing. It is about keeping someone calm, mobile enough to evacuate safely, and less likely to stumble.
Basics
- Rest: a short break can dramatically reduce spasm and pain after a twist.
- Compression: elastic wraps often help more than you expect.
- Elevation: useful during a longer stop, especially for ankle swelling.
- Heat loss prevention: pain plus stillness equals cold fast, even in mild weather.
Over-the-counter meds
- Ibuprofen can help with pain and inflammation if you can take NSAIDs safely.
- Acetaminophen helps pain and fever and is a different class than NSAIDs.
- Be careful combining meds: follow the label, avoid exceeding daily maximums, and avoid alcohol. If you are unsure about dosing, allergies, pregnancy, ulcers, kidney issues, or blood thinners, skip meds and focus on mechanical support and evacuation.
This is general information, not medical advice. If you have health conditions or take prescriptions, talk to your clinician about what belongs in your personal kit before your next season.
When to turn back
Turning back can feel like failing, especially when the summit is “right there.” The trail does not care. Use concrete triggers so you do not negotiate with yourself while the situation worsens.
Non-negotiable reasons to stop and get help
- Possible head injury with confusion, repeated vomiting, worsening headache, or altered behavior.
- Suspected spinal injury, severe chest pain, or difficulty breathing.
- Anaphylaxis symptoms, even if they improve after epinephrine.
- Uncontrolled bleeding.
- Open fracture or obvious deformity.
- Inability to bear weight after lower-limb injury.
- Signs of shock: pale, sweaty, weak pulse, fainting, confusion.
- Rapidly worsening swelling, numbness, or loss of function.
Strong reasons to turn back early
- You are more than halfway in and daylight is tightening.
- Weather is deteriorating or temperatures are dropping.
- The injured hiker is slowing the group below a safe pace.
- The route ahead is technical, exposed, or requires scrambling.
- You have limited water, limited battery, or poor cell coverage ahead.
A simple framework: time, terrain, team
- Time: Do you have enough daylight to move slowly and still exit?
- Terrain: Does the route ahead punish instability, like scree, steep descents, crossings, or ladders?
- Team: Do you have enough healthy people to support and, if needed, go for help?
If two out of three look bad, your “continue” option is usually wishful thinking.
Signaling and evacuation
On popular trails, the fastest rescue is often another hiker with a phone and a strong stride. On remote trails, it might be hours. Your job is to communicate clearly and conserve resources.
Before you call
- Get to the safest nearby spot, even if it means moving 20 meters.
- Add layers and get the injured person insulated from the ground.
- Prepare key info: location, what happened, injuries, and what the person can and cannot do.
- Write down basics: time of injury, major changes, and what you gave (meds, epinephrine). It helps you think and helps rescuers.
If you have cell service
- Call emergency services and state: who, what, where, when, weather, and plan.
- If you do not know your exact coordinates, use a map app to read them off.
- Conserve battery: lower screen brightness, close apps, keep the phone warm.
If you have a satellite messenger
- Send coordinates and a short description: “possible fracture, cannot bear weight” or “bleeding controlled, hiking out slowly.”
- Keep messages brief and factual. Avoid guesswork.
If you need to send people for help
- Send two people if possible.
- They should carry: phone or messenger, headlamp, layers, water, and written coordinates.
- Agree on a return plan and timeframe.
While waiting
- Monitor mental status, warmth, and pain trends.
- Keep the person hydrated and fed if they are alert and not nauseated.
- Re-check circulation below wraps or splints regularly.
Heat, cold, and allergies: fast red flags
Some of the most dangerous day hike emergencies are not dramatic injuries. They are body systems drifting out of range.
Heat illness
- Heat exhaustion: heavy sweating, weakness, headache, nausea, cramps. Stop, cool down, hydrate, and reassess.
- Heat stroke red flags: confusion, collapse, seizures, or hot skin with worsening symptoms. This is an emergency. Cool aggressively and call for rescue.
Hypothermia on “mild” days
- Shivering that is getting stronger, clumsiness, slurred speech, unusual irritability, or zoning out are not personality quirks. Add insulation, get out of wind and wet, feed and hydrate if they can swallow, and consider ending the hike early.
Allergic reactions
- Hives and itching can be mild. Trouble breathing, throat tightness, facial swelling, vomiting, or faintness after a sting or food is not mild. Use prescribed epinephrine and get help.
Field notes that prevent repeats
After you are safely back, do a quick debrief. This is the unglamorous part that saves future trips.
- Shoes and socks: Did the blister come from fit, moisture, grit, or lacing?
- Pace and breaks: Were you rushing descents, skipping water, or hiking too late?
- Navigation: Did a wrong turn add mileage that pushed fatigue?
- Kit audit: What did you actually use? What did you wish you had?
- Quick documentation habit: If someone was truly injured, write down the timeline, major symptoms, and what you did. Next-day you will not remember it clearly, and clinicians love specifics.
Trail safety is a system, not a single heroic moment. The more you practice calm assessment and early decision making, the fewer “minor” injuries become big problems.
One last reminder: Nothing here replaces hands-on training. If you hike often, a wilderness first aid course is one of the best gear upgrades you can buy, because it weighs nothing and it is always in your pack.