Sentinel Bridge Half Dome Reflection

Maya Lin
Maya Lin is a travel journalist and outdoor enthusiast who believes the best trips combine rugged adventures with urban comforts. After spending six years backpacking across four continents, she founded Trail & Town Guide to help fellow travelers navigate both hidden mountain passes and bustling city neighborhoods with confidence.
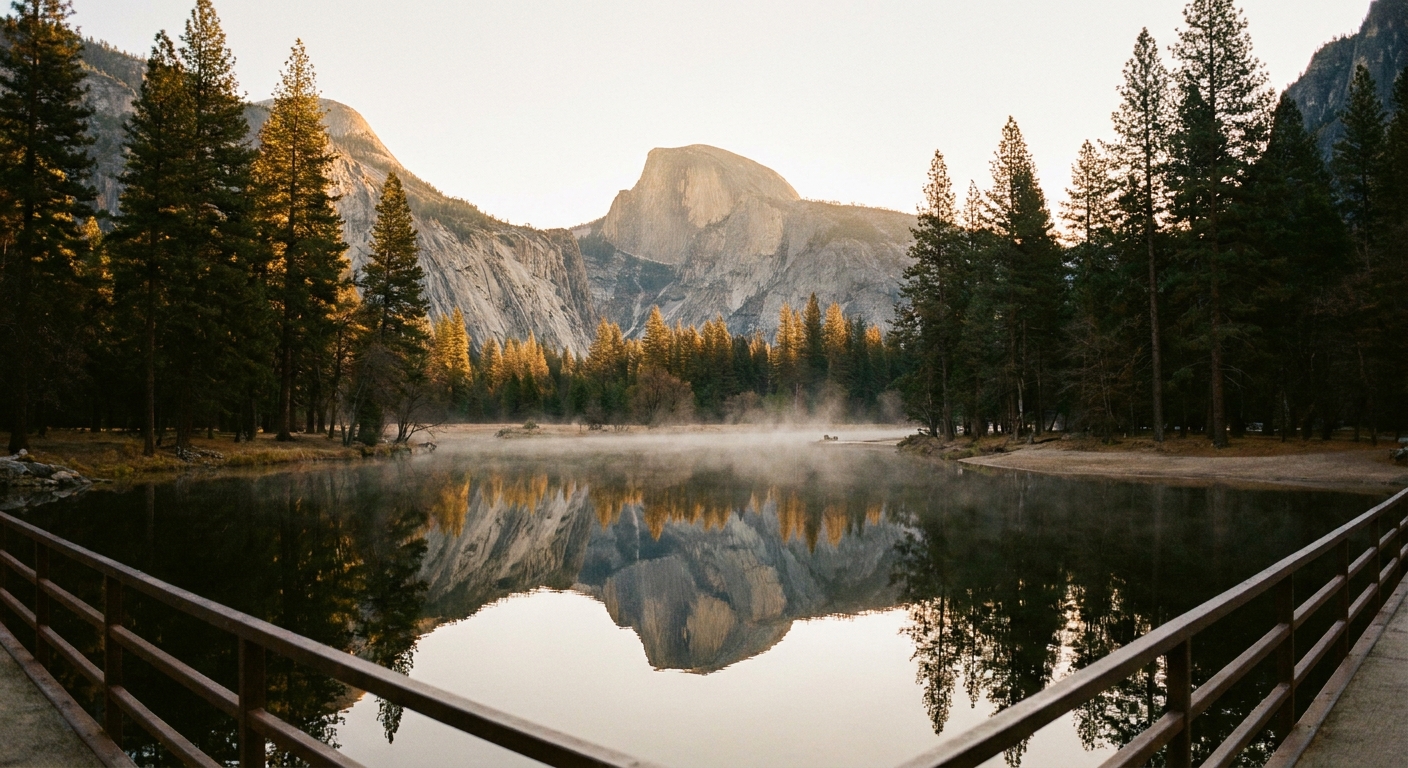
The first time I tried to photograph Half Dome’s reflection from Sentinel Bridge, I showed up with big sunrise dreams and a very average reality: rippled water, a handful of tripods already lined up, and me learning (again) that Yosemite rewards early mornings but does not promise mirror-flat conditions.
That is the thing about Sentinel Bridge. The view is practically guaranteed. The reflection is not. This page is built so you can stack the odds in your favor, budget your time, and have a clean pivot if the Merced River is doing its wavy, glittery thing instead of behaving like a mirror.
Quick plan at a glance
Time budget
- Drive and park: often 10 to 25 minutes once you are in Yosemite Valley (longer in peak mid-morning and afternoons)
- Walk to the best spots: 2 to 6 minutes each way (it is right at the bridge)
- Photo and linger time: 15 to 45 minutes
- Total stop: 30 to 75 minutes
If you only have 20 minutes
- Go straight for the signed Sentinel Bridge Parking area on Sentinel Drive first.
- If it is full, take the first legal pullout you find nearby where you are fully off the roadway, and do not overthink it.
- Walk onto Sentinel Bridge and set up on the upstream side so you are facing Half Dome.
- If the river surface is choppy and the reflection is broken, take a few non-reflection shots and move on. This is not a spot worth forcing when the water will not settle.
When to go
Sentinel Bridge works in a wide range of conditions, but your priorities determine the best time.
Sunrise
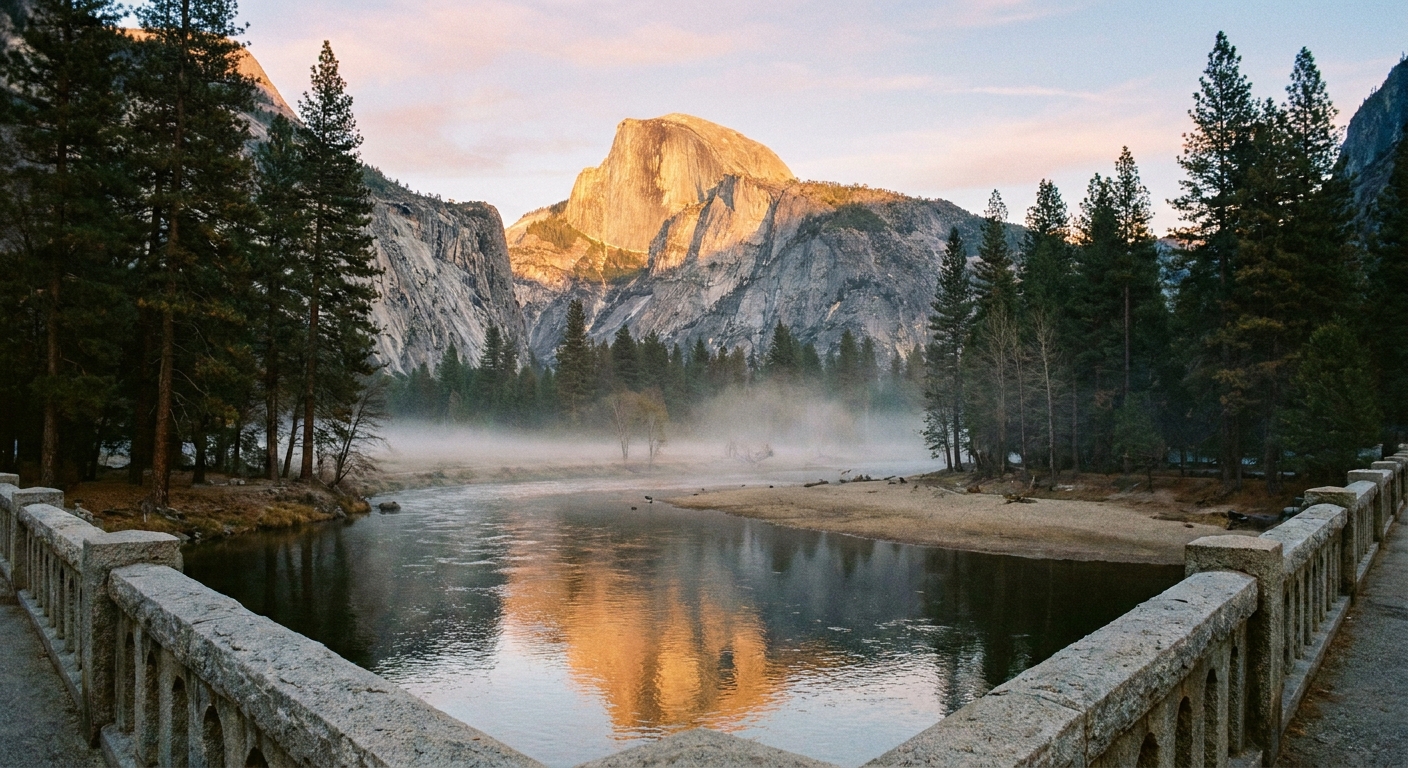
If you want the classic “postcard” reflection, go early. Around sunrise, the air is often calmer, the river can look smoother, and you will often get that quiet valley mood before tour buses and heavy traffic wake everything up.
- Pros: Calmest water, fewer people, that crisp morning feel
- Cons: Cold mornings, fast-changing light, you still might get ripples
Later morning
Later light can make Half Dome pop and the scene feel brighter and more colorful, especially on clear days. The tradeoff is wind and increased river texture. You might not get a perfect reflection, but you can still capture beautiful images with layered pines, granite, and the Merced’s shimmer.
- Pros: Easy light for phones, easier logistics, comfortable temps
- Cons: More crowds, more ripples, more cars to contend with
Near sunset
Evenings can be gorgeous for warm tones and a softer vibe, but the reflection success rate depends on wind and water movement. If your goal is “reflection or nothing,” sunrise is still my pick.
Season notes
A quick note on conditions, because they matter here. Spring runoff can mean faster current and busier water, even on calm mornings. Summer afternoons tend to bring more breeze and sparkle than mirror. Fall and winter mornings often have better odds for smooth water, but winter also brings icy edges and slippery pullouts, so keep your footing and stay conservative near the banks.
Maya’s rule of thumb: If you show up and the river is already textured with little wind lines, the reflection is likely to stay broken. Give it a short wait, then pivot.
Where to stand
Sentinel Bridge crosses the Merced River on Sentinel Drive in Yosemite Valley. Half Dome sits to the east, so for the classic view you will be looking generally east along the river.
Spot 1: Bridge, upstream side
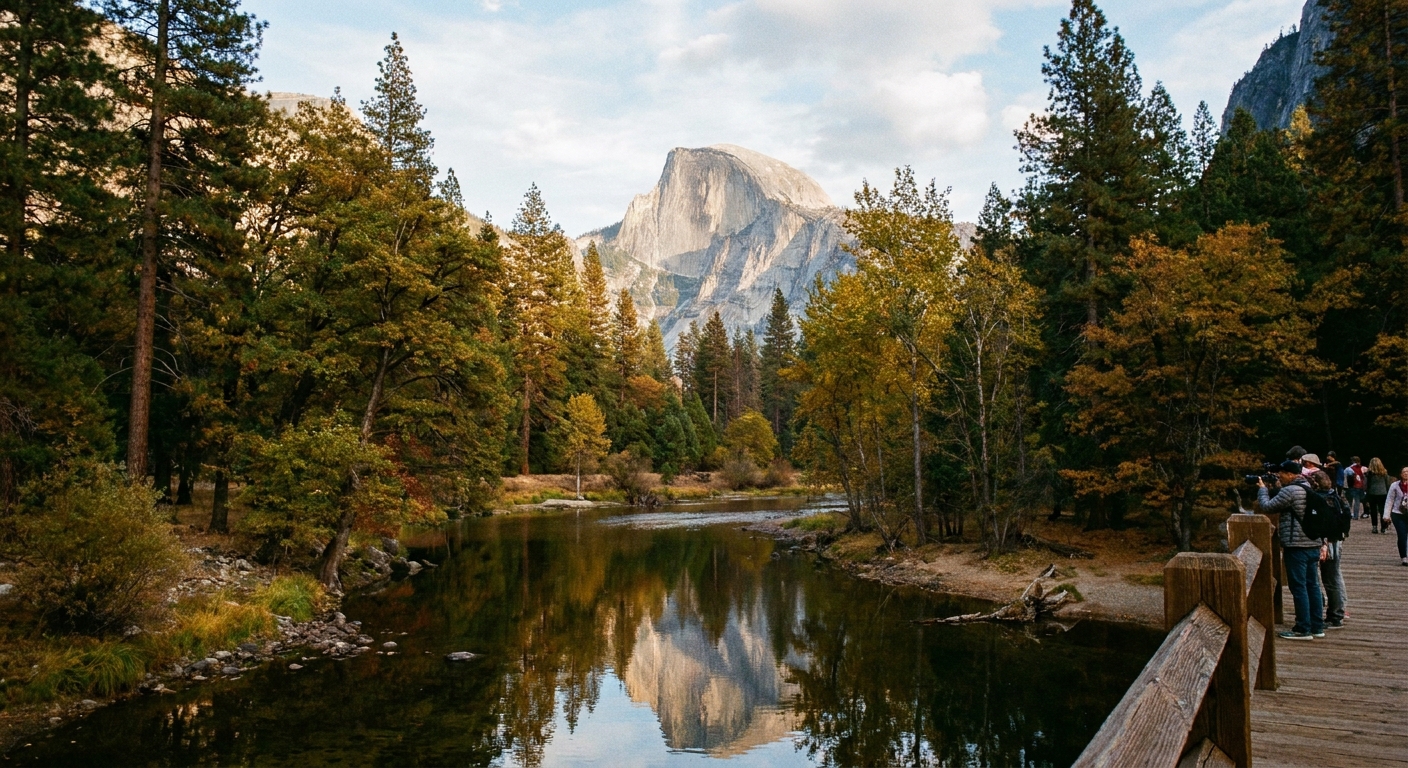
This is the go-to for the classic Half Dome reflection. Walk onto the bridge and position yourself on the side that looks upstream (east). You want a section of river that is wide enough to hold Half Dome’s shape without being interrupted by foreground eddies.
- What to look for: smooth water patches, darker water (less glare), and a clear line of sight past the trees
- Best for: symmetry, clean reflection, wide shots
Spot 2: Small shifts, same side
If the classic upstream rail is crowded, stay on the upstream side but slide a few steps left or right. Tiny changes in position can help you avoid tripod legs in the foreground, find a cleaner gap through the trees, or line up Half Dome and its reflection more neatly.
- Best for: getting your frame without changing the view
Spot 3: Riverbank near the bridge
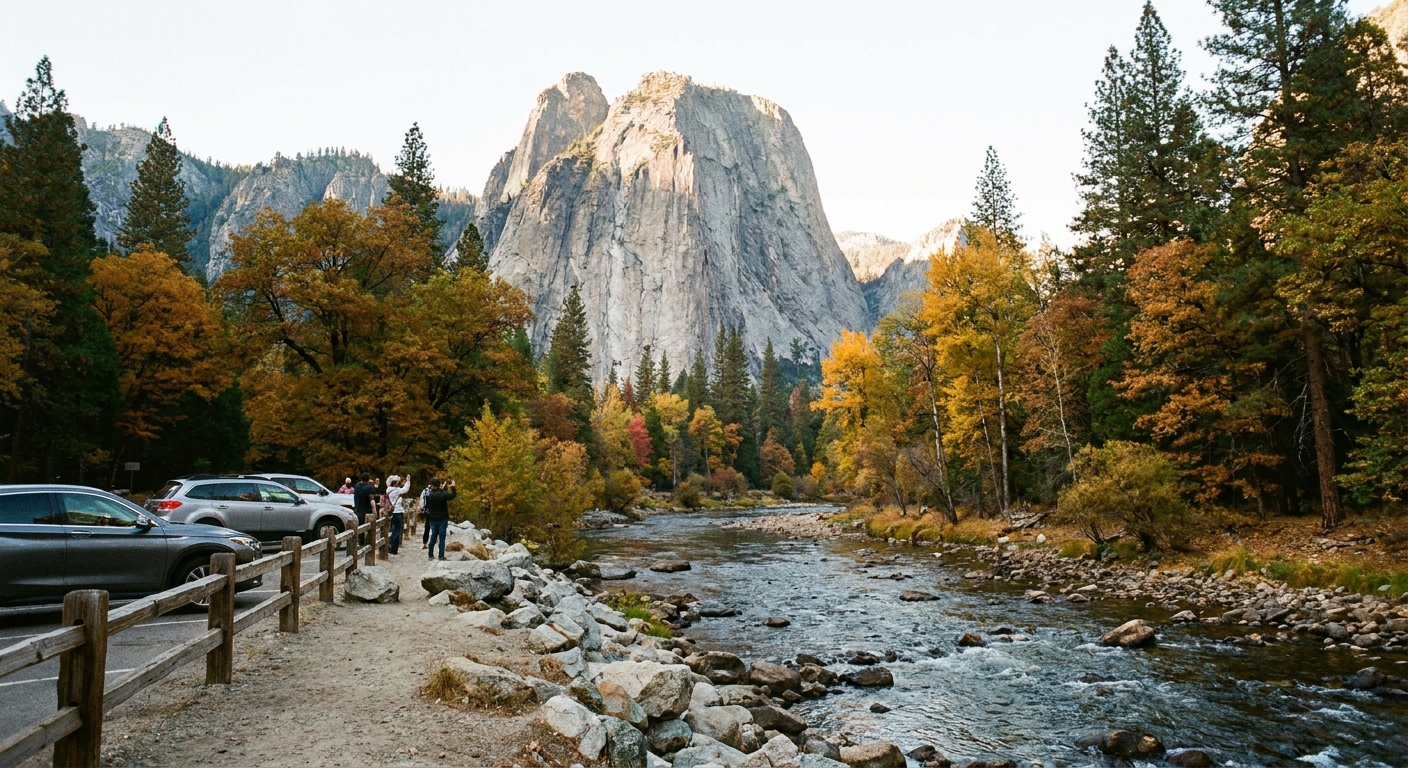
If you want a slightly lower perspective, look for safe pull-offs and established paths near the bridge area that lead toward the river’s edge. Be conservative here. Yosemite’s riverbanks can be muddy, icy, or fragile depending on season. Stay on durable surfaces and do not trample vegetation for a photo.
- Best for: a more immersive perspective and fewer railings in your frame
Accessibility
The bridge viewpoint itself is flat and the walk from the main parking area is short. Riverbank options can be uneven, muddy, or icy, so I treat those as optional and conditions-dependent.
Quick composition tips
- Level your horizon: bridge railings make crooked shots obvious.
- Use the river as a leading line: center symmetry for a clean reflection, or offset Half Dome for a more dynamic look.
- Tap to expose for Half Dome: otherwise bright water can trick your phone into underexposing the dome.
- Try a vertical frame: it often fits Half Dome plus reflection better than you expect.
Parking near the bridge
Parking here is both easier and harder than people expect. Easier because there is an official parking area. Harder because it fills fast and the whole stretch of Valley driving can feel like a slow scavenger hunt.
Best bet: Sentinel Bridge Parking
Your primary target is the signed Sentinel Bridge Parking area on Sentinel Drive near the bridge. It is not huge, and at popular times it can feel like it turns over in slow motion, but it is the most direct option. Parking patterns can also shift seasonally or during road work, so I always sanity-check signs when I pull in.
If that lot is full
- Nearby pullouts: Look for existing legal pullouts along Sentinel Drive. If they are full, keep moving.
- Early morning: usually easiest time to find a spot near the bridge.
- Midday: expect more circling and longer walks if you end up parking farther away.
Do not do this
- Do not park on vegetation or soft shoulders. It damages the landscape and can get your car towed or ticketed.
- Do not block travel lanes or bike lanes.
- Do not create a new pullout. If it is not clearly a parking space, treat it as a no.
My low-stress strategy
If the Sentinel Bridge Parking area is full, I give myself one slow pass to check nearby legal options, then I commit to a farther spot and walk. You will spend less time stressed in a loop and more time actually enjoying the view.
If the reflection fails
Sometimes you do everything right and the river still refuses to cooperate. Here is the decision tree I use so the stop stays satisfying.
Give it 10 minutes
- If you see occasional smooth patches, wait briefly. Wind can lull.
- If the entire surface is consistently rippled, the odds of a sudden perfect mirror are low.
Shoot the non-reflection version
Even without the mirror, Sentinel Bridge is one of the best places to shoot Half Dome framed by valley trees. Aim for:
- Telephoto feel: zoom in to compress layers of trees and granite.
- Texture: let the sparkling river be the foreground.
- People scale: include silhouettes on the bridge for a sense of place.
Pivot: turn around
If you are standing on the bridge and you turn to look downstream (west), you are looking away from Half Dome. That is not a reflection backup plan, but it is still worth a few frames for a different Valley mood. In clearer conditions, and especially when foliage is thinner, you may be able to spot Yosemite Falls off in the distance from this general direction.
Gear basics
You do not need a complicated setup here, but a few small choices can make your keeper rate jump.
- Phone: Try your 2x or 3x lens to make Half Dome feel larger. Tap to expose for the dome, and if HDR makes the water look weirdly crunchy, toggle it off and try again.
- Camera: A moderate zoom is great for cropping out clutter on the banks. A tripod helps at dawn, but it is optional.
- Polarizer (if you have one): A circular polarizer can cut glare, but it can also reduce a reflection depending on your angle. If reflections are your whole goal, take one frame with it and one without and decide later.
What to pack
- Layers: mornings in the Valley can be cold, even when afternoons are warm.
- Traction in winter: if there is ice near pullouts or paths, microspikes can help, but use your judgment and stay off slick river edges.
- Tripod (optional): helpful at dawn, but not required for great shots.
- Lens cloth: river mist and cold mornings love to fog glass.
- Reusable mug: this is me admitting I plan my stops around coffee as much as light.
Safety and etiquette
- Stay behind railings on the bridge. It is a traffic corridor, not a photo platform designed for wandering.
- Watch for bikes and vehicles. Do not step into the road for a wider angle.
- Leave no trace on the riverbanks. Do not shortcut through vegetation for a “cleaner” frame.
- Be kind with tripod space. Everyone is chasing the same moment. A little communication goes a long way.
FAQ
Is Sentinel Bridge good if I am not a photographer?
Yes. It is one of the easiest, highest-reward viewpoints in Yosemite Valley, even if you just want a quick look at Half Dome with the river and pines in front.
How far is the walk?
From Sentinel Bridge Parking, it is a short walk to the bridge. From a nearby pullout, it is usually just a couple of minutes. If you end up parking farther away, the walk can stretch longer, but the viewpoint itself is not a hike.
Do I need a permit for this stop?
No permit is required specifically to stand on Sentinel Bridge. You still need to follow whatever park entry rules are in effect for your visit, including any day-use reservation requirements if Yosemite is using them when you go.
What time should I arrive for sunrise?
Aim to park 20 to 40 minutes before sunrise so you are not rushing and can choose your spot on the upstream side of the bridge. If you are visiting during a busy season, arriving earlier can help with parking and space.