Black Canyon North Rim: Overlooks, Short Walks, and When It Beats the South Rim
If you already read our South Rim article , you know the easy truth: the South Rim is the park’s front door. The North Rim is the back porch. Fewer people. Fewer services. More of that raw, “is this really a national park overlook I’m alone at?” feeling.
This guide is not a repeat of the South Rim highlights. It is the trip-planning fork in the road: what the North Rim access is really like, which overlooks are the highest payoff for the least walking, how tough the North Vista route feels on the ground, and when North Rim light and seasonality actually beat the South Rim for photos and crowd levels.

North Rim vs South Rim
If you want a quick mental model, here it is.
- South Rim: more overlooks, more signage, easier access, closer to Montrose, better for first-timers and short visits.
- North Rim: quieter, more remote, rougher access road, fewer overlooks, bigger sense of wilderness, and a couple of short walks that feel surprisingly “backcountry-adjacent.”
Choose the North Rim if you value solitude, don’t mind slower driving, and want a more rugged vibe without committing to a full-day hike. Choose the South Rim if you want maximum viewpoints per hour and the most straightforward logistics.
Getting to the North Rim
The North Rim is reached via the North Rim Road (off Highway 92). Unlike the South Rim’s paved main approach, the North Rim access is typically a graded dirt road that can be washboarded, dusty, and muddy after storms. In dry weather, many standard passenger cars can make it if you drive slowly and avoid “I have something to prove” speeds. After rain, snowmelt, or during spring shoulder season, conditions can change fast.
What to expect
- Slow travel: plan for a longer approach than the mileage suggests.
- Washboard and dust: common in summer, especially after heavy visitation.
- Ruts and mud: more likely after storms. If you see standing water in dips, assume it is deeper than it looks.
- Limited turnaround points: it feels more remote because it is. Keep your tank happy and your plans flexible.
When to skip it
If you are traveling with a low-clearance vehicle and the forecast shows steady rain, or if you are visiting very early or late in the season when freeze-thaw is a factor, the South Rim is usually the safer bet. The North Rim is incredible, but it is not worth a stressed drive that eats your day and your nerves.
Pro move: check current conditions with the National Park Service before you commit. In shoulder seasons, the difference between “fine” and “nope” can be 24 hours.
Best quick North Rim overlooks
The North Rim is for travelers who like their viewpoints with a side of quiet. Overlooks here tend to feel less “developed” than the South Rim, which is exactly the point.
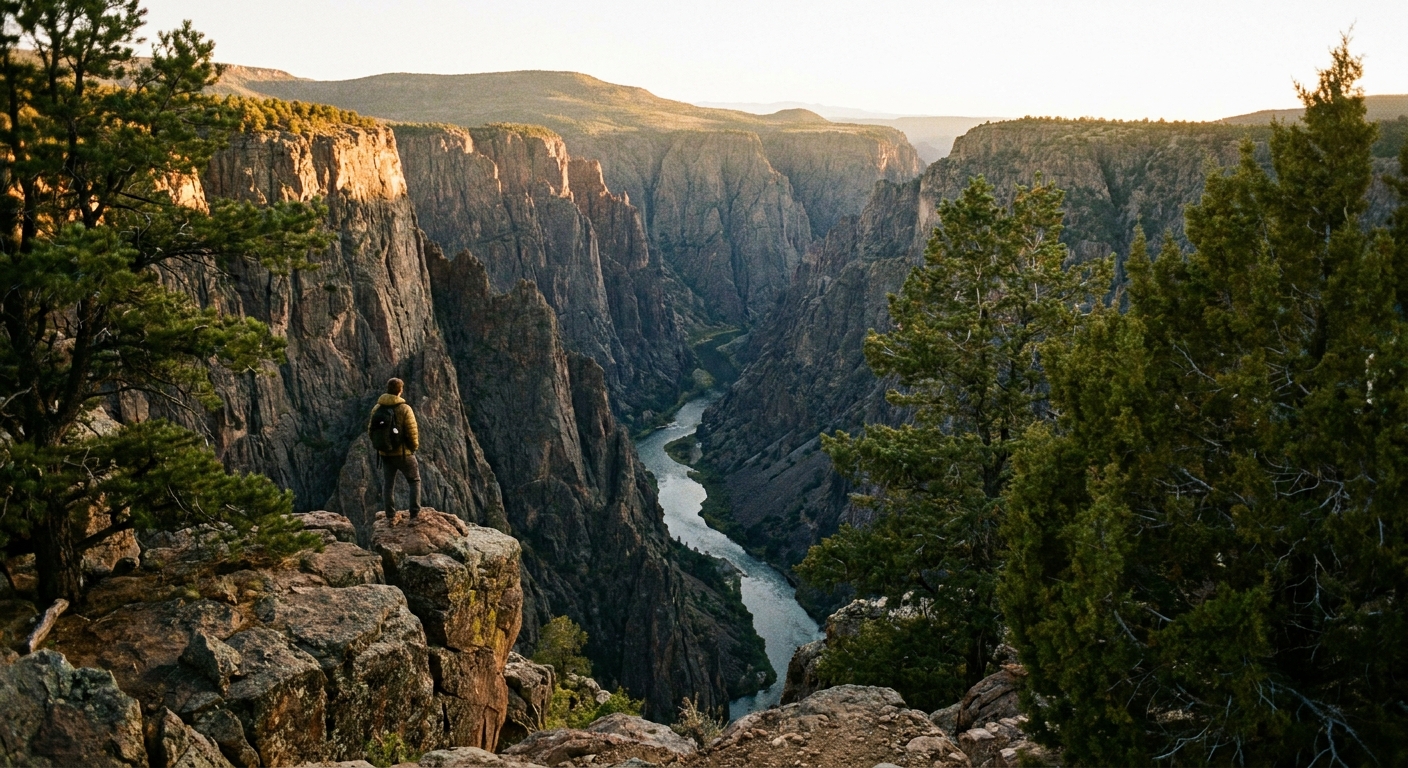
Chasm View
This is the headline stop for most North Rim first-timers, and it earns it. The canyon drops away abruptly and dramatically, and the scale feels extra intense from this side.
- Why it is worth it: huge, immediate canyon drama without a long hike.
- Best for: first North Rim stop, sunset color on the walls, and anyone who wants maximum wow per minute.
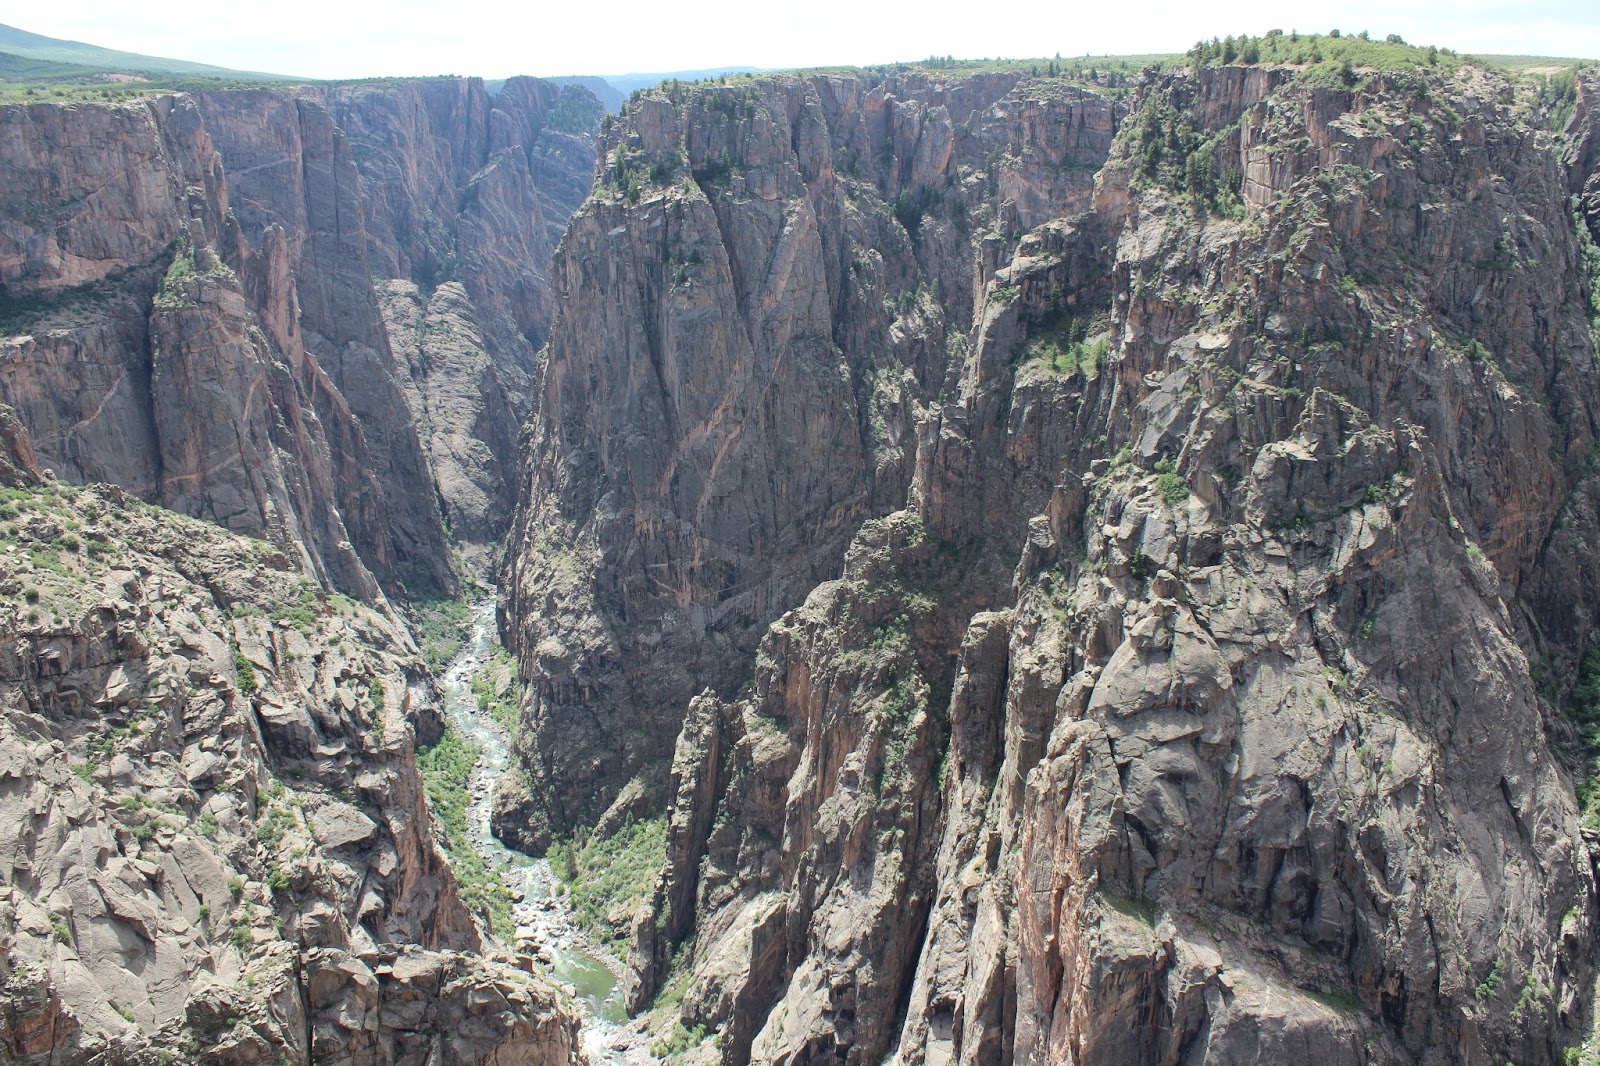
Narrows View
This is the “look straight down and try to process it” stop. The canyon feels especially tight and vertical here, with the kind of depth that makes even seasoned park visitors go quiet for a minute.
- Why it is worth it: some of the most intense depth and inner-canyon drama you can get with a short walk.
- Best for: big vertical views, mid-to-late-day shadows that carve the walls, and anyone who wants a North Rim overlook that feels a little unreal.
Balanced Rock View
This is a fun one for anyone who likes a “subject” in the foreground, not just a sweeping canyon. The balanced rock itself can anchor compositions that feel more three-dimensional.
- Why it is worth it: a recognizable feature for scale and framing.
- Best for: wide-angle shots that include foreground rock, and families who want a memorable stop without much walking.

How this pairs with your South Rim plan: if your South Rim day was all about “collecting overlooks,” let the North Rim day be about staying at a few and watching the canyon change. Fewer stops, more time per stop.
North Vista Trail
North Vista is the North Rim’s signature short-to-moderate hike option, and it is the best way to earn a view instead of just stepping out of the car for one.
The payoff
Most people hike North Vista to Exclamation Point, the classic turnaround and the primary reward for the short-to-moderate version of this route. It is the spot where the canyon suddenly feels even deeper, even steeper, and somehow more three-dimensional than the roadside overlooks. If you only do one hike on the North Rim, make it this one to Exclamation Point.
The vibe
Expect a mix of forested walking and increasingly open rim-side views. It can feel deceptively easy on the way out, because the real effort is often the return climb and the cumulative effect of sun and altitude .
Difficulty
- Effort level: moderate for most active travelers, but it can feel harder on hot days or if you are not acclimated.
- Footing: generally straightforward, though you should still watch for loose dirt, roots, and the kind of trail texture that gets slick after rain.
- Exposure: you are near a canyon rim. If heights make you uneasy, take it slow and give yourself permission to turn around.
What to pack
- Water: more than you think for the mileage, especially in summer.
- Sun protection: hat, sunglasses, and sunscreen.
- Layers: mornings can be chilly even when afternoons bake.
- Traction: grippy shoes beat fashion sneakers every time.
How it compares to many South Rim strolls: South Rim has more easy, paved, and family-friendly viewpoint loops. North Vista feels more like a real hike, even though it is still accessible for most travelers who are comfortable walking on dirt trails.
Season and closures
The North Rim is more seasonal than the South Rim. Not in a “maybe it snows” way, but in a “this side can be inaccessible or not worth the effort at certain times” way.
What closes
- Road access: the dirt approach is vulnerable to snow, mud, and maintenance closures.
- Facilities and services: the North Rim has fewer amenities to begin with, so seasonal changes feel bigger.
- Shoulder season swings: spring and late fall can bring rapid shifts in conditions, including icy mornings and muddy afternoons.
When North Rim wins
- Peak summer crowds: when South Rim overlooks feel like a parking lot with a view, North Rim can still feel calm.
- Quieter sunrise or sunset: fewer people means fewer tripods in your frame and more room to breathe.
- Slow travel days: the longer drive forces a different pace that can be genuinely restorative.
When South Rim is smarter: short winter visits, uncertain weather, and any trip where you need guaranteed paved access and maximum services.
Photo timing
Black Canyon light is dramatic, but it is also tricky. The canyon is deep enough that shadows can swallow detail quickly, and mid-day sun often creates harsh contrast. The North Rim’s best photo moments tend to come with low-angle light.
Best times
- Sunrise: quiet, crisp air, and a calmer experience overall. Great if you want minimal people.
- Late afternoon to sunset: warm light can rake across the canyon walls, pulling out texture and color that looks flat at noon.
What to shoot
- Textures: layered rock, vertical striations, and shadow lines.
- Scale cues: use a foreground feature like balanced rock or trees near the rim to show how huge the canyon is.
- Moody contrast: on partly cloudy days, the North Rim can deliver that cinematic spotlight effect on the walls.
How this differs from the South Rim: the South Rim has more overlooks to chase different angles quickly. On the North Rim, I recommend picking one or two primary viewpoints and committing to the light as it evolves.
How to pair both rims
Option A: Two days
- Day 1 (South Rim): hit the major overlooks efficiently and take advantage of paved access and variety.
- Day 2 (North Rim): slow down, do North Vista to Exclamation Point if conditions allow, and plan your day around late light at one key overlook.
Option B: One day
- Choose South Rim if you have limited time, uncertain weather, or you want the simplest logistics.
- Choose North Rim if your goal is quiet viewpoints, a more rugged feel, and you can handle a slower dirt-road approach.
North Rim essentials
- Offline map: service can be spotty. Download what you need before you lose bars .
- More water than you think: the canyon country air dries you out fast.
- Snack buffer: fewer services means fewer bailout options.
- Warm layer: even in summer, shade and wind at the rim can feel surprisingly cool.
- Leave No Trace mindset: stay on established trails and keep the rim area pristine.
If your South Rim day felt like a greatest-hits album, the North Rim is the acoustic set. Fewer tracks, more atmosphere, and you notice details you missed the first time.
Quick checklist
- Go North Rim today if: the road is dry, you want fewer people, and you are happy with a handful of excellent overlooks instead of many.
- Stick with South Rim today if: you need paved access, you are visiting in winter or messy shoulder season weather, or you want the widest range of viewpoints with minimal uncertainty.
Either way, the canyon delivers. The question is whether you want it served with convenience, or with quiet.