Bryce Canyon Sunrise: Easy First-Light Viewpoints
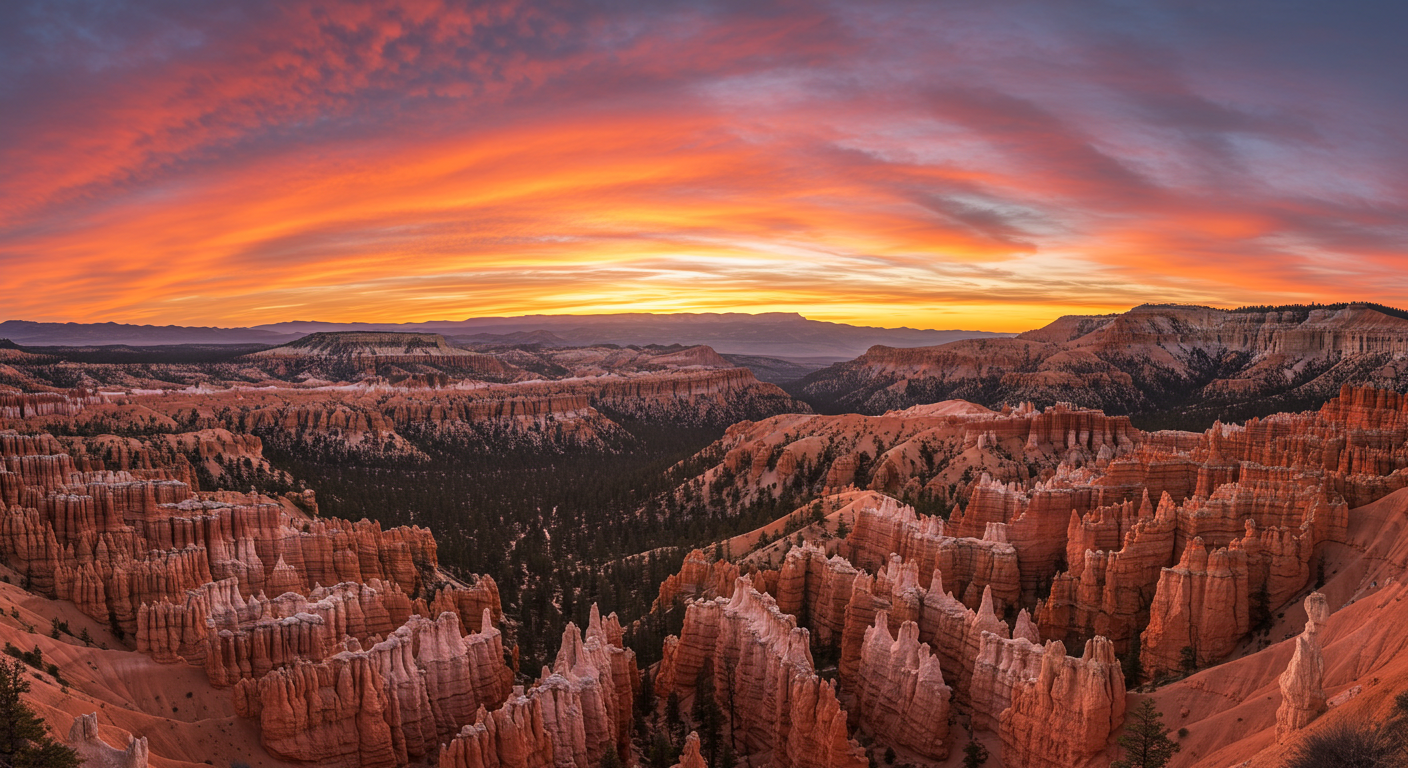
Bryce Canyon sunrise is the rare kind of “worth it” early wake-up: hoodoos catch fire, shadows stretch across the amphitheater, and the air is so crisp it feels like you can hear the rock cooling. The good news for first-timers is that you do not need a hardcore hike to get an iconic view. You just need the right stop, the right timing, and a plan that respects two realities: parking is easiest before dawn, and it is often genuinely cold at sunrise, even in summer.
This guide is built for a sunrise-only window and ranked by minimal walking and maximum payoff, with a clean way to layer in Navajo Loop and Queen’s Garden later if you decide you want more.

Sunrise basics: before you go
At a glance
- Arrive: parked 30 to 45 minutes before sunrise
- Bring: headlamp, warm layers, water
- Winter add-on: traction for icy rim paths
- First-timer pick: Sunrise Point
- Getting around: the park shuttle does not run before sunrise, so plan on driving your own vehicle (or rideshare) for this itinerary
Pick a target, arrive earlier than you think
In Bryce, the best color often starts 10 to 20 minutes before the official sunrise time, depending on clouds and haze. Plan to be parked and walking (or already set up) 30 to 45 minutes before sunrise. In peak season, earlier is calmer and far easier for parking.
Driving and access
- Most classic overlooks are car-friendly, even in the dark, but always leave room for changing conditions. Snow, ice, wildlife, and occasional temporary closures can slow you down.
- Know the spur road: Sunrise Point and Sunset Point sit in the Bryce Amphitheater area off a short spur from the main park road. It is easy, just do not assume every viewpoint is directly on the main road.
- Gate timing: if you are staying outside the entrance, add time for the gate and have your pass or payment ready.
- Winter changes the equation: always check NPS current conditions before committing to a farther-in-the-park stop.
It is colder than the forecast sounds
Bryce sits at high elevation, and the rim can feel biting before the sun hits. Even in summer, a pre-dawn breeze can make it feel like a different season. The altitude also sneaks up on some visitors, so hydrate and take it easy if you are coming from low elevation.
- Base layer: long sleeve or light thermal if you run cold
- Mid layer: fleece or light puffy
- Shell: windbreaker or rain shell (wind is the usual culprit)
- Hands and head: thin gloves and a beanie go a long way
- Footing: in cold months, expect icy patches near the rim. Traction devices can be a confidence booster.
Bring a headlamp, even for “no-hike” viewpoints
Most easy viewpoints still involve walking a paved or packed path from the parking lot. It is simple, but it is dark, and you will enjoy it more if you are not using your phone flashlight around other people.
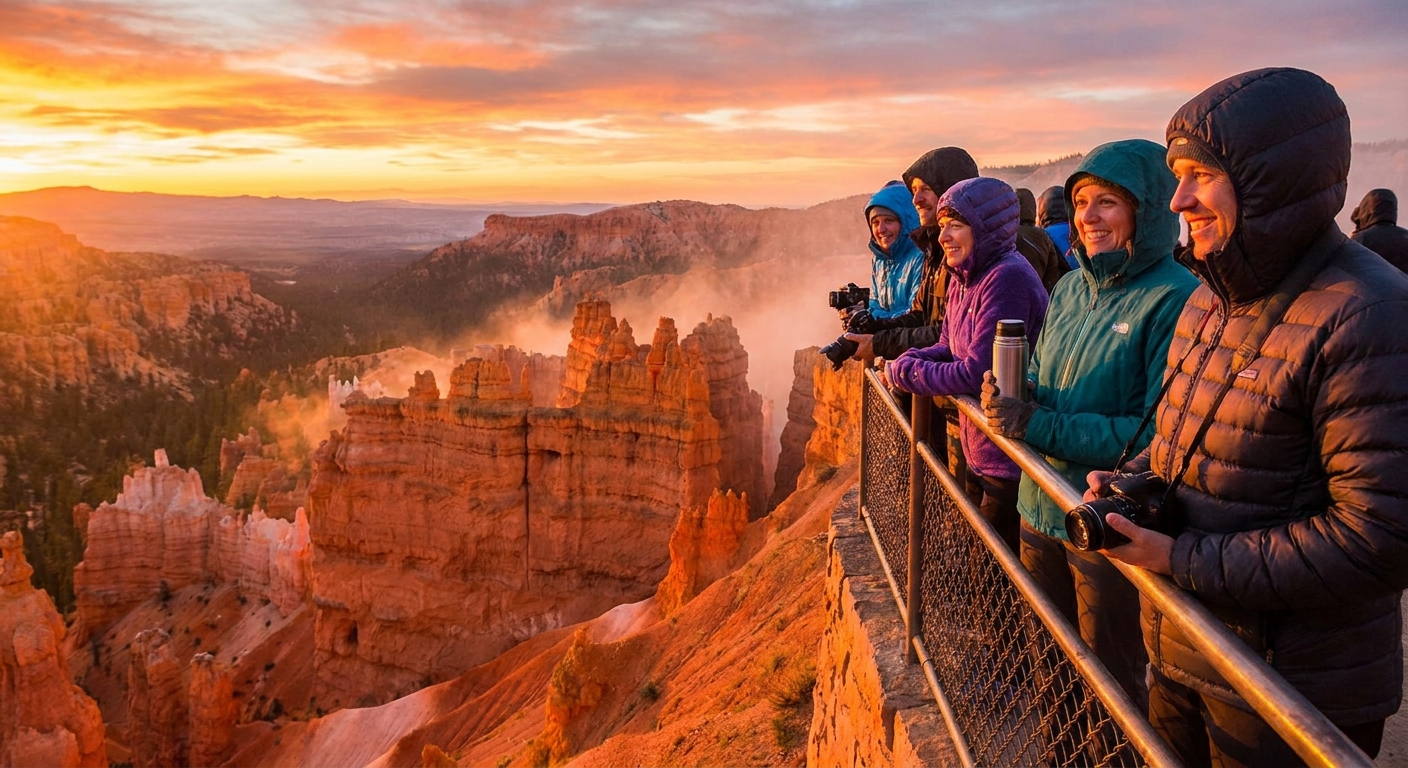
Rim safety
Stay behind railings and well back from the edge, especially if there is snow. Cornices and icy lips can be unstable, and the drop-offs are not forgiving.
Ranked: easiest sunrise viewpoints
This ranking prioritizes minimal walking, straightforward parking, and classic sunrise angles over “best possible photo spot if you are willing to work for it.” Restrooms are noted where they are commonly available, but do not count on services being open pre-dawn.
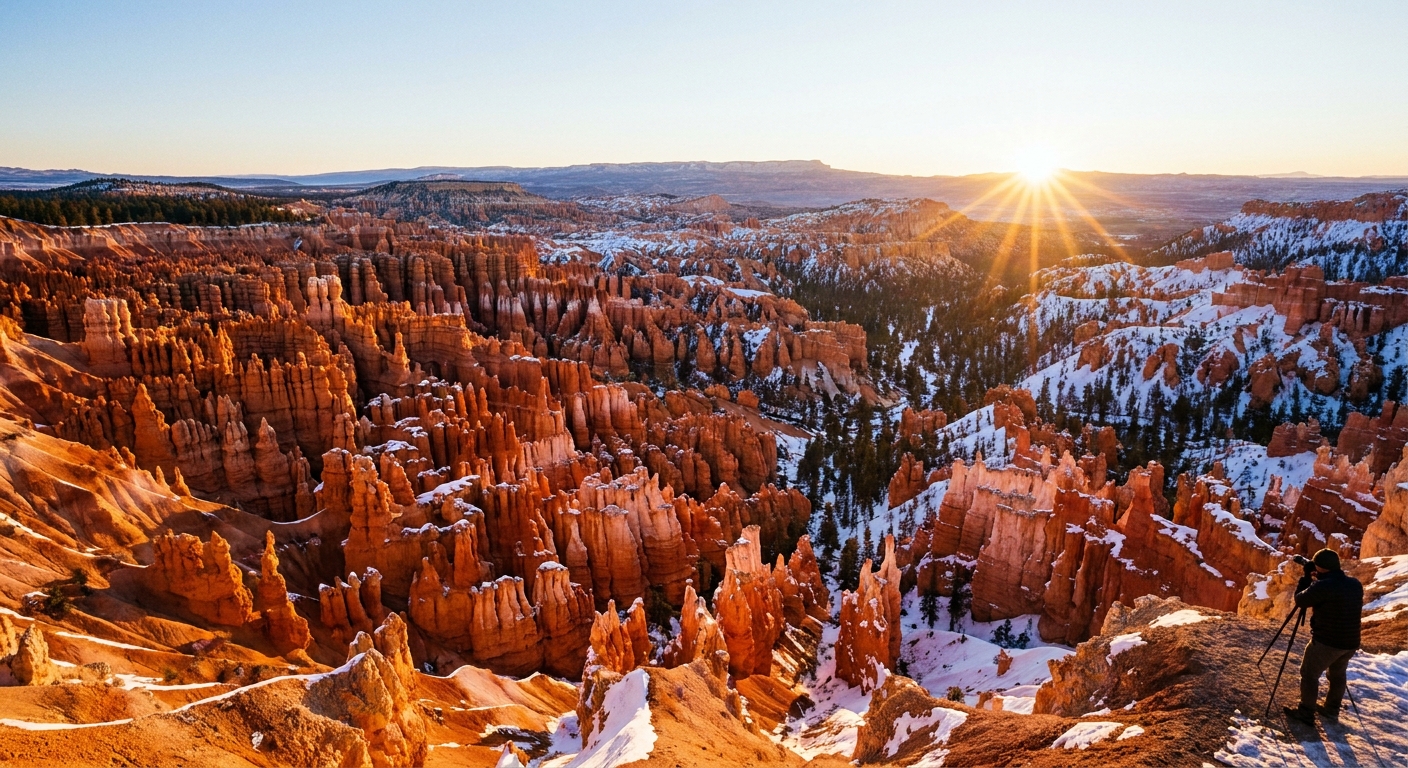
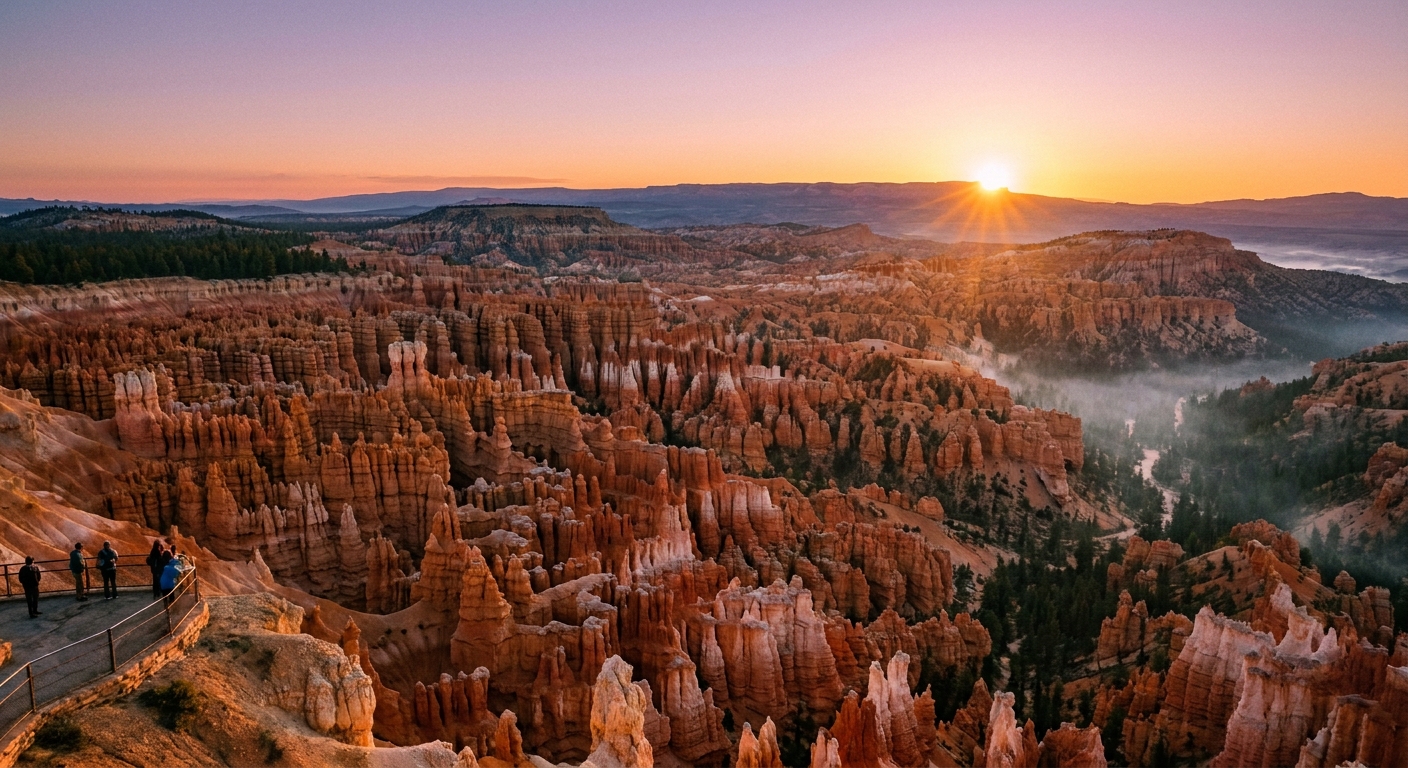
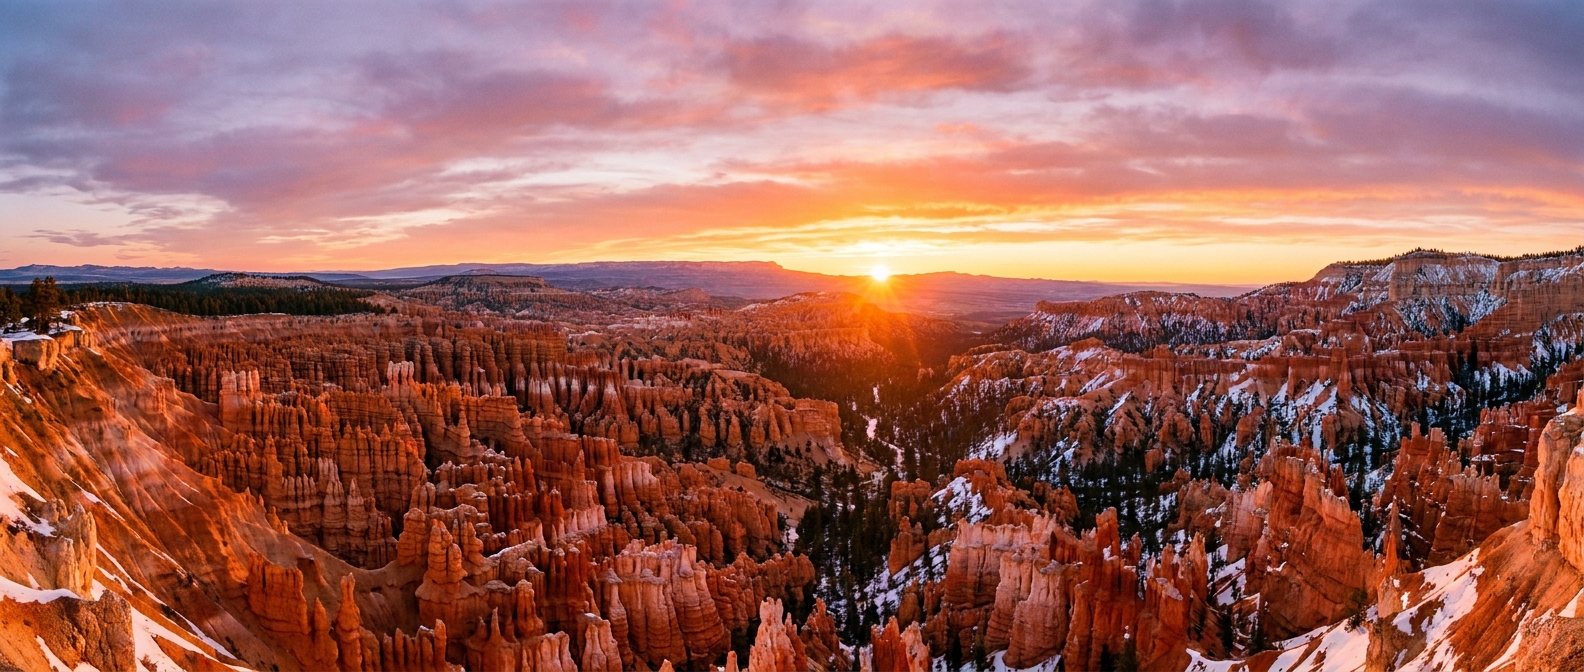
1) Sunrise Point
Why it works: The name is not subtle, and for good reason. Sunrise Point faces the Bryce Amphitheater and delivers immediate hoodoo drama with almost no effort.
- Walk: very short from the lot on paved paths
- Parking: limited and fills quickly, arriving early helps
- Restrooms: typically available in the Sunrise and Sunset Point area (hours can vary)
- Best for: first-time visitors, families, anyone who wants a sure thing
- Photo tip: Look for layered ridgelines and let the shadows do the work. If you have a zoom lens, isolate clusters of hoodoos as the light crawls across them.
2) Sunset Point
Why it works: Sunset Point is famous for evenings, but it is excellent at sunrise too, especially if you like strong contrast and a slightly different angle into the amphitheater.
- Walk: short and mostly paved
- Parking: limited, shared with the amphitheater area
- Restrooms: typically available nearby (hours can vary)
- Best for: people who want a quick rim stroll after sunrise (it connects nicely along the Rim Trail)
- Photo tip: Use the rail line to frame the scene, then step away from the densest crowd for a cleaner view.
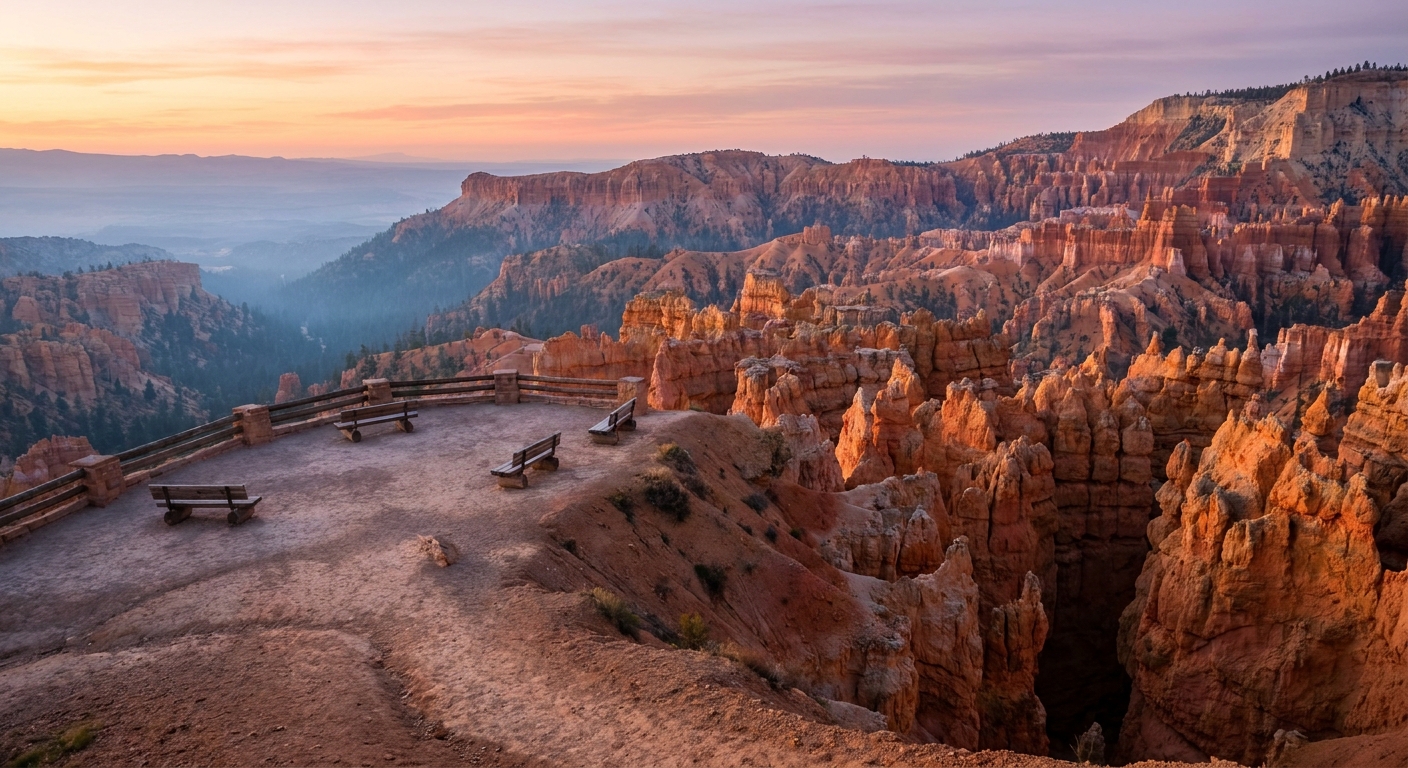
3) Inspiration Point
Why it works: If you can handle a bit more walking and a mild incline, Inspiration Point is the best “easy upgrade.” It is higher, broader, and tends to feel more expansive at first light.
- Walk: short but more uphill than Sunrise or Sunset Point
- Parking: small lots and roadside parking can fill
- Restrooms: sometimes available seasonally, do not assume pre-dawn
- Best for: sunrise with a little more breathing room if you spread out, and anyone who wants a wider panoramic feel
- Photo tip: This is a great spot for a vertical shot that includes sky color plus the amphitheater below.
4) Bryce Point
Why it works: Bryce Point delivers one of the most dramatic sunrise overlooks in the park, with a deep sweep of hoodoos and a sense of scale that makes you go quiet for a second.
- Walk: minimal from the overlook area
- Parking: usually easier than the amphitheater area, but it is farther down the road
- Restrooms: often available seasonally, hours vary
- Trade-offs: more exposed, often windier and colder
- Best for: photographers and anyone who wants the “poster” vista without a hike
- Photo tip: If you have a tripod, use it. Low light plus big contrast can get messy fast if you are hand-holding.
5) Fairyland Point
Why it works: When accessible, Fairyland Point is a calmer sunrise alternative that still feels quintessentially Bryce. It is a solid pick if you want to avoid the most popular amphitheater overlooks.
- Walk: short
- Parking: small, tends to be quieter when open
- Restrooms: limited, do not assume
- Trade-offs: access is seasonally variable. In winter, the Fairyland Point road is closed to cars and is used as a cross-country ski route.
- Best for: a lower-key sunrise experience
Which viewpoint should you choose?
- If it is your first time: Sunrise Point
- If you want easy with a little more space: Inspiration Point
- If you want the biggest drama with minimal walking: Bryce Point
- If you are traveling with someone who hates early mornings: Sunrise Point, then coffee immediately after
If you are truly time-boxed, commit to one viewpoint and do it well rather than trying to “collect” three in the dark.
A simple sunrise-only plan (90 minutes)
Option A: No-stress classic
- Arrive and park 30 to 45 minutes before sunrise at Sunrise Point.
- Watch first light and let the colors shift. The best moments are often pre-sunrise and just after the sun clears the horizon.
- Walk the Rim Trail toward Sunset Point for 10 to 20 minutes if you want a second angle without moving your car.
- Leave before the mid-morning rush or transition into a hike (see below).
Option B: Dramatic overlook
- Arrive early at Bryce Point.
- Stay through the first sun-on-rock moment, not just the sky color.
- Drive back and stop briefly at Inspiration Point if you have time and energy.
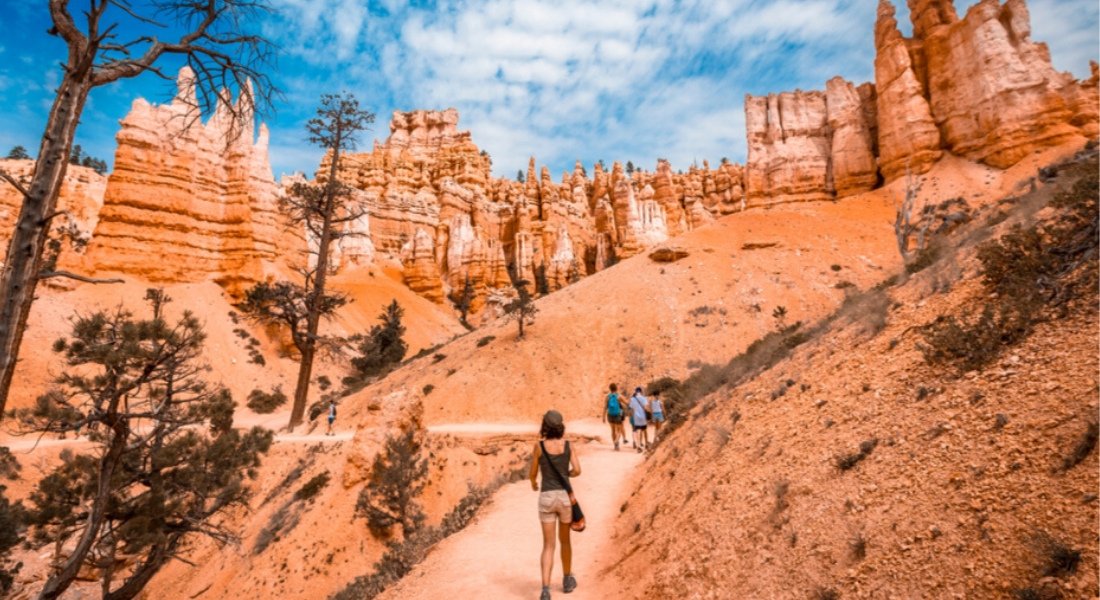
Add Navajo and Queen’s Garden
If you came for sunrise but you are feeling good afterward, the smartest move is to fold in a hike after the first light show, when the trail is visible and your body is warm. The classic combo is Navajo Loop + Queen’s Garden, typically done as a combined loop using the Rim Trail between Sunrise and Sunset Points to connect the two canyon trails.
Best order after sunrise
- Watch sunrise at Sunrise Point.
- Descend Queen’s Garden first from Sunrise Point. It is a more gradual descent, which feels kinder on sleepy legs.
- Connect to Navajo Loop and climb out on the Navajo side. The climb is the effort, so it is better once you are awake and the sun has taken the edge off the cold.
- Finish at Sunset Point, then stroll the Rim Trail back to Sunrise Point if you need to return to your car.
Winter and spring note for Navajo
In winter and often into spring, the Wall Street side of Navajo Loop can be closed due to ice and rockfall risk. If that is the case, you will use the Two Bridges side instead. Check the daily trail status with NPS before you commit.
Do this to keep it enjoyable
- Eat something warm before you drop in. A thermos coffee or tea is not just cozy, it helps you stay comfortable.
- Start with layers on, then strip a layer once you are moving. Sweat plus cold air is a fast way to feel miserable.
- Protect your knees if you are sensitive to descents. Trekking poles help, even on well-trodden trails.
Cold-season tips
Windproof beats heavy
A light puffy plus a wind shell often feels warmer than one bulky jacket because wind off the rim can cut straight through “warm” fabric.
Watch for ice near the rim
Even when the parking lots look dry, shady sections of rim paths can be slick. Take short steps, keep your hands free, and consider traction if conditions are icy.
Battery reality
Cold drains phone and camera batteries faster than you expect. Keep a spare battery or your phone in an inner pocket close to your body.
Quick photo checklist
- Turn off flash. It will not help and will annoy everyone.
- Use night mode carefully. It can blur moving clouds or people, so brace your phone on a rail or rock.
- Wipe your lens. Cold mornings and pockets create smudges that ruin sunrise color.
- Stay for the second act. The minutes after sunrise often bring the best hoodoo glow.
Sunrise etiquette
- Use dim lights and avoid blasting headlamps into faces.
- Keep voices low. People came for quiet as much as color.
- Step back from the rail after you get your shot so others can see.
- Stay on established paths. Fragile soils and icy edges are not a place to “find your own angle.”
If you do Bryce at sunrise once, you will start planning your next parks around first light. Choose one easy viewpoint, show up early, dress like it is colder than you think, and let the hoodoos do the rest.