Hawaiʻi Volcanoes National Park: First-Day Hikes and Crater Rim Stops
Hawaiʻi Volcanoes National Park is one of those places where your “quick stop” turns into a full day of staring into steam and thinking, this planet is alive. If you are a first-timer, the biggest decision is also the simplest: do you mostly want overlooks from the rim, or do you want to hike down into a crater and feel the scale of it in your legs?
This guide is built for a one-day visit with two priorities: (1) you get the best Kīlauea-area route in the right order, and (2) you do not waste your limited hours on stops that sound cool but do not deliver as well as the park’s greatest hits.
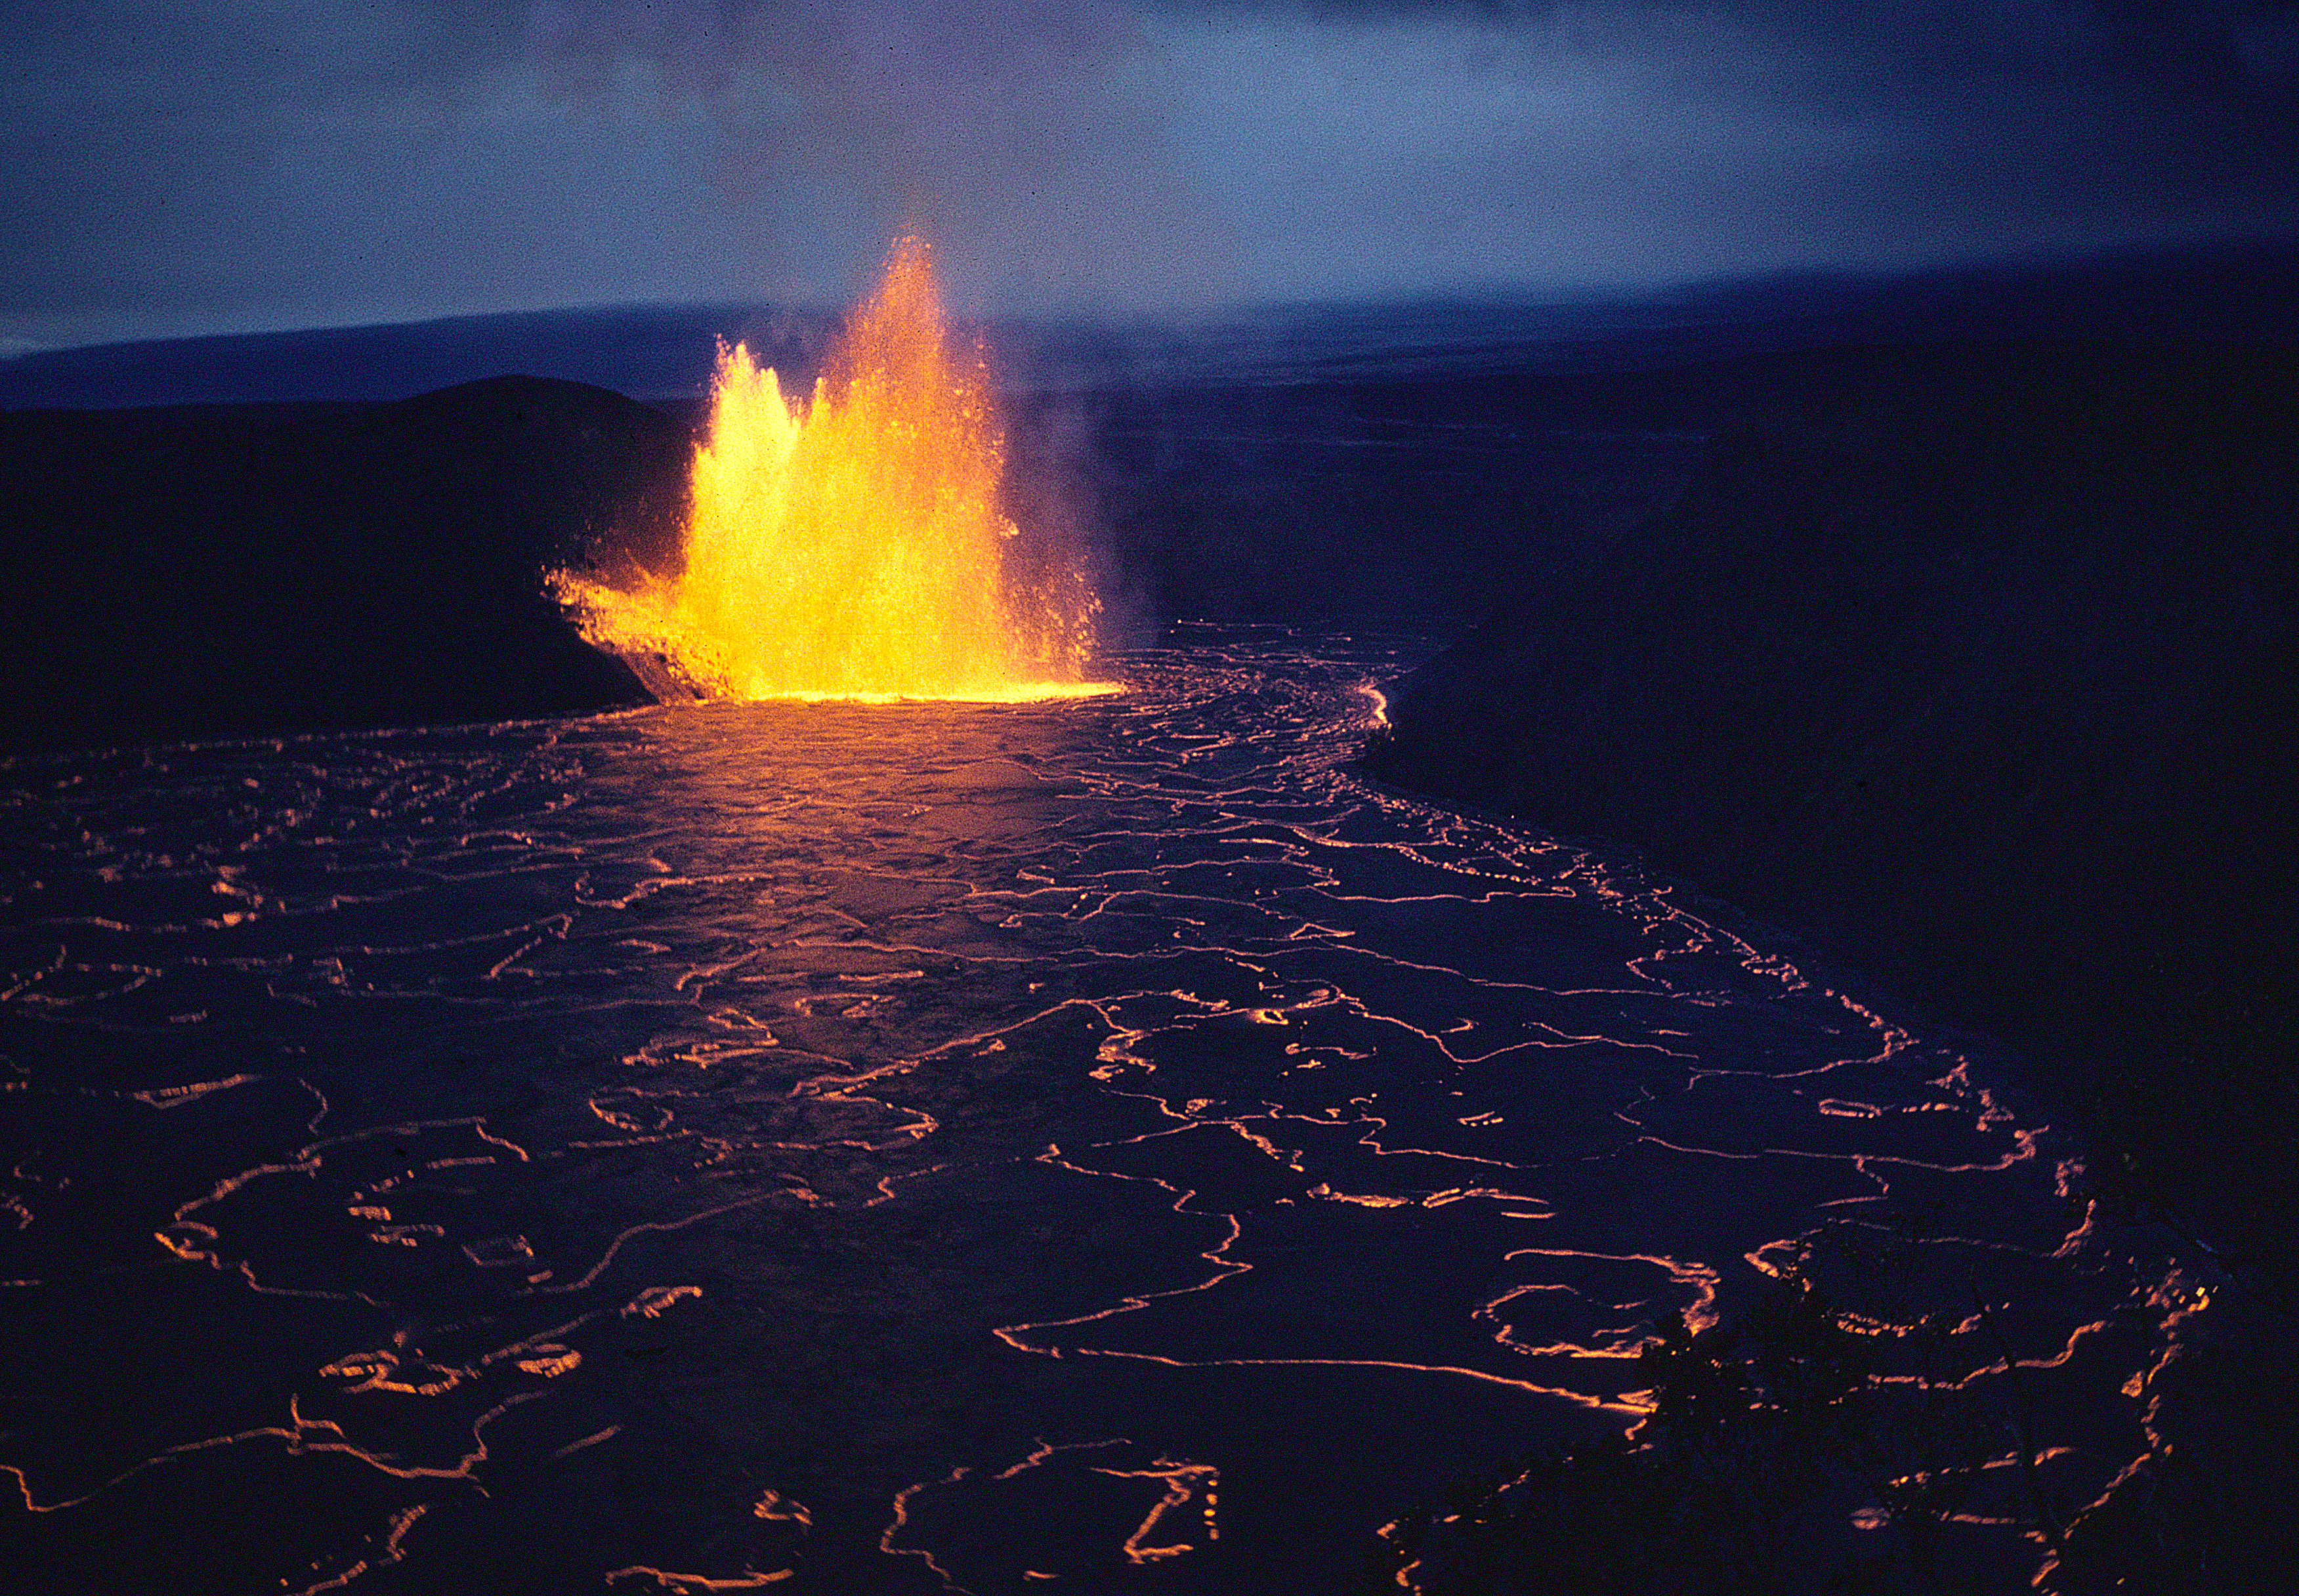
One quick reality check: eruptions and visible lava are intermittent. Sometimes you get a glow or active views, sometimes you get steam, clouds, and the quiet thrill of standing on a living volcano. Either way, the park shows up.

Start near Kīlauea (the logic)
If you only have one day, begin around the Kīlauea Visitor Center area or whatever facility is currently serving as the main visitor contact point. (Operations can shift, and the visitor center has had periods where services relocate or change. Check the park’s official alerts before you go.)
The reason you start here is practical: the overlooks, short walks, and ranger updates give you the fastest read on:
- Visibility: mist and low cloud can erase the caldera in minutes.
- Wind direction: volcanic gases can make certain viewpoints unpleasant or unsafe on a given day.
- Current conditions: trail closures, road work, eruption-related restrictions, and reroutes.
Quick win order for first-timers: get a caldera view first, then decide if your energy and weather are pointing you toward a longer hike.
Best first stops near Kīlauea
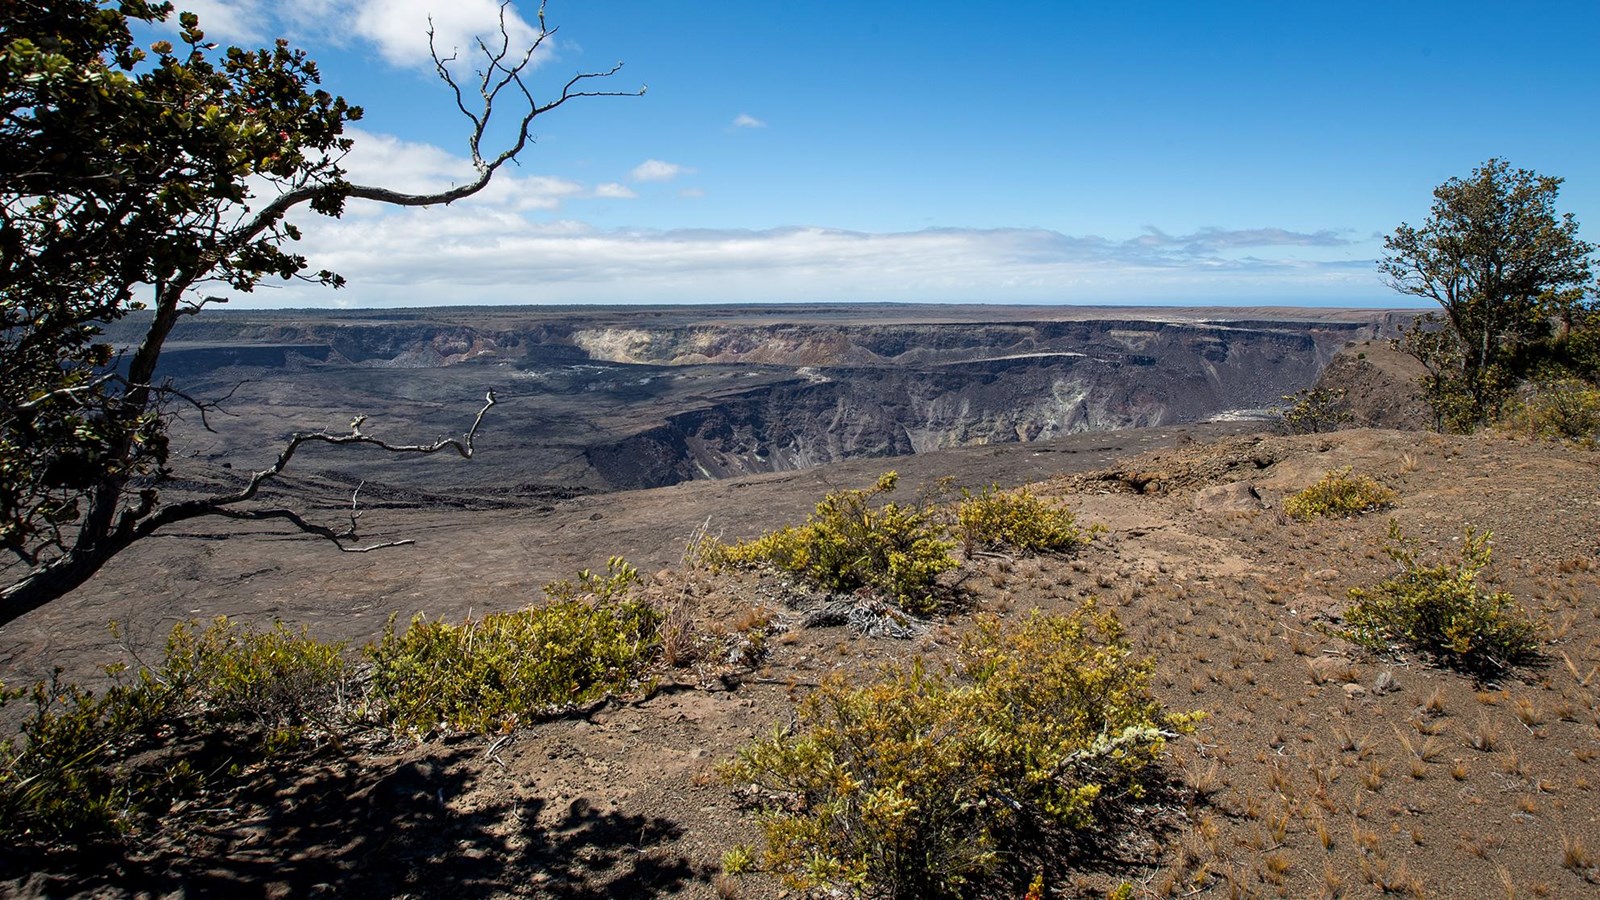
- Kīlauea Overlook: your “orienting” view. Stand still for a minute and watch the steam drift. It helps you understand the terrain before you hike anywhere near it.
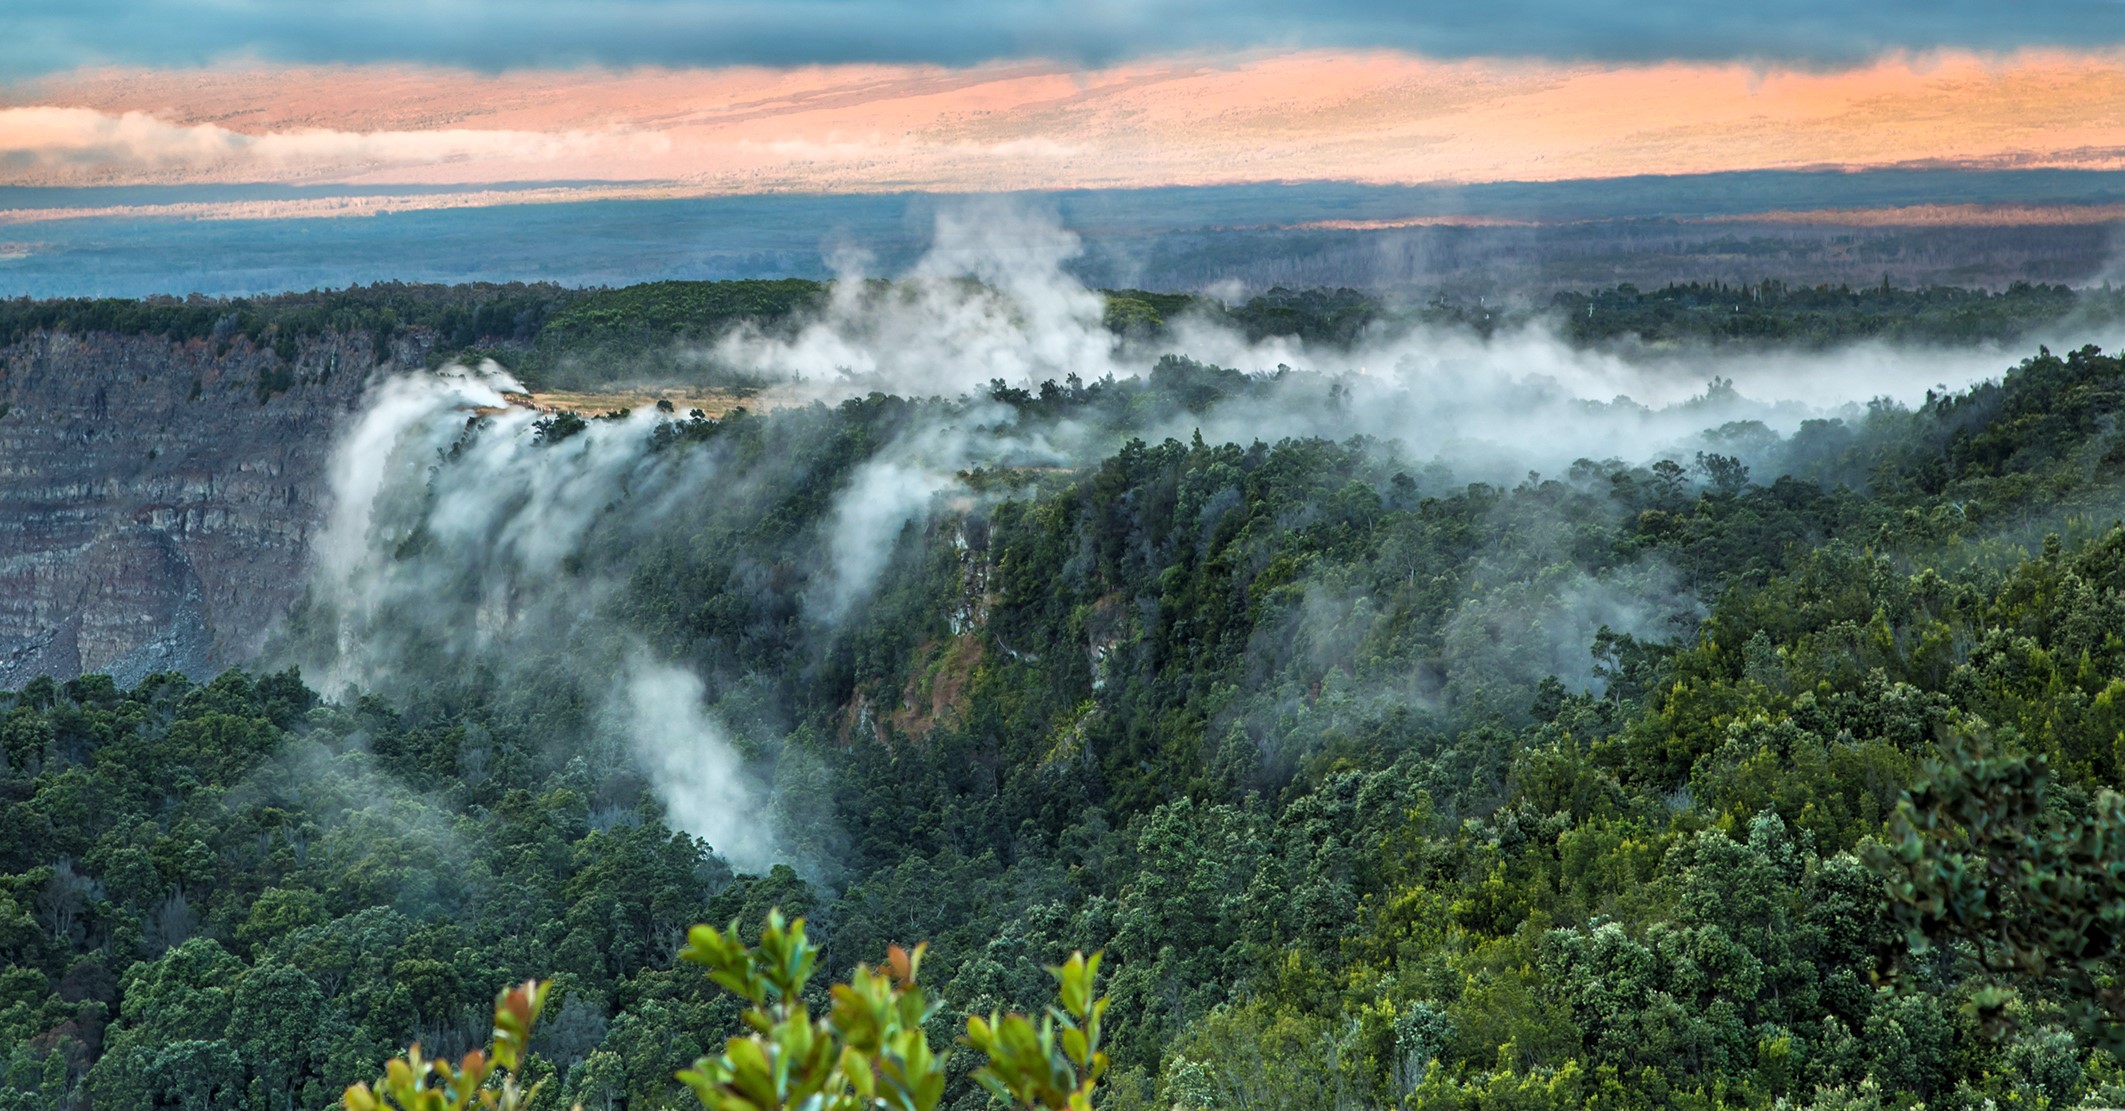
- Steam Vents and Sulphur Banks: short, sensory, and oddly beautiful. If the wind is calm, the smell is stronger. If the wind is up, you will appreciate a light layer.
- Volcano House area viewpoints: if accessible, these are great for a quick coffee or restroom stop paired with a big view.
Rim views vs crater hikes
Think of it like two different parks stitched together.
Option A: Rim views (more stops, less sweat)
If weather is variable or you are traveling with mixed fitness levels, build your day around rim viewpoints and short walks. You will still feel the drama, and you will have flexibility to pivot if the caldera disappears into mist.
- Pros: easy pacing, quick access to restrooms and services, great for photography when clouds lift.
- Tradeoffs: you are often looking at the landscape rather than moving through it.
Option B: Hike into a crater (fewer stops, bigger payoff)
If you want a hike that feels like walking on another planet, plan for a down-in-the-crater route. The classic first-timer pick is the Kīlauea Iki Trail, which drops you into Kīlauea Iki crater (not the main Kīlauea Caldera). It takes you down through rainforest, across a solidified lava lake, and back up.
- Pros: immersive, memorable, and varied terrain in a relatively compact hike.
- Tradeoffs: you will earn your climb back up, and weather can change quickly once you commit.
My rule for one-day visitors: If you can only do one “real” hike, choose Kīlauea Iki over a string of smaller walks. It gives you the story arc: lush rainforest to lava to views.
First-timer day hikes (pick 1 to 3)
You can absolutely do more, but your experience gets better when you choose a few hikes that feel different from each other instead of stacking similar viewpoints.
Kīlauea Iki Trail (top pick)
Why go: It is the park’s greatest “how is this real?” hike for beginners who are comfortable with a moderate outing. You get elevation change, rainforest, and a crater floor that still feels unreal under your feet.
- Time: plan a half day with stops.
- Planning note: expect a decent amount of up and down, especially on the way back out. It is not a casual stroll, even if your pace is chill.
- Tips: Start earlier for cooler temps and clearer skies. Bring more water than you think you need. The crater floor can feel warmer and more exposed than the rim.
Sulphur Banks (easy, high reward)
Why go: Short boardwalks with a strong sense of the volcano’s active chemistry. Great when you want a leg-stretch without committing to a long hike.
- Time: 20 to 40 minutes.
- Tips: If you are sensitive to sulfur smells, keep it brief and stand upwind where possible.
Devastation Trail (easy, dramatic)
Why go: A quick walk through stark, volcanic landscapes with big views on clear days. It is a great contrast after forest trails.
- Time: 20 to 45 minutes.
- Tips: Wind can be intense here. Keep a layer handy even if you started your day in sunshine.
Puʻuloa Petroglyphs (cultural stop)
Why go: A chance to connect the geology to human history. The walk is flat and exposed, and the site is quietly powerful.
- Time on trail: around 1 to 1.5 hours round trip including time at the petroglyph field.
- Important driving note: the trailhead is off Chain of Craters Road, near the far end of the drive. From the Kīlauea summit area, plan roughly 40 to 45 minutes each way depending on traffic, stops, and current road conditions. That is a real chunk of a one-day itinerary.
- Tips: Stay on designated paths and rock surfaces. Do not touch or trace petroglyphs. Bring sun protection because there is very little shade.

Crater Rim Drive stops
For a first day, think of Crater Rim Drive and nearby spurs as a choose-your-own-adventure loop of viewpoints and short walks.
Heads up: since the 2018 summit collapse, portions of Crater Rim Drive have had long-term closures and reroutes. The drivable route can change, and some “classic” stops may be accessed differently than older guidebooks suggest. Check the park’s current road status when you arrive.
Must-do stops
- Kīlauea caldera viewpoints: do at least one early, and another later if the clouds shift. The same viewpoint can feel like two different places in one day.
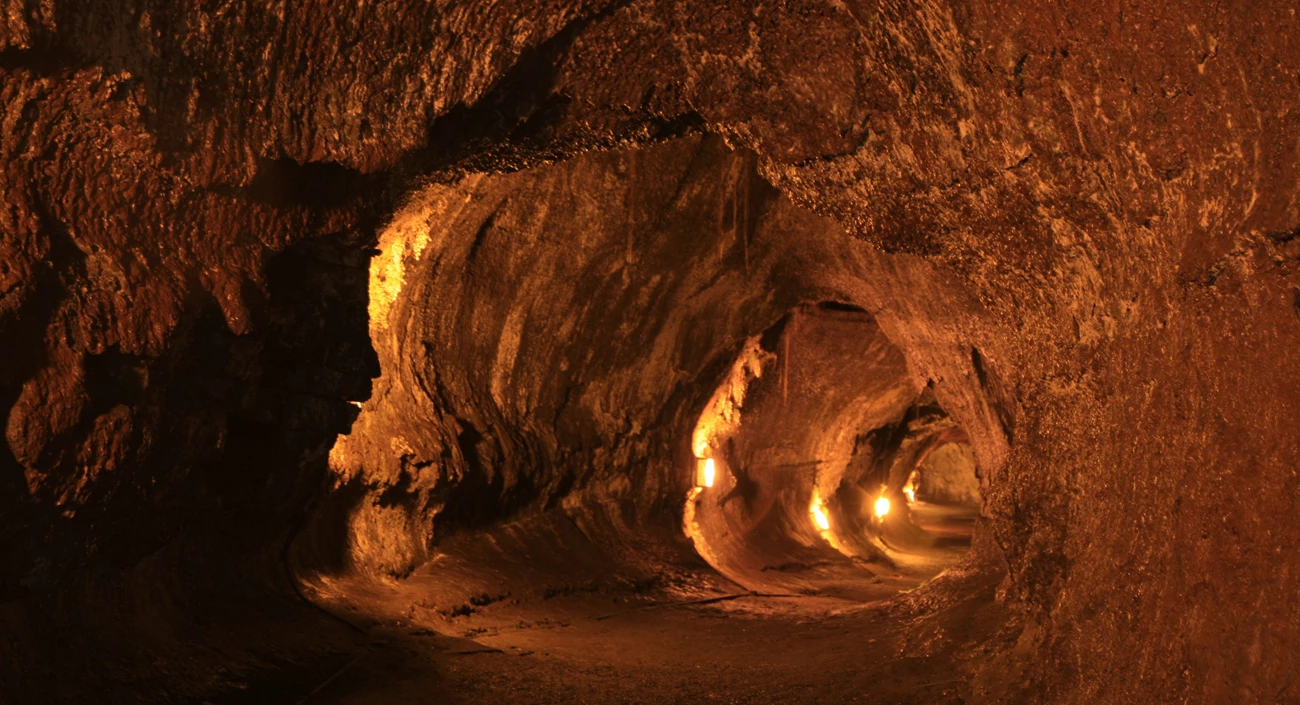
- Thurston Lava Tube (Nāhuku): otherworldly and easy to slot in.
Nice-to-do if you have time
- Extra overlooks and short trails: pick based on visibility and wind. If you cannot see across the caldera, prioritize forested trails instead.
- Roadside lava features: fun for geology nerds, but do not let them crowd out your main hike.

Thurston Lava Tube timing
Thurston Lava Tube is one of the park’s easiest “wow” moments, but timing matters.
When to go
- Go early for fewer people and easier parking.
- Go late if you want a moodier feel and softer light in the surrounding rainforest.
How to do it right
- Know the lighting window: the tunnel is typically electrically lit from 8 AM to 8 PM. Outside those hours, a flashlight is not optional. Even during the day, a small light helps you catch texture in the walls and peek into crevices.
- Take your time in the rainforest approach. The contrast between dripping green forest and black lava is part of the magic.
- Be patient inside. Let groups pass, pause, and listen. Lava tubes have a quiet, cathedral-like vibe when you are not rushing.
If you only have one day: what to skip
This park is huge, and the temptation is to “see it all.” With one day, you will have a better trip if you skip a few things on purpose.
- Too many similar overlooks: choose 1 to 3 based on visibility. If you cannot see much, stop hunting views and pivot to a forest or crater hike.
- Long drives that eat your day: Chain of Craters Road is incredible, but it can turn into a full commitment. If your goal is the Kīlauea summit area highlights, do not spend prime daylight hours driving to the far end and back unless it is a top priority for you.
- Anything that feels rushed: volcanic landscapes reward lingering. If you are sprinting from stop to stop, you miss the way light and weather transform the crater.
One-day strategy: pick one signature hike (Kīlauea Iki is my vote), add Thurston Lava Tube, and round it out with one steam or overlook stop. If you want Puʻuloa Petroglyphs, treat it like your main “other zone” choice and plan the drive time on purpose.
Eruption viewing etiquette
Hawaiʻi Volcanoes is not an amusement park. It is a living volcanic system, and the rules are there because conditions can change quickly. Also, active eruption viewing is not guaranteed on a typical day, so let the park be the park and treat any live glow as a bonus.
Do
- Check official updates before you go and again when you arrive. Conditions, closures, and safe viewing areas can change fast.
- Stay behind barriers and follow rangers’ directions. If an area is closed, it is not a suggestion.
- Give others space at viewpoints. Let people take their moment, then rotate through.
- Keep voices low during any active viewing. Many visitors are having a once-in-a-lifetime experience.
Do not
- Do not step off trail onto fragile surfaces. Crust can be unstable, and vegetation can be delicate.
- Do not shine bright lights at crowds at dusk or night. If you need a light, point it down.
- Do not fly drones where prohibited. Beyond rules, they disrupt wildlife and the quiet that makes the park feel sacred.
If you are close enough to feel you are “sneaking” a better view, you are too close. The best viewing is the kind that does not make rangers worry about you.
Weather changes fast
Even in Hawaiʻi, the summit area can feel downright alpine. The park’s elevation, open crater landscapes, and frequent cloud banks make for fast-changing conditions.
- Mist and drizzle: common, especially around the rainforest sections. Your hair will get damp before you realize it.
- Wind: the rim and exposed trails can be gusty and chilly, particularly near viewpoints.
- Sun breaks: when the clouds part, UV can be intense. You can get sunburned on a “cool” day.
Visibility tip: if the caldera is socked in, do a forest hike first. Often the weather opens up later, and you can return to overlooks for a second chance.
What to wear and pack
My carry-on-only brain loves this park because you do not need much. You just need the right few things.
Wear
- Light base layer plus a windbreaker or rain shell. Wind plus mist is the signature combo here.
- Closed-toe shoes with grip. Lava rock can be uneven, sharp, and slippery when wet.
- Hat and sunglasses for sudden sun.
Pack
- Water: carry more than you normally would on a similar-mileage hike.
- Snacks or a simple lunch: options in and near the park can be limited, and you do not want hunger to rush your hike.
- Small flashlight: helpful any time, and required if you do Nāhuku outside the typical lit hours.
- Microfiber cloth for misty glasses and camera lenses.
One-day itinerary
Here is a simple structure that works for most first-timers.
Morning: big views before clouds build
- Kīlauea caldera viewpoint stop
- Steam Vents or Sulphur Banks short walk
Midday: your signature hike
- Kīlauea Iki Trail (or your chosen longer hike)
- Quick lunch or snack break
Afternoon: lava tube and flexible bonus stops
- Thurston Lava Tube (Nāhuku)
- Devastation Trail or an extra overlook if visibility is good
If you are short on time: do one caldera overlook, do Thurston Lava Tube, and commit to either Kīlauea Iki or two short walks. Trying to do everything halfway is the only real mistake here.
Quick FAQs
Is this park good for non-hikers?
Yes. You can build a satisfying day around overlooks, short boardwalks, and the lava tube. Add one moderate hike only if it fits your group.
Will I see lava?
Sometimes, but not always. Volcanic activity changes, and safe viewing depends on current conditions. Treat visible lava as a bonus, not a promise, and you will enjoy the park more.
Is it cold up there?
It can be. Wind and mist at elevation make it feel cooler than you expect in Hawaiʻi. Bring a light layer and a shell.